views
- To add a new IP address, find the IP address, default gateway, and DNS server addresses from your network administrator.
- In Control Panel, go to "Network and Sharing Center" > "Change adapter settings," right-click your adapter, and select "Properties."
- Select "TCP/IPv4" and click "Properties," click the "Advanced" button, and add your new IP address and subnet mask.
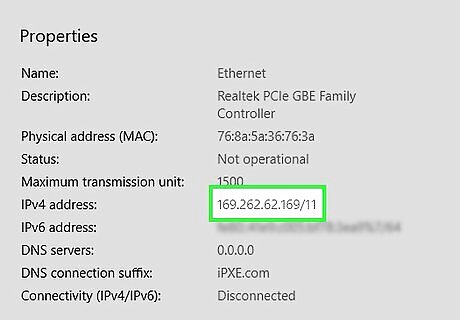
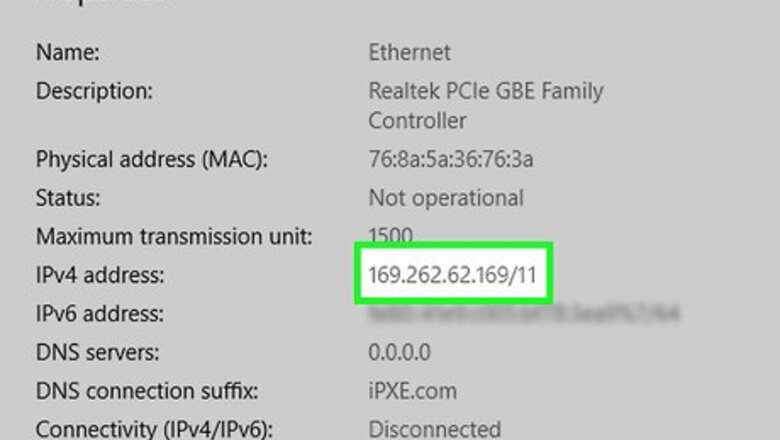
Obtain the IP address and other information. The information you'll need to add an IP address to your server varies by what you're trying to do: If you are adding a new public IP address to a Windows server that already has a static IP address, you'll just need the new IP address and subnet mask. This is common if your server is hosted by a cloud or web hosting company and you requested an IP address for a specific website or application you host. If your Windows server does not already have at least one static IP address, such as a home or office server, you'll need: The IP address (either IPv4 or IPv6) The default gateway address The subnet mask The addresses of your DNS servers. Alternatively, you can use Google's—we'll show you how later in this method. If you're not sure which numbers to use, contact your internet provider, hosting company, or the administrator responsible for providing you with a static IP address.
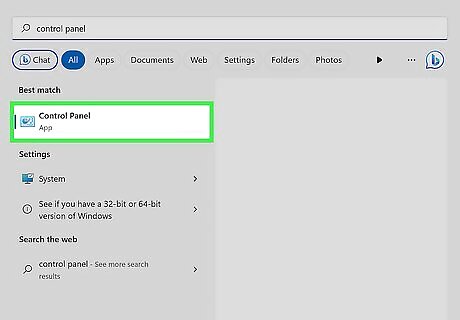
Open the Control Panel. Press the Windows key, type control panel, and click Control Panel in the search results.
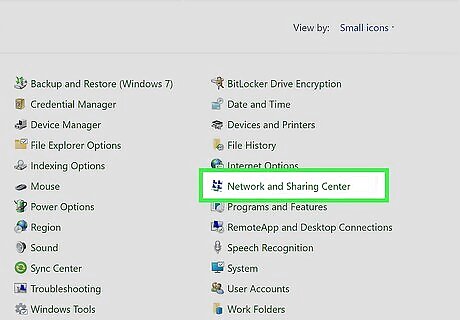
Select Network and Sharing Center. If you don't see this option, click the menu at the top-right corner of the window and select Small icons first.
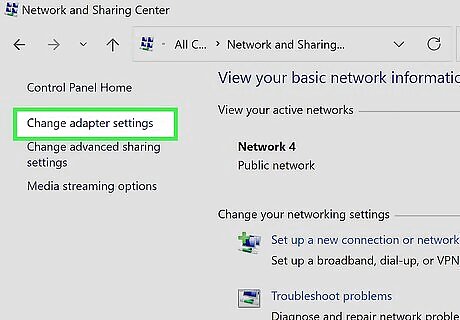
Click Change adapter settings. It's near the top of the left panel. You'll see a list of all connected adapters, including your Wi-Fi and ethernet interfaces.
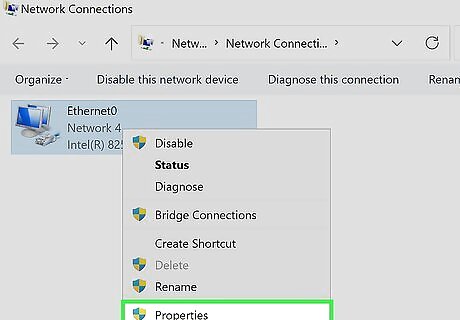
Right-click the adapter and select Properties. Do this for the adapter to which you want to assign the IP address (e.g., your ethernet card).
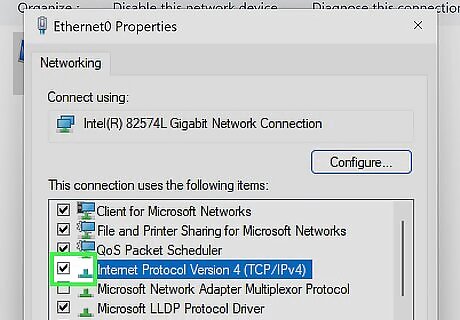
Check the box next to "Internet Protocol Version 4 (TCP/IPv4)." If the box is already ticked, you can skip this step. If you are adding an IPv6 IP address, check that box instead.
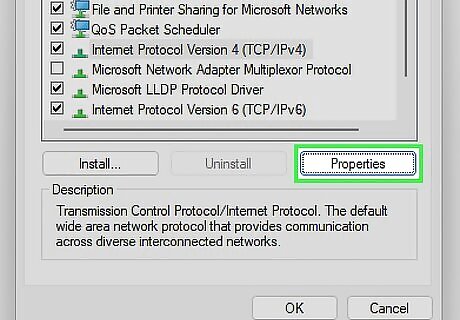
Select "Internet Protocol Version 4 (TCP/IPv4)" and click Properties. This opens your general TCP/IP properties. If you're adding an IPv6 IP address, select Internet Protocol Version 6 (TCP/IPv6) instead.
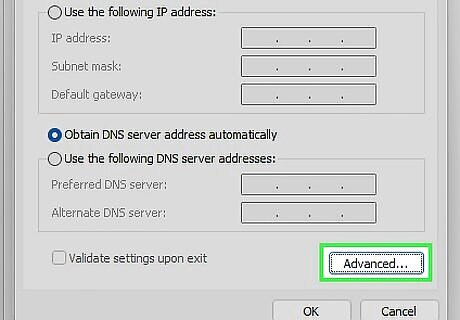
Click the Advanced… button. It's at the bottom-right corner of the window. If you haven't already assigned this server an IP address, select "Use the following IP address" before choosing this option.
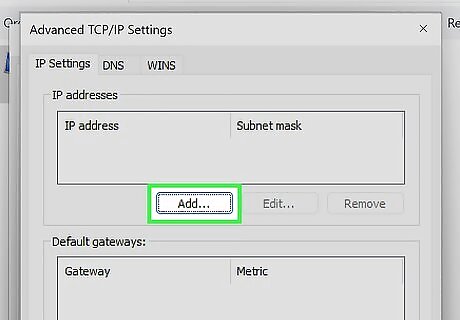
Click Add under "IP addresses." This is the first "Add" button below the top box.
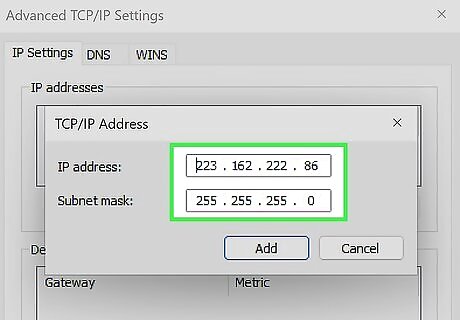
Enter the IP address and press Tab ↹. After typing the IP address you want to add, pressing Tab will automatically fill in the subnet mask. Double-check the subnet mask to make sure it is correct.
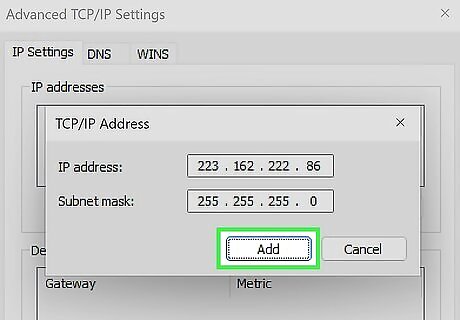
Click Add and then OK. This returns you to the "General" tab. If you just added a new public IP address to a server that already had an IP address for general connectivity, you can now click OK and OK again to close. The new IP address is active and ready for your applications.
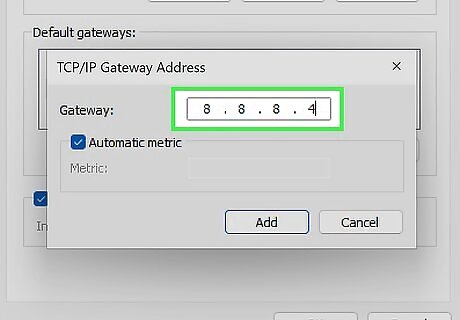
Enter the gateway address and DNS servers. If this is the first IP address you are assigning to the server, you will need to perform a few more steps. In the "Default gateway" address, enter the address you were provided for your default gateway, then enter at least one DNS server address into the fields below. If you're not sure which DNS servers to use, you can use Google's public DNS servers: IPv4 8.8.8.8 8.8.4.4 IPv6 2001:4860:4860::8888 2001:4860:4860::8844
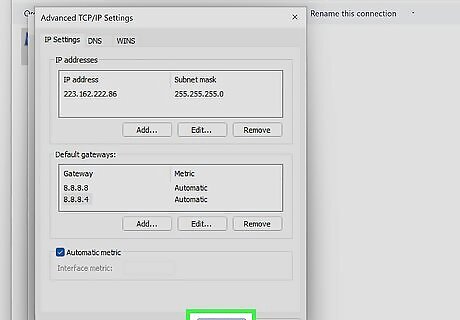
Save your settings. Click OK and then OK again to save your new IP address.


Comments
0 comment