
views
- Find or design a base image for your icon. It should be a square image around 256 x 256 pixels (px) on Windows or 512 x 512 px on Mac.
- Open the image in your photo editing software. Then, remove the background, add a transparency layer, and customize the icon until you get the look you’re going for.
- This guide just covers icon creation and exporting to .ico (the Windows icon file format). See our guides on changing icons on Windows and Mac OS X for additional information.
Editing the Image

Find or make a base image. You can use any image file to create an icon, but it should have a resolution of at least 256 x 256 px. This will allow it to scale well between all the different icon sizes. It doesn't matter if the image contains things you don't want to include in the final icon; you’ll be erasing everything you don't want to keep! You can create your own images from scratch using your favorite drawing software or you can use any photo, drawing, or other image file. Icons are square, so your image should fit well into a square. If it’s too long, the icon will likely look squished. If you are creating Mac OS X icons, 512 x 512 may look better.
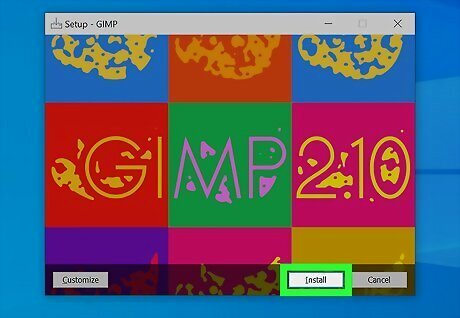
Install an image editing program. In order to create an icon file, you might want to use a more powerful program than MS Paint. You can use Photoshop or a free image editor. Try GIMP, Adobe Express, or Pixlr for a free editing experience. This guide uses GIMP, since it’s free on all operating systems. The process is very similar in Photoshop and Pixlr.
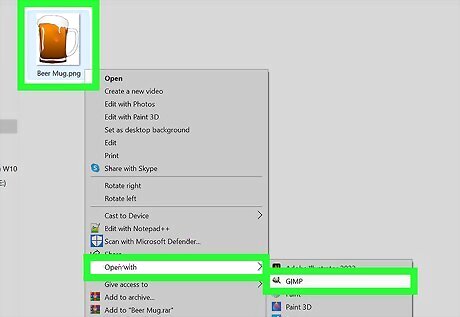
Open your image in your editor. Open the downloaded or created image using GIMP. The image will appear in a window in the middle of your screen.
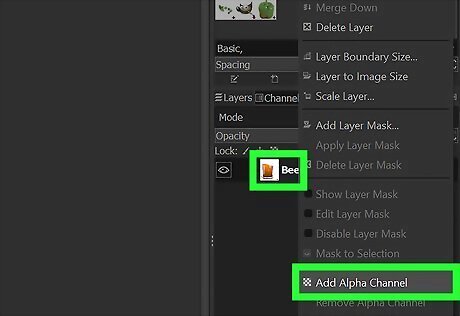
Add an alpha channel. The alpha channel is a layer of transparency. This will allow the icon to have a transparent background when you erase the parts of the image you don't want. To add an alpha channel, right-click on the layer in the Layers window on the right side of the screen. Select "Add Alpha Channel".

Insert a Quick Mask. The Quick Mask will allow you to easily get rid of the parts of the image you don't want to keep. To insert the Quick Mask, press ⇧ Shift+Q. A red layer will appear over the image. Quick Mask allows you to select part of an image. You can use a different selection tool if you prefer!
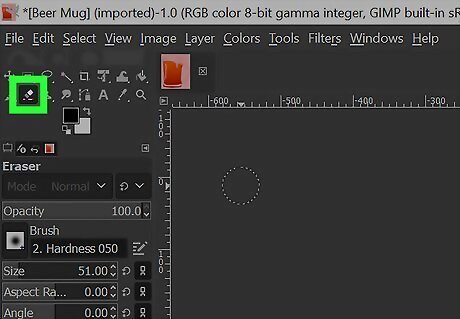
Erase the mask over the part you want to keep. Select the Eraser tool from the Toolbox window on the left side of the screen. Use the tool to erase the red layer over the part of the image you want to keep. For example, if you have an image of a phone lying on a table and want to use the phone as the icon, erase the red layer from the phone only. Use the Tool Options tab in the Toolbox window to adjust your eraser size. You can also zoom in to ensure that you erase exactly what you want. When you erase the mask, you will only be removing the mask, not the image beneath it.
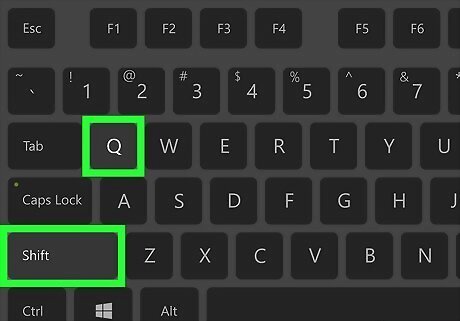
Toggle the mask. Once you are finished clearing the mask off of the part you want to keep, press ⇧ Shift+Q again to toggle off the mask view. The part of the image that you erased will be selected.
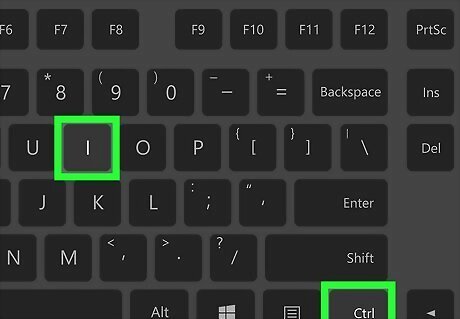
Delete the background. Press Ctrl+I or go to Select → Invert. This will select everything in the image except the part you erased the mask off of. Press Del to delete the selection, leaving just the subject of your icon.
Creating an Icon
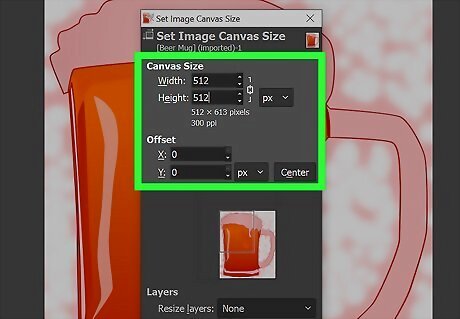
Change the canvas size. Click Image → Canvas Size. In the window that appears, click the chain icon to unlink the width and the height. Change the canvas size to a size that shows the subject well, and ensure that both width and height are set to the same number. Use the Offset values to center the image in your new canvas before clicking the Resize button. Once you've resized the image, right-click on the layer and select "Layer to Image Size". This will change the layer boundary to match the canvas size.
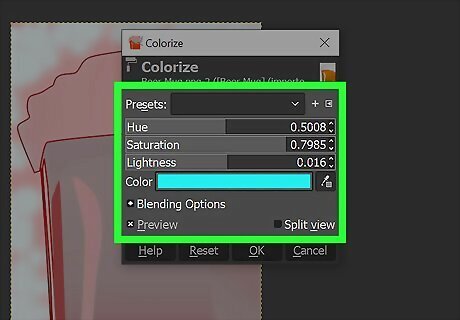
Adjust the color. If you want, you can use GIMP's color tools to change the coloration of the image. The easiest way to do this is to click Color → Colorize and then adjust the settings until you find the color you feel looks best.
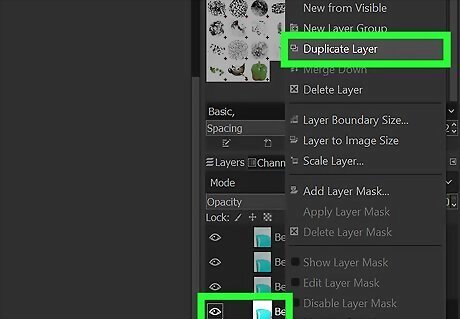
Create the different icon sizes. The final step in creating an icon is ensuring that the image supports all the different icon sizes. This is essential if you want to be able to use the icon in different areas of the operating system and want them to scale when icon size is increased or decreased. Duplicate the layer 5 times. Right-click the original layer in the Layers window and select Duplicate Layer. Repeat this until you have 4 copies of the original layer, 5 layers total. Scale the original layer. Right-click the layer and select Scale Layer. Change the image scale to 256 X 256 px. Then click Image → Fit Canvas to Layers. (Note: if you are creating the icon set for OS X, start with a 512 X 512). Scale the 4 copied layers to the following sizes: 128 X 128 48 X 48 32 X 32 16 X 16
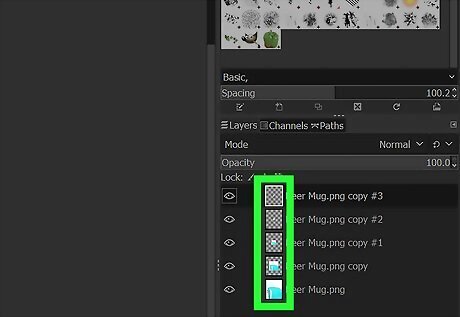
Examine your layers. You should have 5 layers, each one with an image smaller than the last. If any of them look blurry, open the Sharpening Tool by clicking Filters → Enhance → Sharpen. Adjust the slider until the image is clearer.
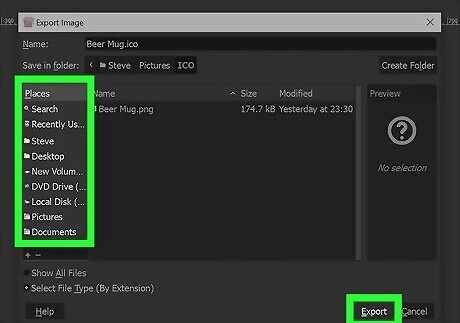
Save the image as an icon. Click File → Export As. In the Export Image window, change the extension in the top field to ".ico" and choose a location to save the icon. A window will appear, asking if you want to compress any of the layers. Check the box to compress the two biggest layers, unless you are using Windows XP.
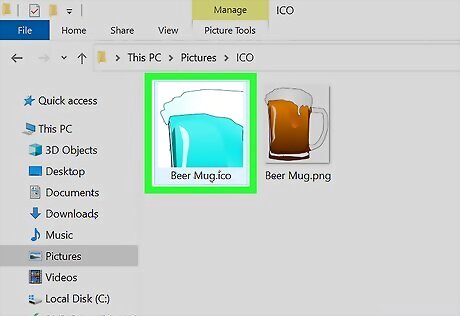
Use the icon. Once you've exported the image into .ico format, you can use it to replace the icon for any file or folder you'd like. Check out our guide for changing the icons on Windows. See our guide on changing the icons on your Mac OS X computer. You might need to use a free online converter to change the ICO file to an ICNS file (Mac's icon file format).


Comments
0 comment