
Getting Started
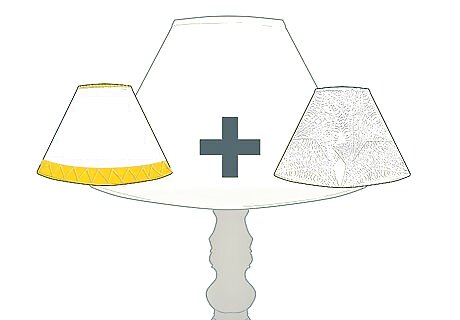
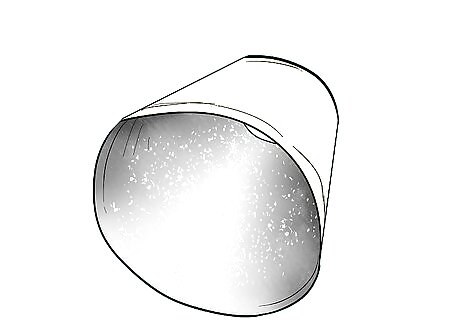
Find a suitable lampshade to decorate. Some lampshades are easier to work with than others. When choosing a lampshade, consider the following: Glue and paint sticks better to lampshades that are made fabric or paper than lampshades that are made out of plastic or glass. Cone, box, or tube-shaped lampshades are easier to work with than domed or asymmetric lampshades. Lampshades that have a smooth surface are going to give you more freedom than ones that already have a textured surface (such as being covered in beads, glitter, trim, or sequins).
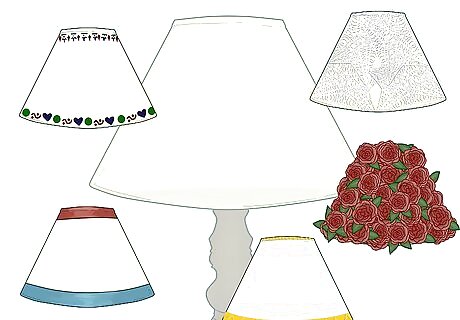
Decide how you want the lampshade to look like in the end. Do you want to decorate the entire lampshade? Or do you just want to add a trim to the top and bottom? Get out a piece of paper and sketch out a few designs. If you are having trouble coming up with a design, look at pictures of lampshades online or in a catalogue. Consider basing your lampshade off of a certain theme, such as Asian, Mexican, tribal, nature, or holiday.
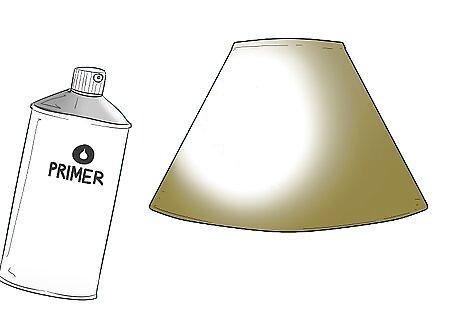
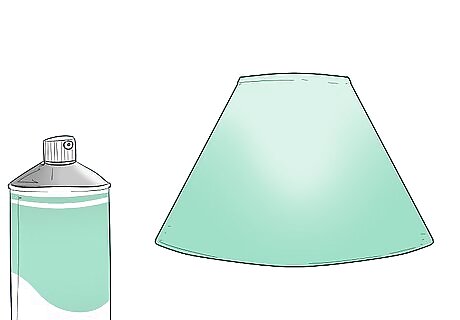
Consider priming your lampshade. If your have a dark colored lampshade and want to cover it with a light colored paper of fabric, some of that dark color might show through. This might not give you the result you want. To get a better finish in the end, paint your entire lampshade with a white primer. You can use spray paint, a foam roller, or a paintbrush. This will help the lighter colors on your paper or fabric show up better.
Combine different methods for a fancier lamp. For example, you can paint or cover your entire lamp with fabric first. Then, you can add a trim to it to give it a final touch.
Adding Trim and Baubles
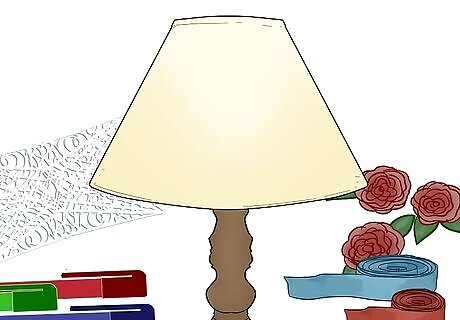
Consider covering your lampshade with objects you have laying around the house. You don't have to do all of the steps in this method. Choose the one you like best.
Create your own artwork using a permanent marker or a fabric pen. You can draw simple designs like spirals or flowers. You can even write down the words to your favorite poem, song, or book passage.
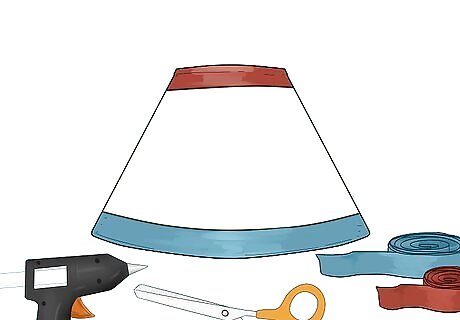
Add a trim to the top or bottom of the lampshade. You can use ribbon, rickrack, braided trim, beaded trim, feather boas, bridal lace, or even a sequin trim. Use fabric glue or hot glue to attach the trim to your lampshade, and cut the excess off. Fabric glue and hot glue set quickly. It might be a good idea to apply the glue only an inch (2.54 centimeters) at a time. If you have a trim with beads dangling from a ribbon, consider gluing the ribbon to the inside of the lampshade. This way, you won't see the stitching, and the dangling beads will be sticking out from underneath the lampshade.
Cover the inside of your lampshade with glitter. The glitter will reflect the light and make it seem brighter. Coat the inside of your lampshade using a white, liquid glue. Dump some glitter onto the glue and roll the lampshade around to spread the glitter. Set the lampshade right-side-up and let the glue dry. If you are worried about the glitter shedding, brush on some clear, glossy Mod Podge, or spray it using a clear, glossy, acrylic sealer. You must use a glossy Mod Podge or acrylic sealer. If you use matte, the glitter won't sparkle. You can use chunky glitter or fine, scrapbooking glitter. You can find both in an arts and crafts shop.
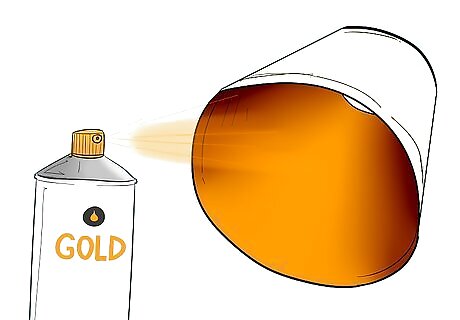
Spray paint the inside of your lampshade gold to give it a warm glow. Shake the can until you can't hear it rattle anymore. Then, spray the inside of the lamp using light, even strokes. Be sure to overlap each stroke by a little bit to prevent any gaps. If you need to apply a second layer, wait for the first one to dry first.
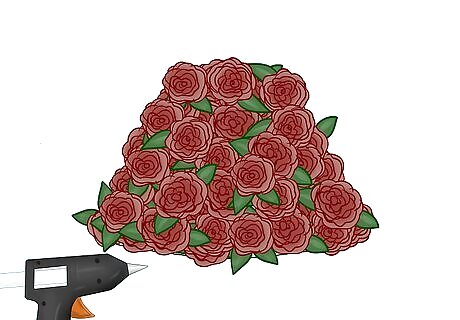
Glue fake flowers all over the lamp for a puffy, tufted look. Put a drop of hot glue on the back of the flower, and press it against the top of the lamp shade. Glue the second flower right next to the first one, so that the petals are touching. Keep gluing flowers until the entire lampshade is covered and no fabric is showing. If you are using flowers that come on a stem, pull them off the stem first. They should just pop off. If they don't, snip the flowers off as close to the base as you can using wire cutters.
Glue doilies all over the lampshade. Choose several tatted or crocheted doilies. They can be all the same size and color, or they can be different ones. Spray the back of a doily with spray adhesive, then press it onto the lampshade. Add as many doilies as you want. Consider overlapping the doilies by a little.
Painting a Lampshade
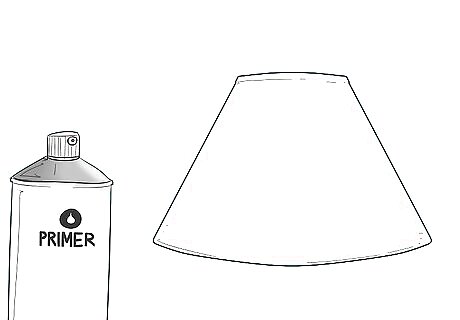
Consider priming your lampshade. If your lampshade is a very dark color and you want to paint it a lighter color, you might want to prime it first. This is because many lighter colored paints are translucent and the darker color may show through. You can prime your lampshade by painting it with a white paint primer. You can use a paintbrush or a foam roller to apply the paint. You can also use a white primer spray paint. Be sure to let the primer dry before you move on to the next step.
Tape off any areas you don't want painted. Use painters tape or masking tape to do this.
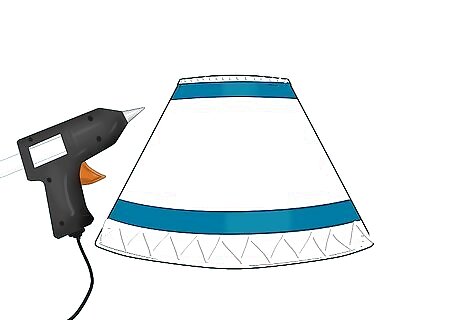
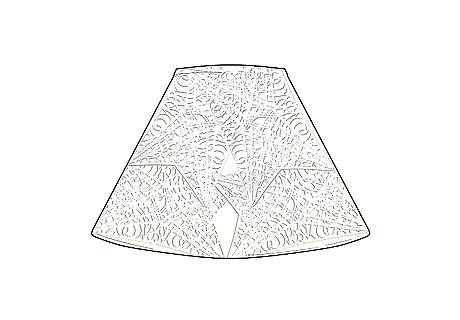
Consider drawing some designs onto your lampshade using a hot glue gun. This will create a raised effect on the surface of your lamp after you paint it. You can make little dots, squiggles, or swirls. You can draw spirals, vines, leaves, or even birds.
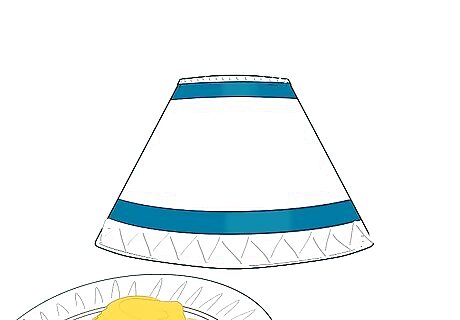
Pour some paint onto a paper plate or paint palette. The best type of paint to use is fabric paint or acrylic paint. If the paint is very thick, you might end up with some visible brushstrokes. You can remedy this by mixing a few drops of water into the paint.
Start applying a thin layer of paint and let it dry. Don't worry if some of the original color of the lamp shows through. You will be painting on another layer or two. It is better to apply paint using many thin layers rather than one thick layer. This will help prevent brushstrokes in the finished piece.
Apply a second coat of paint once the first one has dried. You will notice that the original color is disappearing. If necessary, apply a third layer.
Remove any tape and allow the paint to dry before using it. Most paints will dry to touch within 20 minutes, but this does not mean that the paint is fully dry or cured. Some paints will require 2 to 4 hours before they are fully dry. Because each brand of paint is different refer to the label for exact drying times.
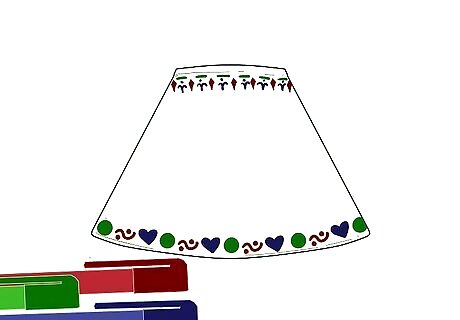
Applying Stencils
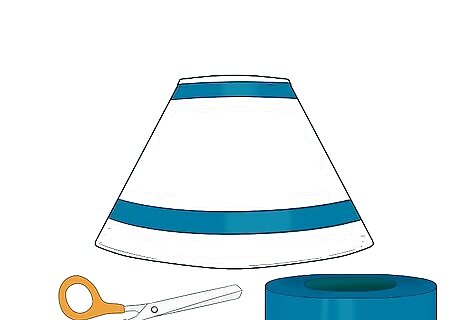
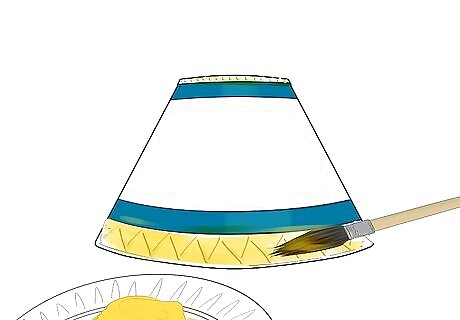
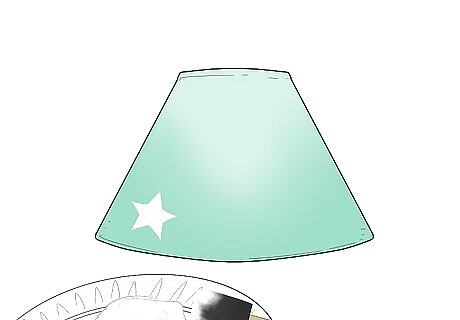
Consider painting your lampshade a solid color first. You don't have to do this, but it can give your lampshade a while new look. For example, you can paint your lampshade turquoise and stencil some white designs onto it. You could also paint your lampshade white, and stencil some gold designs onto it.

Choose your stencil. Do you want a pattern that covers the lamp completely? Or do you want to stencil on a small design (such as a flower or bird) here and there?
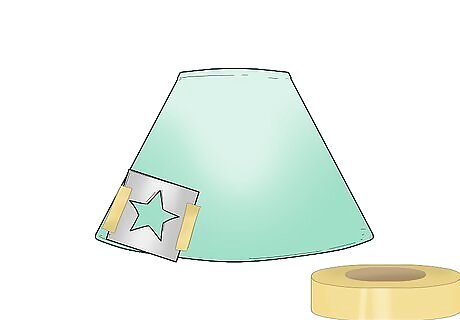
Place your stencil against the lampshade and tape it in place, if necessary. Some stencils have an adhesive back, so they should stick to your lampshade on their own. Other stencils are not adhesive and will move around. To keep that from happening, place your stencil where you want it, then secure it with a piece of painters tap or masking tape on each side of the stencil.
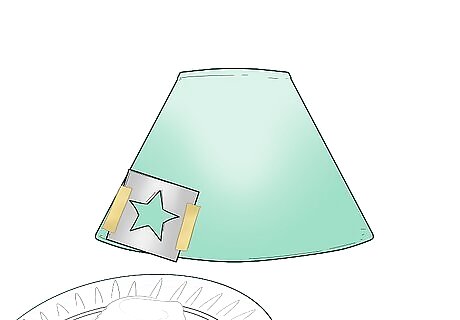
Pour some paint out onto a paper plate or palette. The best types of paint to use are fabric paints or acrylic paints.
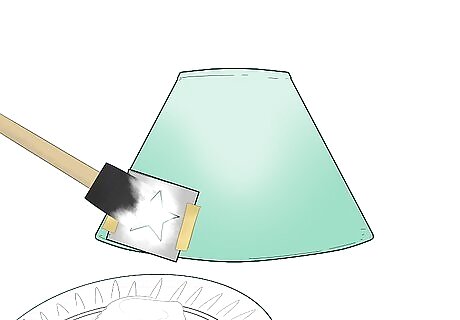
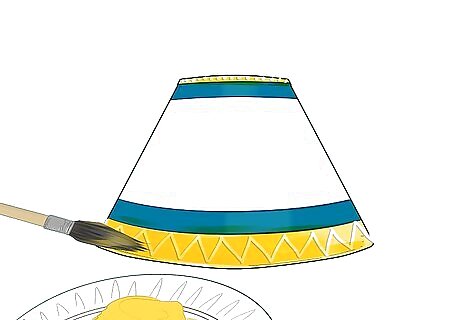
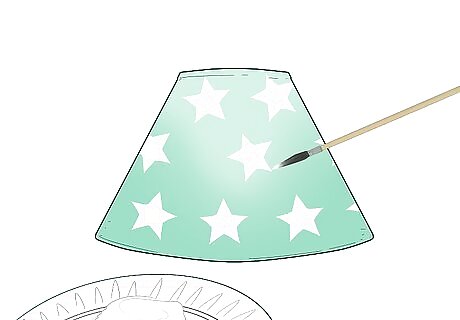
Dab the paint onto the stencil. Use a foam brush or a stencil paintbrush, and dab the paint on using a light, tapping motion. Do not apply too much paint at once, or the paint may drip under the stencil. Don't worry if the lampshade's color shows through the stencil; you can always apply a second layer.
Allow the paint to dry before applying the second layer, if necessary. Sometimes, one layer of paint will give you enough covered. Other times, however, a single layer is not enough. If you still see some of the original color peaking through, apply a second layer, and if necessary, a third.
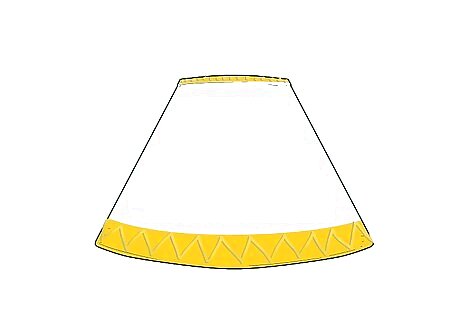
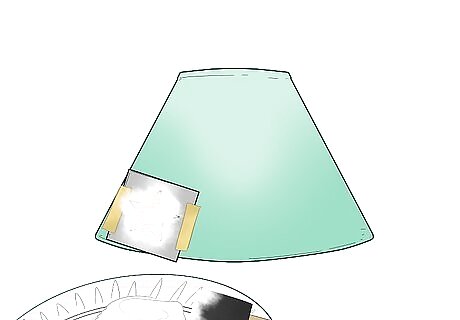
Pull the stencil off while the paint is still wet. Use both hands to pull the stencil off upwards so that you do not smudge the wet paint.

Allow the paint to dry before applying the stencil to another area. If you want to apply more designs to your lampshade, then wait until the paint is dry to the touch; this will usually take about 20 minutes for most brand of paint. Try not to cover up a previously-painted area with your stencil. This might cause the paint to smear if it is not fully dry.
Touch the designs up using a thin brush, if necessary. Sometimes, the paint does not reach the edges of the design, and you don't notice this until is it too late. If there are any bare patches in your design, take out a thin paintbrush and some extra paint. Carefully fill in those patches using the thin paintbrush.
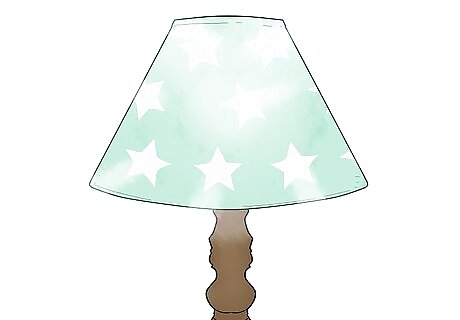
Let the lampshade dry completely before using it. Refer to the label on your paint bottle for specific drying times. Some paints are fully dry and cured in as little as 20 minutes, while others require 2 to 4 hours. Some need more time than that before you can use them without worrying about ruining the finish.
Creating a Patchwork Lampshade
Choose your material. For this project, you will be gluing bits of paper, fabric, or tissue paper to create a patchwork or paper mache effect. Tissue paper will give you a translucent effect, whereas paper will give you the most opaque one. You can use scrapbooking paper, map pieces, or pages torn from an old book. If you want the text appearance that book pages can give you, but don't want to tear up any books, then consider using newspaper instead.
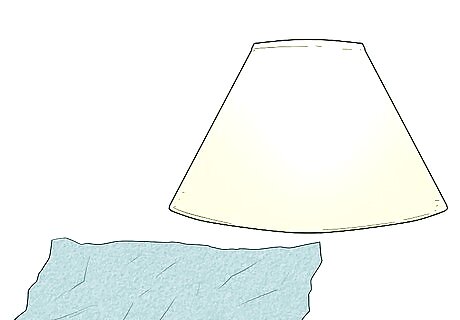
Choose an appropriate lampshade. Almost any shape will work for this method. You might want to use a lighter colored lampshade, however, especially if you plan on covering it with tissue paper. Because tissue paper (and certain types of fabric) is so thin, the original color of the lampshade will show through. A lighter color, such as ivory or white won't make much of a difference, but a darker color, such as black, burgundy, or navy, will. You might not even see the colors of your tissue paper. If you can't find a light colored lampshade, you could paint your current lampshade white. Keep in mind, however, that the light may not pass through the lampshade as well anymore. You'll end up with a softer glow.
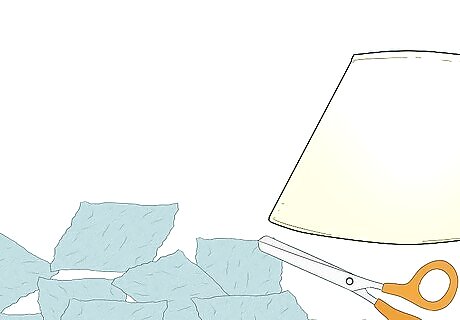
Cut your material into small squares. Try to keep the squares proportionate to the lampshade itself. For a very small lampshade, try cutting the squares 1 by 1 inch (2.54 by 2.54 centimeters). For a larger lampshade, try 3 by 3 inches (7.62 by 7.62 centimeters).
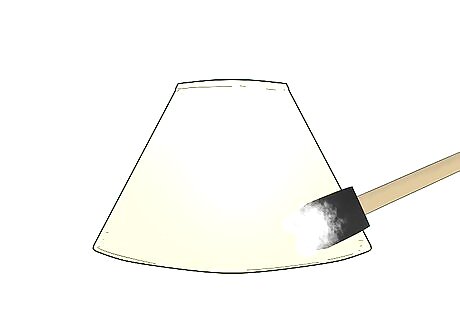
Cover a small patch of the lampshade with Mod Podge. The patch should be a little bit bigger than the size of your square. Use a paintbrush or a foam brush to apply the Mod Podge. You will be working in small patches so that the Mod Podge does not dry out. If you do not have any Mod Podge, you can make your own by mixing 1 part white school glue with 1 part water.

Press the first square down onto the Mod Podge and smooth it out. You can smooth it out using your fingers. If you don't like getting messy, you can also use the paintbrush or foam brush you were using earlier.
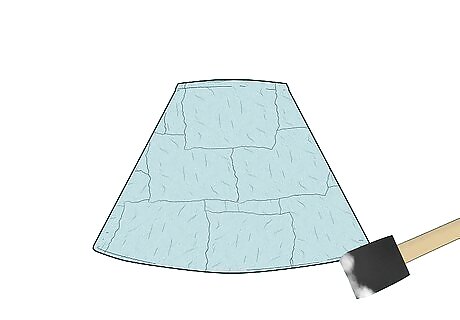
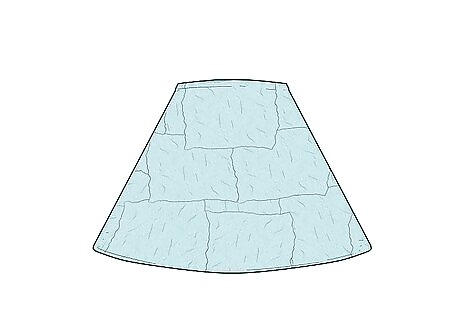
Keep applying the squares until the entire lamp is covered. You can line them up side by side to create a quilt-like effect. You can also apply them at different angles to create a patchwork or paper mache effect. Whatever design you decide on, try to overlap each square by a little; this will help prevent any gaps from showing up in the finished piece. Be sure to cover both the top and bottom rim of your lampshade. Do this by folding the excess paper or fabric over the top/bottom of the lampshade, and pressing it against the inside. This will give you a clean, finished-looking edge.
Allow the lampshade to dry. This can take anywhere from a few hours to a day, depending on how dry or humid it is.
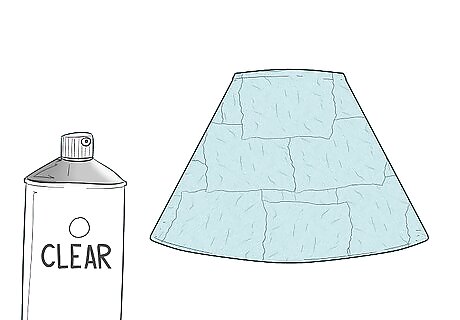
Seal the lampshade to protect your work. You can do this by brushing more Mod Podge over the lampshade using a foam brush or a paintbrush. You can also spray the entire lampshade using a clear, acrylic sealer. This will help protect your work, and prevent it from peeling. If necessary, wait for the first coat to dry before applying a second one.
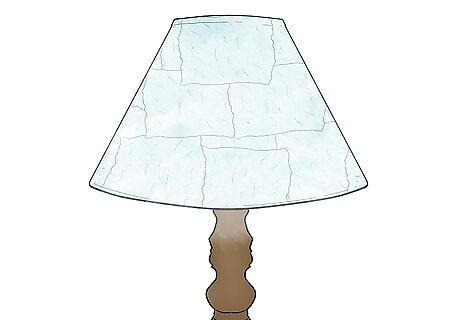
Let the lampshade dry entirely before you use it. This can take anywhere between a few hours to a whole day. It depends on how much Mod Podge you used, and how dry or humid it is.
Covering a Drum Lampshade with Fabric
Know that this method won't work on beveled lampshade. If your lampshade is beveled, it likely has multiple sides or panels to it. This method will not work on this sort of lampshade. Instead, click here to learn how to cover your beveled lampshade.
Choose an appropriate fabric. The best type of fabric to use would be something thin and lightweight so that the light can pass through it. If the fabric is too heavy, the light won't shine through, and will only come out the top and/or bottom of your lampshade. Lightweight fabrics include cotton and silk. Heavy fabrics include satin, brocade, velvet, and canvas. You can also use paper for this as well.
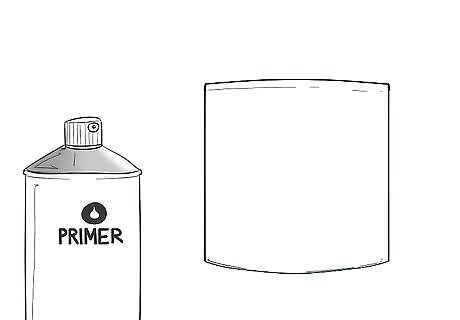
Consider priming the lampshade. If your lampshade is a very dark color and you are planning on using a lighter color of fabric, you might want to paint the lampshade white first. You can apply white acrylic primmer with a paintbrush or a foam brush. You can also spray the entire lampshade using a white primer spray paint.
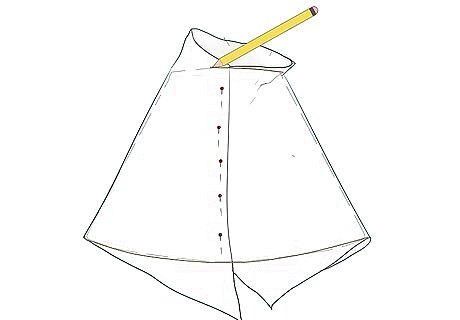
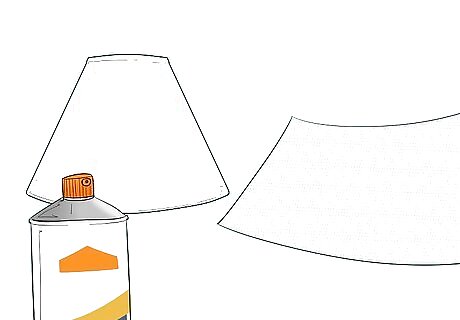
Lay a large piece of paper on a flat surface. The paper should be taller than the lampshade, and wide enough for the lampshade to roll across it. You will be using this to make your template.
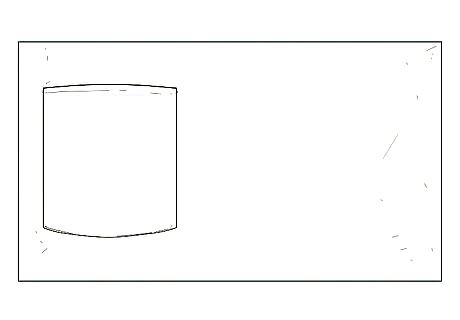
Place the lampshade seam-side down onto the paper. If the lamp is wider at one end, place the lamp at a slight angle. If the lampshade is a perfect cylinder, then place it parallel to the edge of the paper.
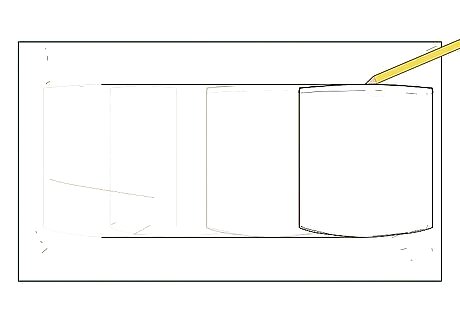
Roll the lampshade across the paper while tracing the top and bottom edge. Stop when you reach the seam again.
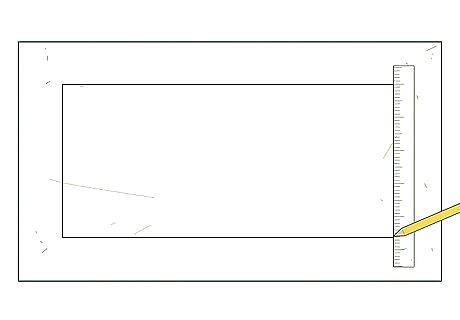
Take the lampshade off and connect the top and bottom lines. Use a ruler to make the lines even. If your lampshade is wider at one of the ends, you will end up with something that looks like an arch. If your lampshade is the same width at the top and bottom, you will end up with something that looks like a rectangle.
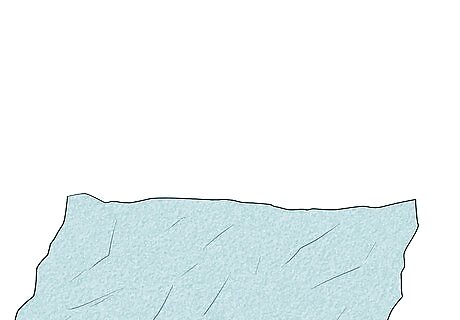
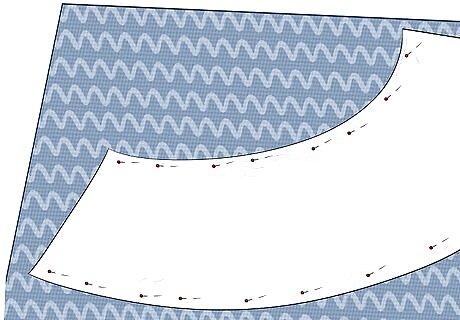
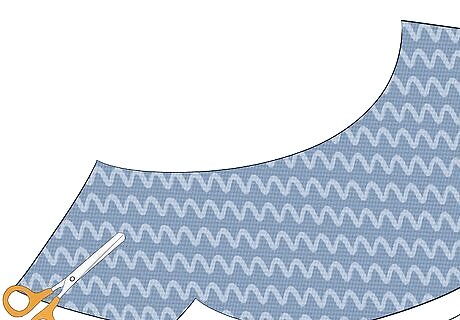
Cut the template out and pin it to your fabric. It does not matter which side of the fabric you are pinning it to. What you do want to keep in mind, however, is the pattern and grain of the fabric. The fabric must be smooth. If there are any wrinkles in it, you must iron them out.
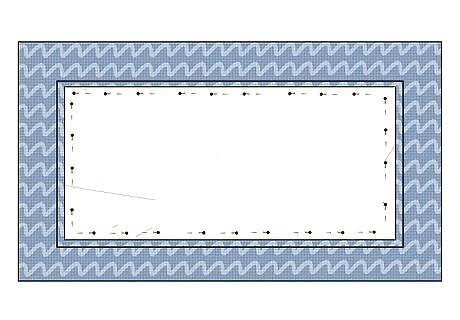
Trace around the template, leaving a ½ inch (1.27 centimeter) seam allowance all around the template. You need this extra space, because you will be folding it over into the lampshade.
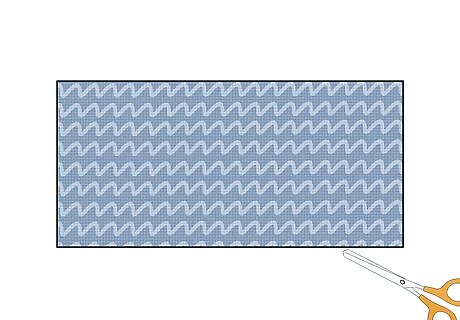
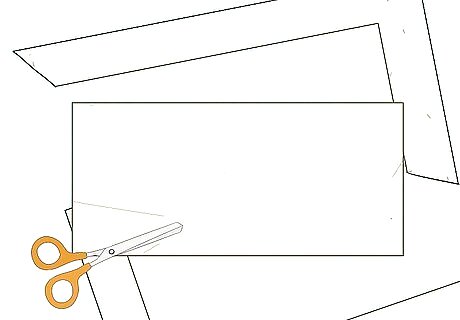
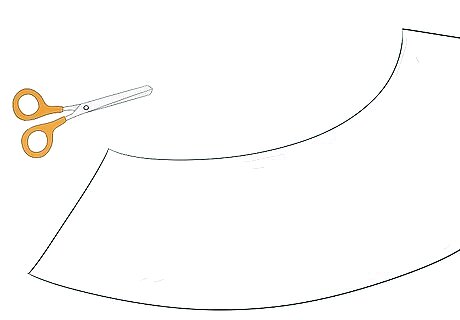
Cut the fabric out and remove the template. You can use regular fabric scissors or pinking shears.
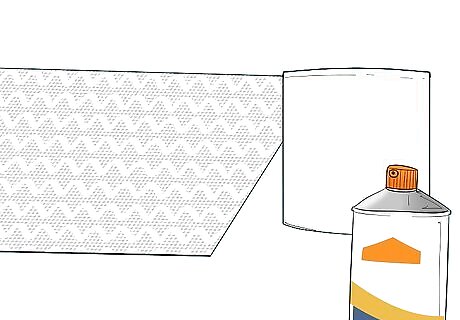
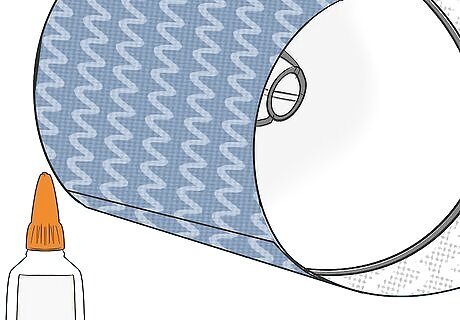
Spray the outside of lampshade and wrong side of the fabric with spray adhesive. Use straight, even strokes. Try to overlap each stroke by a little to prevent any gaps.
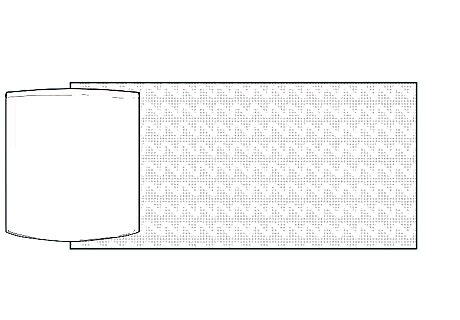
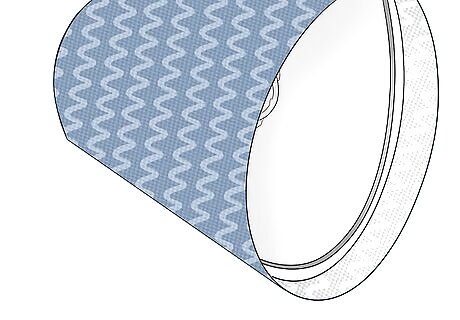
Position the lampshade onto the fabric. Make sure that one of the cut straight edges is lining up with the seam of the lampshade. There should be ½ inch (1.27 centimeters) of extra fabric above and below the lampshade. You need this extra fabric because you will be folding it over later on.
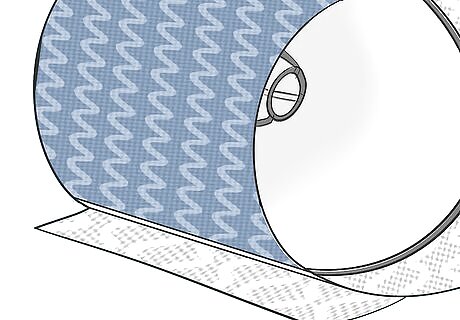
Roll the lampshade across the fabric. Keep rolling until you have 1 inch (2.54 centimeters) of fabric left over.
Seal the seam. Fold the edge in by ½ inch (1.27 centimeters). Press it down onto the lampshade. It should overlap the raw edge by a little.
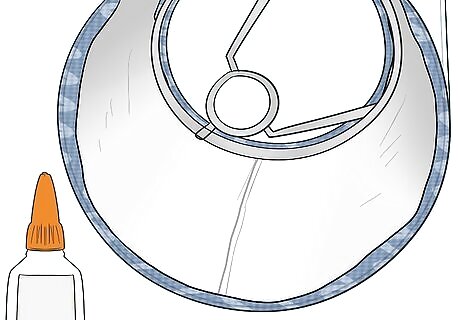
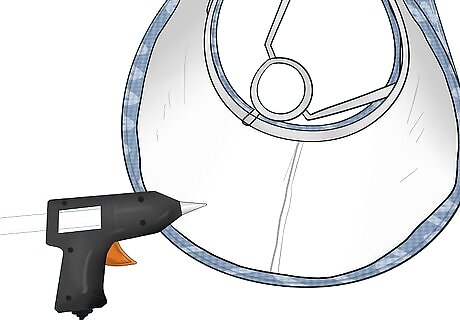
Tuck the bottom and top edges into the lampshade. Place a line of glue inside the lampshade, just beneath the wire rim. Carefully fold the top and bottom seam over the edge of the lampshade, and onto the inside. Run your finger along the fabric to seal it. You may notice that your lampshade has metal bars either on the top or bottom. You fabric will lay across those bars instead of laying smoothly across the lampshade. To prevent this from happening, take your scissors and cut a slit into the seam. Press the fabric down to either side of the metal bar.
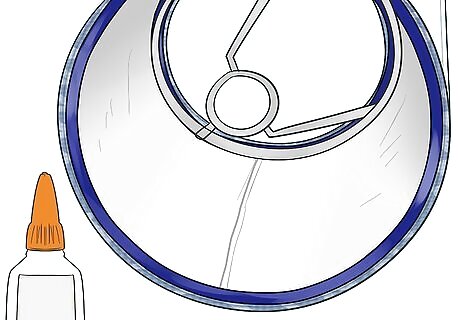
Add a ribbon to the inside of the lampshade to hide the seams. You can also use hem tape. Try to use a color that matches your fabric color, or the inside of the lampshade. Place a line of glue all the way around inside the lampshade, right on top of the fabric hem. Press the ribbon or hem tape onto the fabric. If you come across a metal bar, then try to slide the ribbon under the bar, instead of over it.
Covering a Beveled Lampshade with Fabric
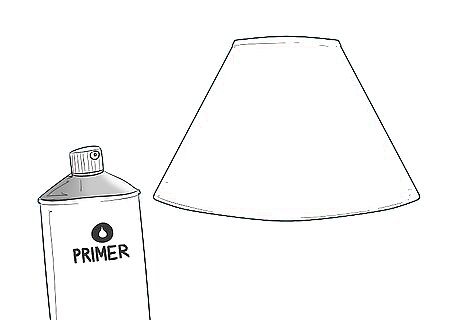
Consider priming the lampshade. If your lampshade is a very dark color and you are planning on using a lighter color of paper or fabric, you might want to paint the lampshade white first. You can apply white acrylic primmer with a paintbrush or a foam brush. You can also spray the entire lampshade using a white primer spray paint.
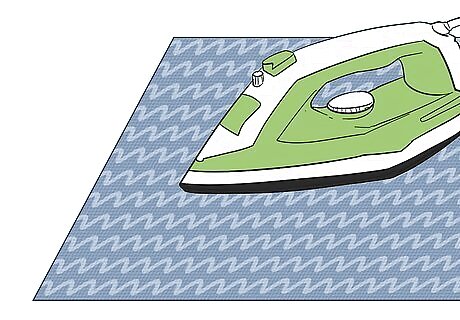
Iron the fabric, if necessary. If there are any wrinkles in the fabric, you will need to iron them out. If you don't do this, the wrinkles will show up in your finished piece.

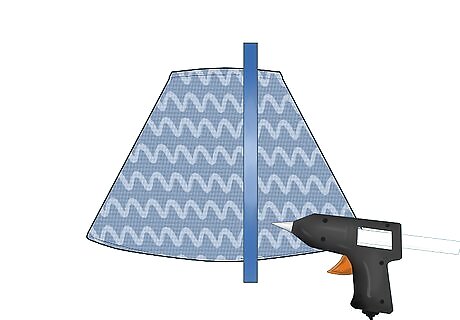
Take a piece of tracing paper and pin it to one of the panels. Use straight pins, and stick them straight down into the lampshade. You can also tape the tracing paper to the lampshade.
Carefully trace the panel onto the tracing paper. Trace over the top and bottom of the panel. Also, trace over the left and right side seam.
Cut the panel out of the tracing paper. This will be your template.
Pin the panel onto the fabric and trace around it. Leave a ½ inch (1.27 centimeter) seam allowance all the way around the template.
Cut the fabric out and remove the template. You can use regular fabric scissors or pinking shears. Be sure to cut the rest of the panels out of the fabric. For example, if your lamp has six sides to it, then cut six panels.
Spray the outside of lampshade and the panels with spray adhesive. Use straight, even strokes. Also, try to overlap each stroke by a little. This will prevent any gaps. When spraying the fabric panel, make sure that you are spraying the wrong side of the fabric.
Press the fabric panels onto the lampshade. Each panel will overlap by ½ inch (1.27 centimeters) at the seam. Make sure that there is ½ inch (1.27 centimeters) of extra fabric at the top and bottom of your lampshade. You will be folding this excess fabric inside your lampshade.
Fold the top and bottom seams into the lampshade. If your lampshade has a scalloped bottom, then you will need to cut little nicks into the seam allowance to get it to curve right. If there are any metal bars, you will need to cut little nicks into the fabric as well, so that the seam can lay flat against the inside, to either side of the metal bar.
Cover the side seams with ½ inch (1.27 centimeter) wide ribbon. Take a piece of ribbon and cut it so that it is 1 inch taller than your lampshade. Run a line of hot glue or fabric glue down one of the vertical seam on your lampshade (right where two panels join. Press the ribbon down onto the glue so that it covers the entire seam. There should be ½ inch (1.27 centimeters) of extra ribbon sticking over the top and bottom of your lampshade. Repeat this step for the rest of the seams.
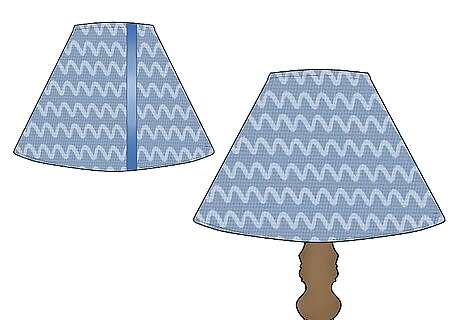
Fold the excess ribbon into your lampshade. Place a drop of glue on the end of the ribbon and press it down into the lampshade. Repeat this step for the rest of the ribbons.


Comments
0 comment