
Designing the Cube
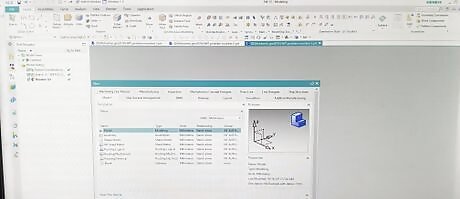
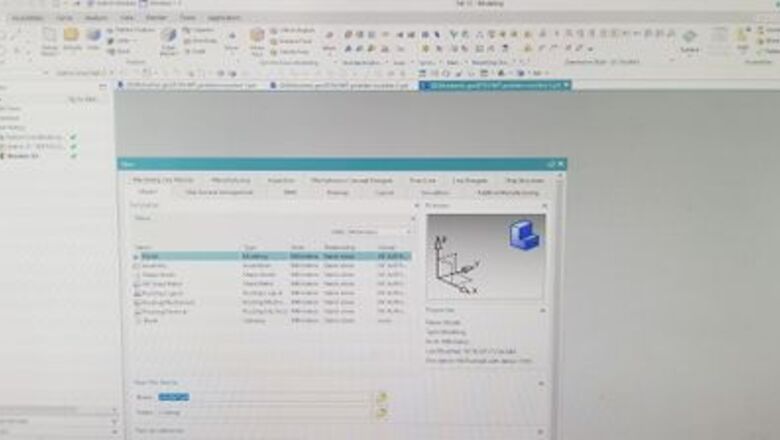
Open NX 12 and click File in the top left hand corner. Then, select new and select Model. Give your model a name and save it in the desired folder using the folder icon. Click OK.
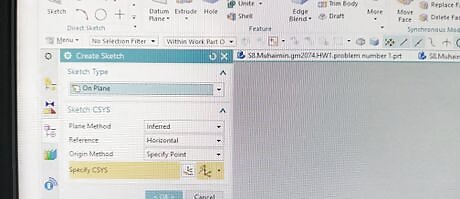
Select the Sketch option underneath the word “File,” making sure the menu option you have selected is the "Home" menu. A box will appear which will contain instructions on which plane to sketch on. Leave everything on default, unless you want to use a specific plane, and press OK.

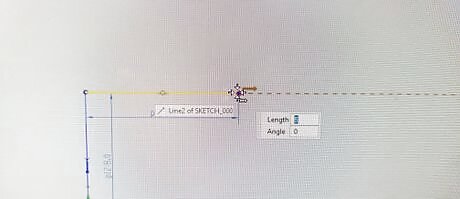
Select Home from the menu options at the top of the screen and select Direct Sketch from the tools that appear. From the shapes pictured, select the drawing of a diagonal line with a red dot at either end of it. This will create your first line. The line created will have two points and will say "Line" when you hover the cursor over it. This particular cube is 8x8.

Click the center of the plane at (0,0); this will be the starting point of the first line. A box with two options, length and angle, will appear. This is where you will input your desired measurements. For this cube, the length should be 8 and the angle should be 90 degrees. Enter 8 in the box for length and press Enter on your keyboard. Then, enter 90 in the angle field and press Enter once more.
Press the end point of the first line that you created and move the cursor horizontally across the plane. Enter 8 in the box for length and press Enter on the keyboard. Enter 0 for the angle and press Enter once more.
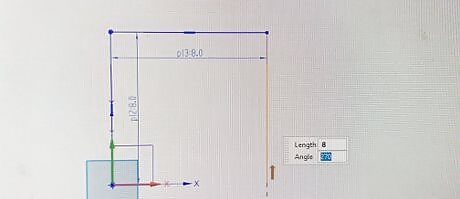
Click the end point of the previous line and move the cursor downwards this time. The length to input is still 8, but the angle is now 270 degrees. Enter 8 in the box for length and press Enter on the keyboard. Enter 270 for the angle and press Enter once more.
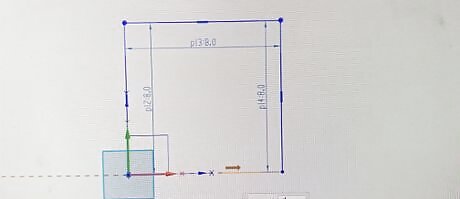
Click the endpoint of the previous line and connect that line to the starting point of the first line. Alternatively, you can enter the length and angle manually. To do this, enter 8 for the length and press Enter on the keyboard. Then, enter 180 for the angle and press Enter once again.
Press Finish Sketch in the upper left corner of the screen once you see a completed square. This is not the finished product, as you have not yet made it a 3D object.

Finish making this square a 3D object using the extrude tool. Select Home from the menu options at the top of the screen. Then, click Extrude. In the box that appears, enter 8 in the "Distance" field and press OK to create the cube. You might have to zoom in to see the square.
Drafting the Cube
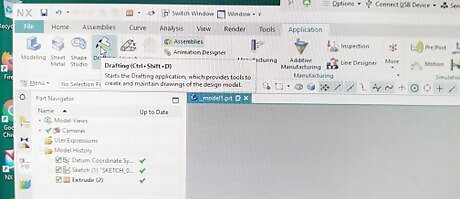
PressApplication from the menu options at the top of the screen. Select Drafting from the tools that appear.
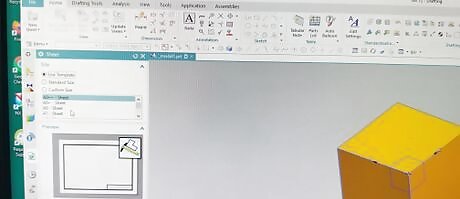
Press Home from the menu options to return to the home menu. Select New Sheet from the very left hand side of the menu. A new screen will then appear with a different layout. Leave all the settings on default, unless you require specific settings, and press OK.
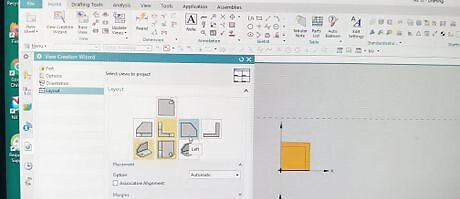
Select View Creation Wizard, which is underneath the "Home" menu option. In the box that appears, go to the Layout option to choose the desired drawings of the cube. Click Finish after selecting your desired drawings. Common drawings include left, top and isometric views.
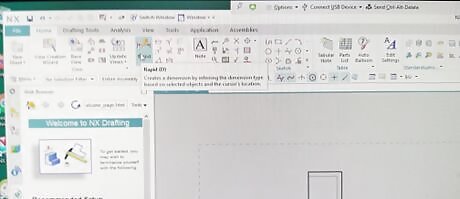
Select Rapid from the top of the screen, which is a tool within the "Home" menu. Type in the dimensions of the cube and a new screen will appear with drawings automatically generated. Since this is a cube, the dimensions we need are length and width, and they are all the same.
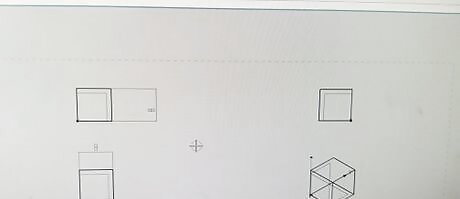
Place the dimensions on the screen. To do this, click on the length or width of the cube drawings you have just generated. Move the cursor away and right click to place the dimensions. Once the desired dimensions are placed, save the file. Click File from the menu options at the top of the screen and find a place to save your file. Click Save when you are done.


Comments
0 comment