
X
Research source
If you have a fiberglass kayak, you can only repair holes using epoxy resin, although the epoxy resin will work with linear polyethylene as well. Luckily, most kayaks made today are made out of linear polyethylene. While there are a few ways to repair damage on your kayak, the preparation work is always the same. After you sand, clean, and oxidize the surface, you can use an epoxy, scrap plastic, or patch to repair the damage.
Cleaning and Sanding the Damage
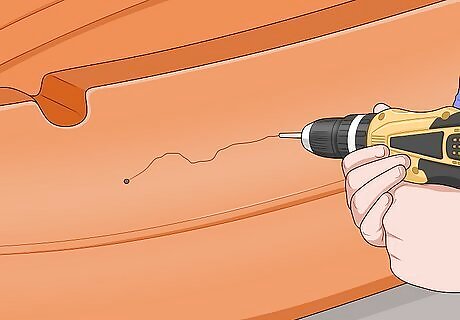
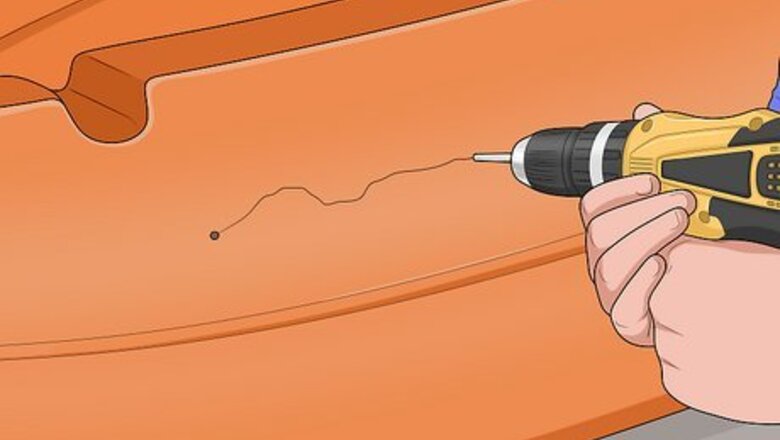
Drill holes into the edges of the damage if it’s cracked. If you specifically have a crack in the surface of your hull, it will continue to spread if you repair it. To prevent this from happening, attach a pilot drill bit to a drill. Place the tip of the bit on one end of the crack and drill ⁄8–⁄16 in (0.32–0.16 cm) into the plastic. Repeat this process on the other end of the crack. This will keep the crack from spreading after you repair it. You only need to drill into the surface of the crack if the damage doesn’t run all the way through the hull. If you can see clean through the crack to the other side, drill all the way through the kayak’s hull. You do not need to drill gouges, punctures, scratches, or thru holes, which are holes in the hull that are deep enough where you can see through to the other side.
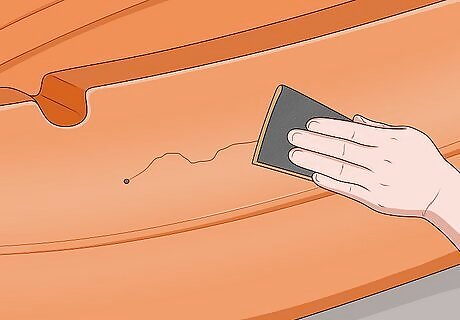
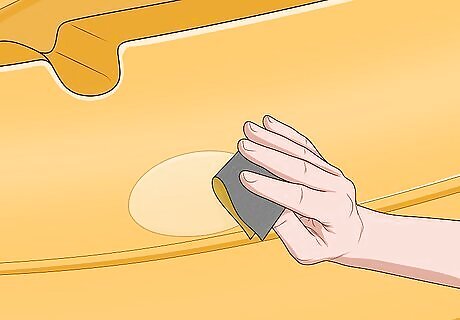
Rough up the damaged area with 80-grit sandpaper. Get a sheet of 80-grit sandpaper. Place it over the hole or scratch and rub it back and forth over the kayak. Scrape up the 1–2 inches (2.5–5.1 cm) surrounding the damage and scratch up the interior portion of the indentation or crack if you can. If you’re dealing with a thru hole, scrape the edges of the hole to the best of your ability.Tip: You only need to do this on the side where the damage occurred. In almost all cases, kayaks are damaged from rubbing against something on the exterior side of the hull, so you won’t need to mess around with the inside of the kayak.
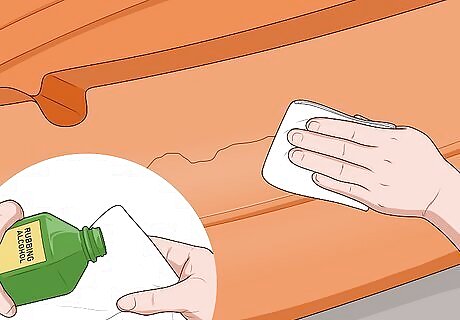
Wipe the area with rubbing alcohol and paper towels. Grab a roll of paper towels and rip a few sheets off. Put on some rubber gloves and pour some rubbing alcohol into the paper towels to soak them. Rub the damaged area down thoroughly with the wet paper towels to remove any debris or scraps of plastic from the sanding. You can use soap and water if you don’t have any rubbing alcohol. The main goal here is just to clean the area.
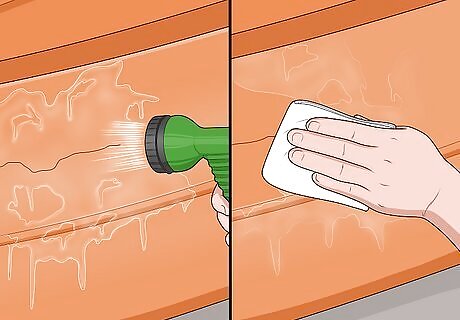
Rinse the area and wipe it dry to finish cleaning the damaged area. Grab a hose or fill a bucket with water and pour it over the area you soaked in alcohol. Then, grab some dry paper towels and wipe the area down to get it dry. This will wipe up any residue on the surface of the kayak.
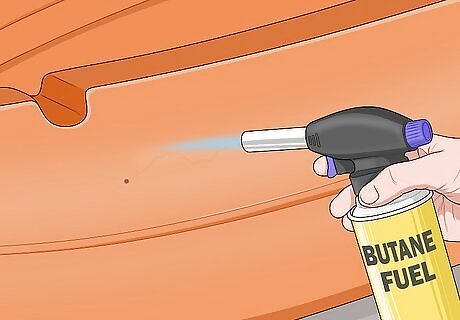
Run a butane torch over the surface rapidly to oxidize the plastic. Grab a butane torch and turn it on. Without letting the flame come in direct contact with the plastic, run the torch back and forth over the surface damage. Cover 12–16 inches (30–41 cm) every 1 second by rapidly moving the torch to avoid melting the plastic. Do this for 5-15 seconds to prep the kayak for your repair. The goal here is to oxidize the polyethylene, not to melt it. Oxidizing the surface ensures that whatever filling material you use will bond permanently to the kayak. If you don’t do this, your patch job is much more likely to come undone.
Filling a Deep Gouge with Epoxy
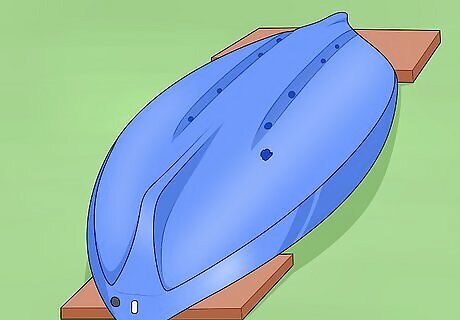
Prop the kayak up so that the damage rests parallel to the ground. Set some cinderblocks or bricks along the edges of the kayak to prop it up at an angle where the damaged area is facing directly up. The epoxy resin you’re going to use will drip out of the hole if the damaged surface isn’t parallel to the floor. This process is ideal for gouges, deep scratches, and small holes that don’t go all the way through the hull. If you have a fancy fiberglass kayak, this is the only way to repair damage.
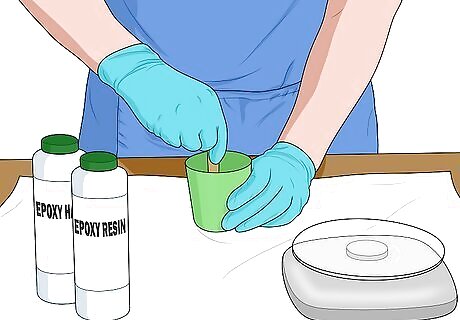
Mix your 2-part epoxy in a plastic cup to activate it. Put on some nitrile gloves to keep the epoxy off of your hands. Take a 2-part epoxy and squeeze out the resin into a plastic cup. Add an equal amount of the activating agent and mix the 2 compounds together slowly with a wood mixing stick. This will activate the epoxy and cause it to begin hardening slowly.Tip: Once you do this, you have roughly 30-45 minutes to work. If you take too long, the epoxy will harden in your cup. You can buy a 2-part epoxy resin from a hardware, construction supply, or automotive store. It’s often used to fill in damaged pipes or plastic surfaces. Any 2-part epoxy resin will work for this.
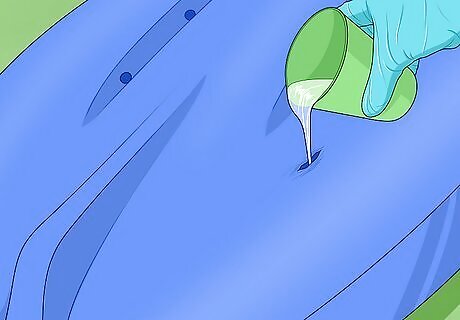
Pour the epoxy directly into the gouge to fill it up flush with the kayak. Tilt the cup over the damaged area and slowly pour the epoxy out. Move your cup as needed to fill up the hole, scratch, or gouge entirely with the epoxy. Wipe up any excess epoxy that overflows over the damage with a dry cloth. Continue pouring until all of the damage is filled and the epoxy is flush with the surface of the kayak. It looks pretty thick in the cup, but the epoxy pours smoothly. You shouldn’t need to move it around in the damaged area. If you do need to spread it around, feel free to use your gloved finger to do this.
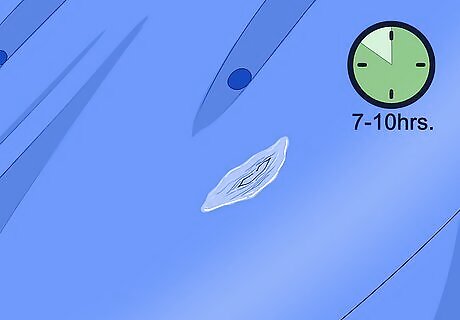
Wait 7-10 hours for the epoxy to cure. Once you’ve filled the damaged area, let the kayak sit for 7-10 hours. This will give the epoxy time to cure to the polyethylene. Once the epoxy is cured, you can paint over the surface or take your kayak out on the water. Most kayak enthusiasts don’t bother painting over repairs on the bottom of the hull since you can’t see it anyway. If you do want to paint over it, use standard acrylic spray paint.
Repairing Hull Damage with Scrap Plastic
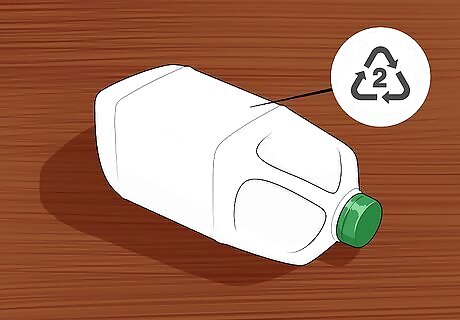
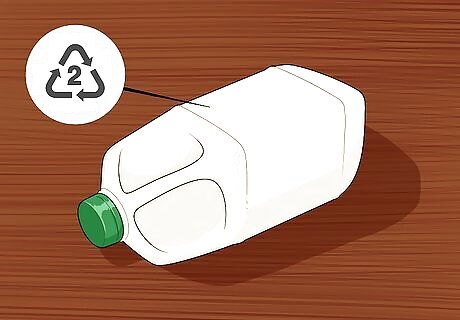
Find some #2 recyclable scrap plastic to fill the damage. The same polyethylene in your kayak is used to make a variety of other products. Look for any plastic object with a #2 printed on it with 3 arrows surrounding it. This is high-density polyethylene and you can use it to repair your kayak. Grab a bucket, milk jug, empty detergent or shampoo bottle, or scrap piece of plastic to perform this repair. This repair is ideal for nasty hull damage that can’t easily be repaired with resin. If the shape of the hole or scratch is malformed and you need to move the repair material around, this is the way to go. If the plastic isn’t clean, wash it with soap and water and dry it off before doing this. If possible, use a plastic that matches the color of your kayak. This will make the repair less noticeable. You’re going to destroy this object for your repair, so don’t grab something you may need one day!
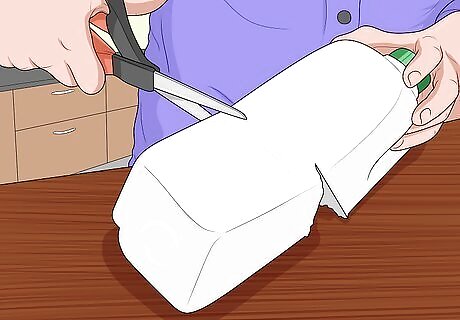
Cut the plastic out to match the shape of your hull damage. Grab a set of tin snips and cut out a chunk of plastic to match the shape of the damage. If you’re using a thinner material, like a milk jug, cut out twice as much as you need and lay the pieces over one another. Don’t worry about getting scientific here—you can always scrape the excess off as you’re applying it. If you don’t have tin snips and you’re using thinner plastic, you can carve it out of the object with a utility knife.
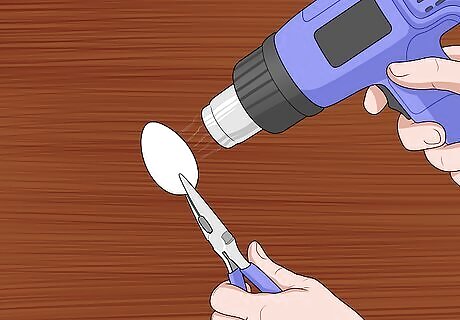
Heat the scrap plastic with a heat gun for 1 minute to soften it. Grab some pliers or channel locks to hold the plastic safely away from you. Lift the plastic up and hold a heat gun 5–10 inches (13–25 cm) away from the scrap plastic. Turn it on and move the heat gun back and forth until the plastic loses its shape and it looks flimsy as it dangles in the air. You can use a butane torch instead of a heat gun. Just make sure you don’t let the flame directly touch the plastic and move the torch around to melt each piece evenly.
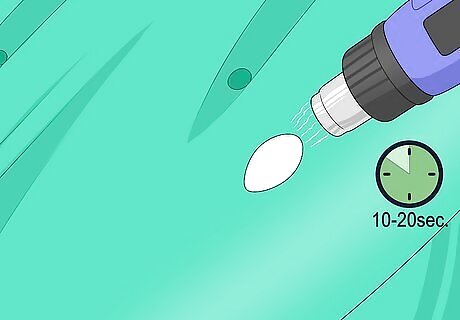
Place the plastic over the damage and continue heating it for 10-20 seconds. While the plastic is soft and pliable, slowly lay it down over the damaged area to fill it in. Move the heat gun back and forth. Keep heating the area for 10-20 seconds to warm all of the polyethylene up and melt the plastic you’re using to patch the kayak.Warning: Do not heat the kayak directly for too long. You only want to warm it up to make the two polyethylenes bind together. If the plastic patch begins dripping or bubbling, stop heating it and wait 10-20 seconds before proceeding.
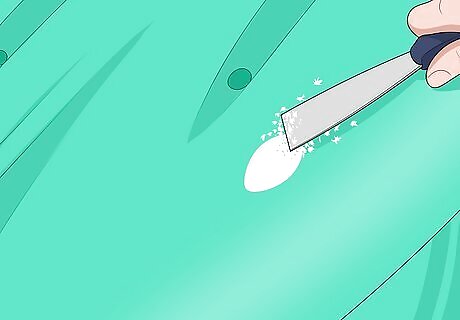
Spread and smooth the plastic out using a putty knife or screwdriver. Grab a putty knife if the damage is really wide or flathead screwdriver if the damage is smaller or oddly-shaped. Use the flat edge of your tool to spread the melted plastic around slowly. Keep moving the melted plastic until the surface of the kayak is flat and flush. You can repeat this process any number of times if you run out of patching plastic. Use the tip of the putty knife or screwdriver to scrape up any excess plastic. Wipe the plastic off on a piece of paper or cloth.
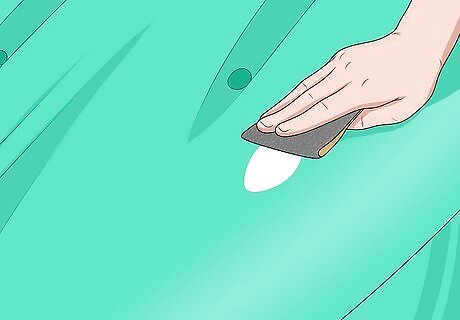
Wait 20-30 minutes for the plastic to dry and sand it if you want. The plastic will dry pretty quickly. Just let it rest for 20- to 30-minutes to give the plastic time to cure. Once it’s dry, you can leave it as it is if you’d like. Alternatively, you can sand it down with 200-grit sandpaper and paint it with spray paint. Most people don’t bother sanding or painting the damage if it isn’t really noticeable or it’s on the bottom of the hull.
Patching a Thru Hole

Buy a patch from the manufacturer if you can to match the plastic. If you have a hole that goes all the way through the hull, first email or call the manufacturer. Ask them if they have any plugs or scrap plastic to repair the damage. If they do, pay for it to get shipped for you. This is the ideal way to patch the hole.Warning: Do not take your kayak into deep water when you’re done if you’re patching a thru hole in the bottom of your boat. It will still be fine for creeks and shallow rivers, but there’s always a chance that a hole on the bottom will reemerge. If you’re out in deep water when this happens, you could end up in trouble. If you bought the kayak recently, the manufacturer may cover the damage with your warranty. They may just send you a brand new kayak if you ask. Patching a thru hole is pretty hard. It can certainly be done, but the finished product may not look the best.
Grab some scrap polyethylene if you can’t purchase a patch. If you can’t get a hold of some plastic from the manufacturer, you can patch the hole with a thick piece of #2 plastic. Get a bucket made out of polyethylene to create your patch. If possible, get a plastic bucket that is roughly the same color as your kayak.
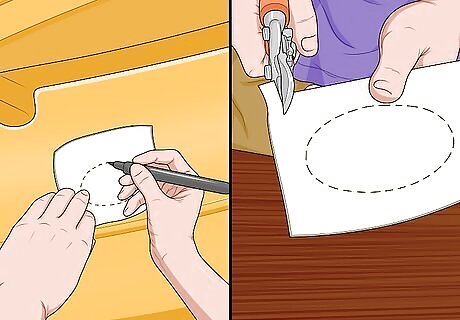
Trim the plastic to be ⁄2 in (1.3 cm) bigger than the hole. Take the bucket or scrap plastic and hold it under the hole. Trace around the edges of the hole with an erasable marker. Then, take some tin snips and cut around the outline to make the plastic a ⁄2 in (1.3 cm) bigger than the hole you’re patching. This is pretty hard to do in 2-3 cuts. You may need to cut small portions off one at a time until you can shape the plastic to match your kayak.
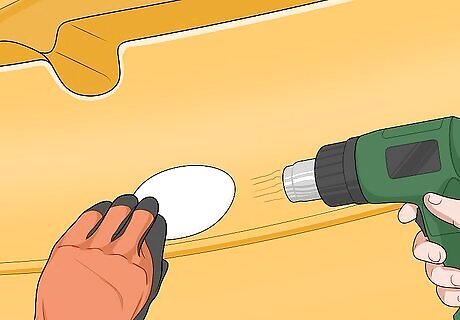
Place the plastic over the hole and begin melting it with a heat gun. Put on a pair of thick work gloves. Set the plastic down over the hole and line the edges up so that the patch sits over the kayak. Take your heat gun and set it to low. Move the heat gun around to soften up the patch and melt it. Try to avoid melting the portion of the plastic surrounding the patch. If the middle of the patch starts drooping down in the center, carefully prop it up from underneath with your gloved finger. If your finger starts to get hot, grab a piece of scrap wood to hold it up from underneath.
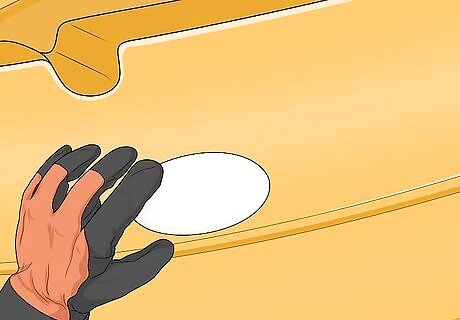
Push the edges of the patch inside the seam with your gloved finger. Be careful as you do this and work slowly to avoid burning your finger. Gently push the patch into the hole so that the edges match. If the plastic hardens at any point, reheat it for 5-10 seconds to re-melt it. If the plastic patch starts drooping, brace it up from the other side with your gloved finger.
Wait for the patch to dry and sand it with 200-grit sandpaper. Wait 20-30 minutes for the plastic and the kayak to dry. Once the surface has hardened, grab a sheet of 200-grit sandpaper and gently run it over the patch and surrounding area to smooth it down. Then, feel free to paint the area using spray paint if you’d like. You can cover the seam between the patch and the kayak with a plastic weld rod or Lexel caulk to seal it if you’d like a cleaner finish.


Comments
0 comment