views
Using the Disks Utility
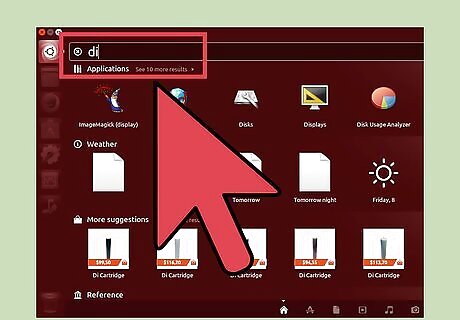
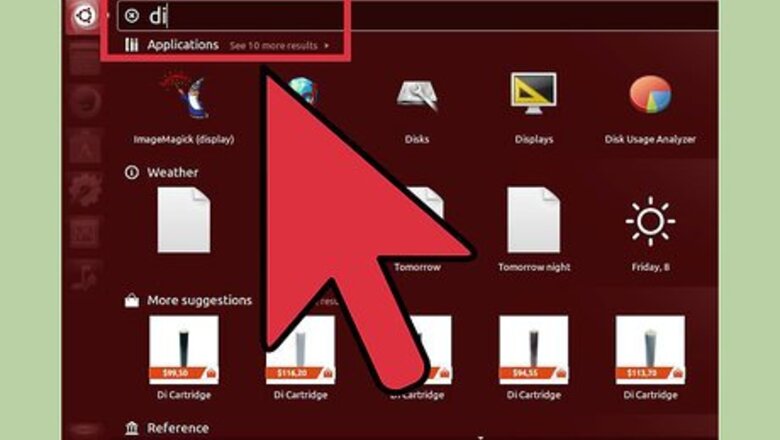
Click the Dash button and search for "disks." You'll see Disks appear in the Applications results.
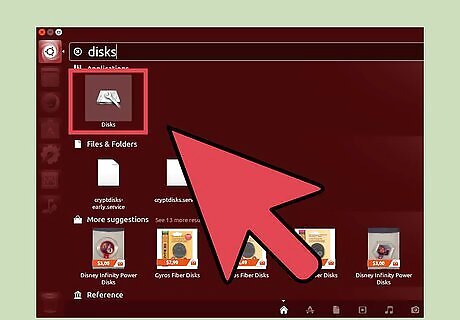
Launch Disks from the search results. A list of connected devices will appear in the left frame.
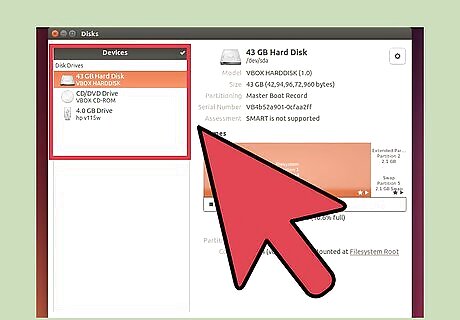
Select your USB drive from the list of devices. Its details will appear in the right frame.
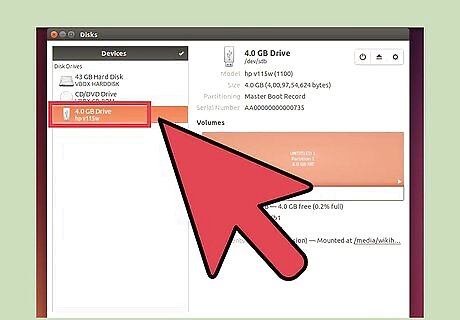
Select at least one volume on the USB drive. Most USB drives will only have one volume, but if yours has multiple volumes you can select one or all of them.
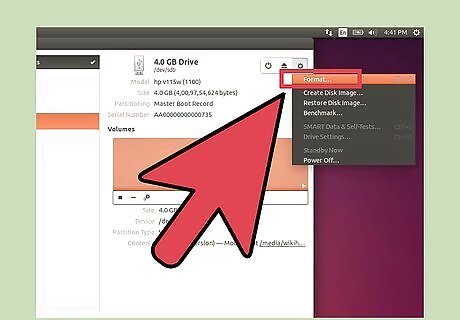
Click the Gear button underneath the Volumes and select "Format." This will open the formatting options.
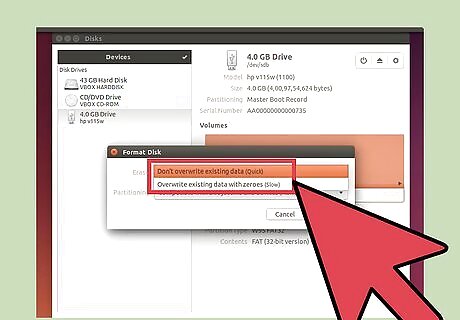
Select what you want to erase. A Quick format will not erase any data on the drive. A Slow format will erase all of the data and check for errors on the drive.
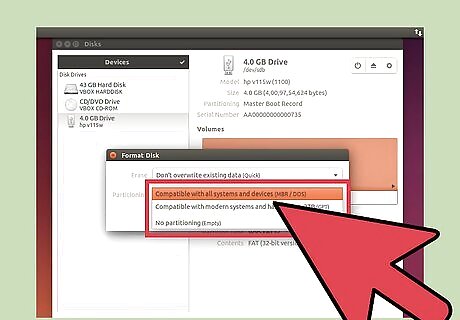
Select the file system. There are several different file systems that you can choose from. For maximum compatibility with other devices, select "FAT" (FAT32). This will work on all computers and virtually any other device that works with USB drives. If you're just planning on using the drive with Linux, select "ext3." This will allow you to use Linux's advanced file permissions.
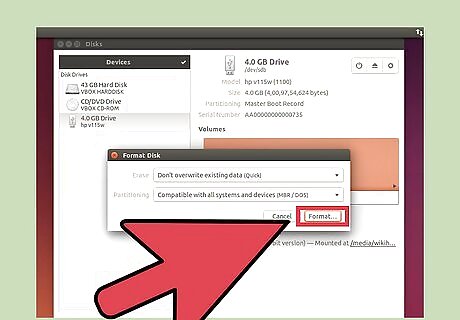
Format the drive. Click the Format button and wait for the USB drive to be formatted. This may take a while for larger drives, and erasing all of the data will add to the time it takes.
Using the Terminal
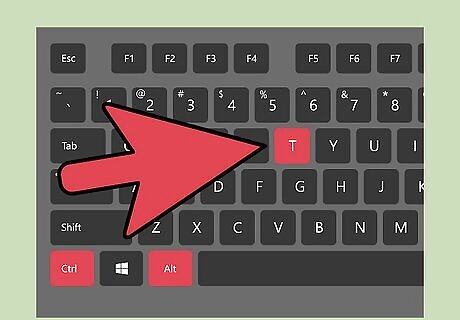
Open the Terminal. You can open this from the Dash, or by pressing Ctrl+Alt+T.
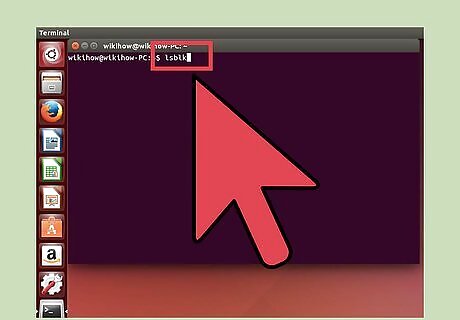
Type .lsblk and press ↵ Enter. This will display a list of storage devices attached to the computer.
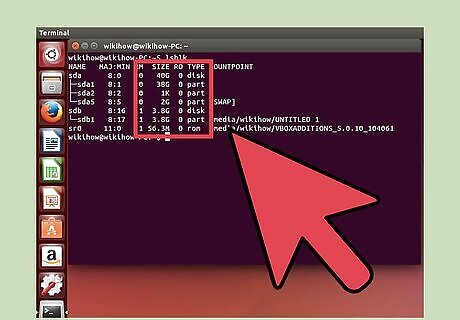
Identify your USB drive. Use the SIZE column to find your USB drive in the list.
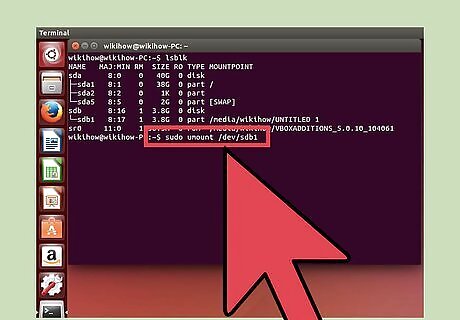
Unmount your USB drive's partition. You'll need to unmount the drive before formatting. Type the following command, and replace sdb1 with your USB drive's partition label. sudo umount /dev/sdb1
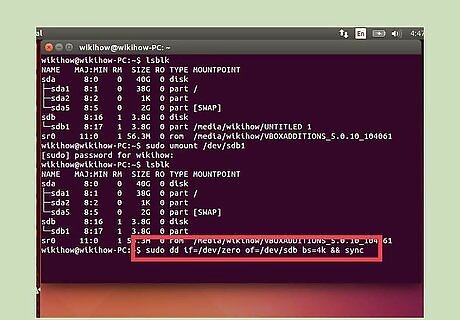
Erase all of the data on the drive (optional). You can delete everything on the drive by entering the following command. Replace sdb with your USB drive's label. sudo dd if=/dev/zero of=/dev/sdb bs=4k && sync This will take a while to process and may appear frozen. On Ubuntu 16.04 and later: sudo dd if=/dev/zero of=/dev/sdb bs=4k status=progress && sync.
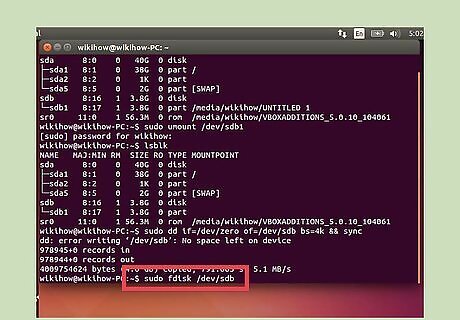
Create a new partition table. The partition table controls the volumes on the drive. Type the following command, replacing sdb with your USB drive's label. Type sudo fdisk /dev/sdb and press ↵ Enter. Press O to create an empty partition table.
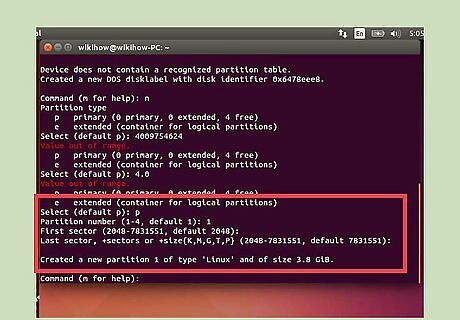
Press .N to create a new partition. Enter the size of the partition that you want to create. Enter the full size of the drive if you are just creating a single partition.
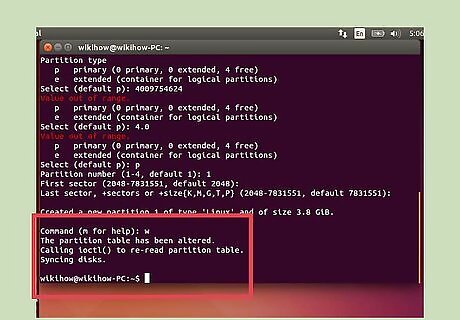
Press .W to write the table and exit. This may take a moment.
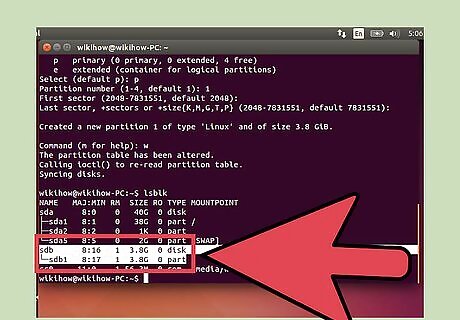
Run .lsblk again to view your new partition. It will be listed below your USB drive's label.
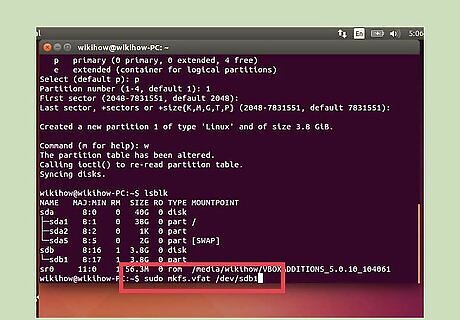
Format your new volume. Now that you've created the new volume, you can format it with the file system of your choosing. Enter the following command to format the drive as FAT32, the most compatible file system. Replace sdb1 with your partition's label: sudo mkfs.vfat /dev/sdb1
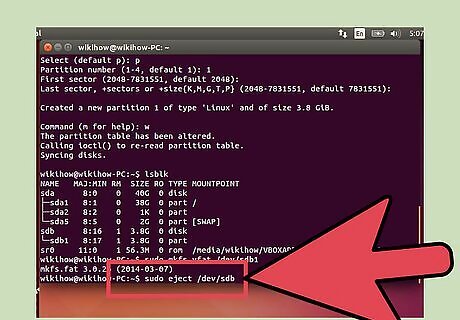
Eject your drive when finished. Once the format is complete, you can safely eject your device: sudo eject /dev/sdb





Comments
0 comment