
Chinese Gong
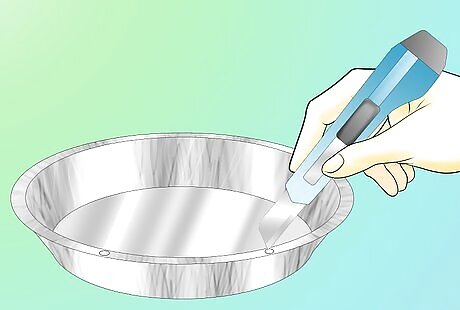
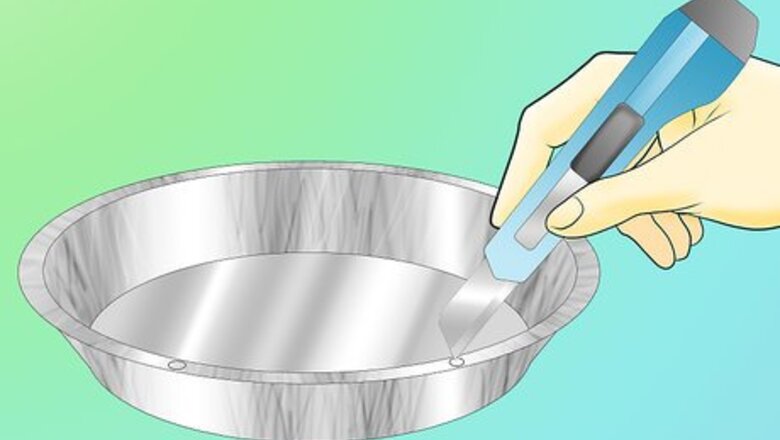
Poke two holes in a disposable roasting pan. Use a pocket knife to poke two small holes in the lip of one side of the roasting pan. Ask an adult to do this step. Choose one of the shorter ends. This will now be the top of your gong. The holes should be 2 to 3 inches (5 to 7.6 cm) apart. The tip of a scissors blade could also be used instead of a pocket knife.
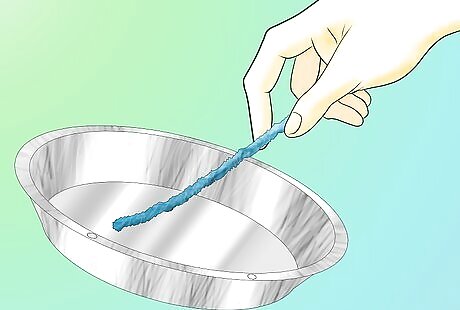
Slide pipe cleaners into the holes. Place one pipe cleaner into each hole. Securely twist the ends of each pipe cleaner together. Each pipe cleaner should form a loop with the ends twisted together. You'll need two loops (one in each hole). The loops should be 3 to 4 inches (7.6 to 10 cm) in diameter.
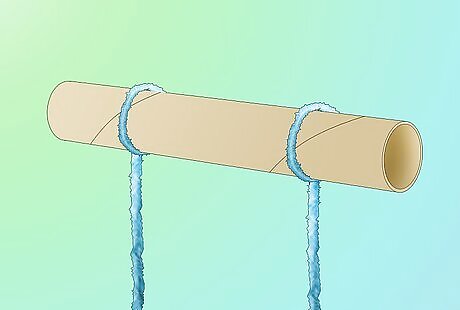
Hang the pipe cleaners from a cardboard tube. Slide the cardboard tube of a wrapping paper roll or paper towel roll through the pipe cleaner loops, centering the loops on the tube. You could use a broomstick, measuring stick, or other large stick instead of the cardboard tube if desired. Just make sure that the stick itself is longer than the width of your roasting pan gong. This tube or stick will act as the support for your gong.
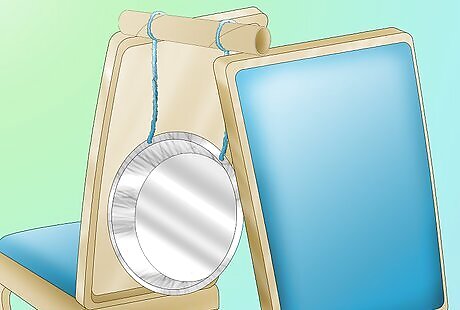
Prop up the gong. Place two desk or dining room chairs back to back. Rest the support on the back tops of both chairs so that the gong hangs in place. For added security, you could hold the support in place using more pipe cleaners. Alternatively, you could use two large, thick books or any other evenly sized sturdy pieces instead of the chairs. This "stand" needs to be able to stay in place without additional support, though.
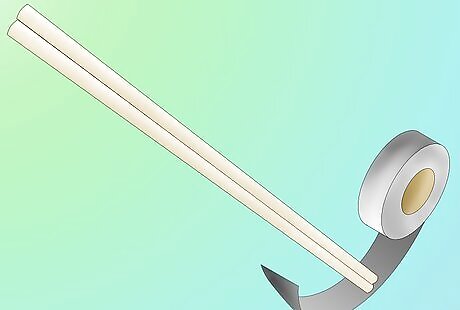
Wrap the end of a chopstick with tape. Wrap electrical tape around one end of the chopstick, overlapping the tape until it forms a thick mass. Instead of a chopstick, you could also use a wooden spoon or 12-inch (30.5-cm) wooden dowel. The taped portion of the stick will be the head of your beater. The head should be about 2 to 4 inches (5 to 10 cm) thick.
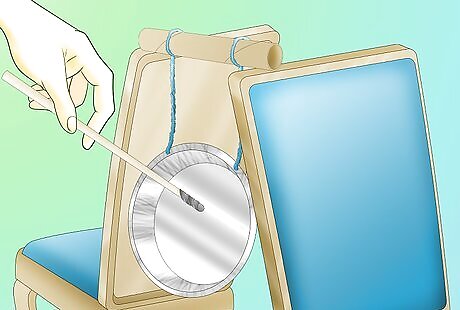
Play the gong. To play the gong, simply strike the bottom, flat side of the roasting pan with the head of your beater.
Maracas
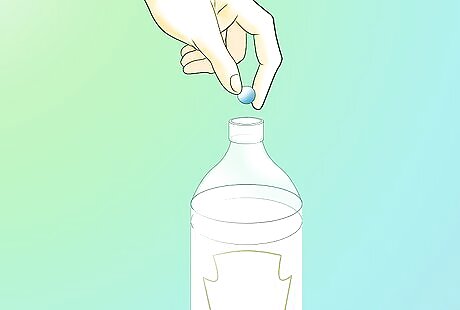
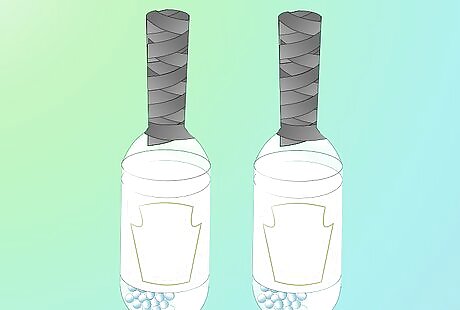
Fill a plastic bottle. Fill an 8-oz (250-ml) plastic bottle halfway with a noise-making material. Tightly secure the cap on the top of the bottle. There are different options you can use for the filling. Pebbles, beans, rice, birdseed, beads, dry pasta, small washers, and paper clips will produce stronger noises. Sand, salt, and small erasers will produce quieter noises. You can also mix different filling materials inside one maraca or use a filling idea not mentioned here. The filling just needs to be small enough to shake around inside the maraca.
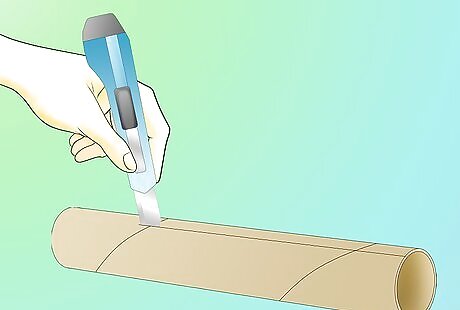
Cut a cardboard tube lengthwise. Cut straight down the length of one toilet paper tube. The cut should be as straight as possible. Only cut one slit down the length of the tube. Do not cut the tube completely in half. If working with a paper towel roll instead of a toilet paper roll, completely cut the paper towel roll in half crosswise before cutting it lengthwise. Only use one of these halves for one maraca handle.
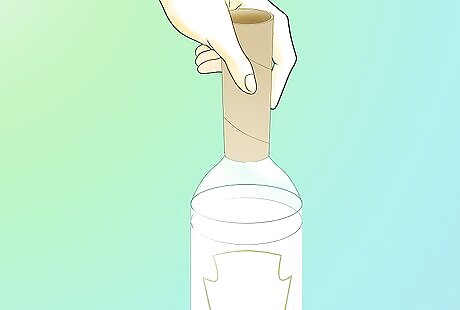
Tighten the tube around the cap of the bottle. Roll the cardboard in on itself lengthwise. Fit one open end onto the cap of the bottle. The opening should be about 3/4 inch (1.9 cm) in diameter, or just big enough to fit onto the cap snugly.
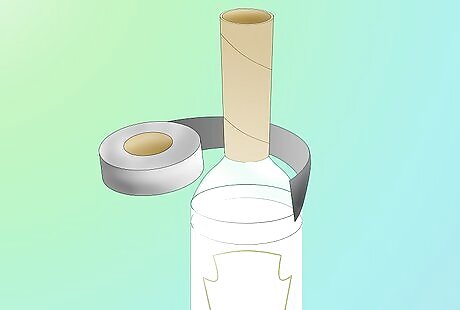
Attach the tube with tape. Start wrapping the electrical tape around the bottom part of bottle, near the cap. Wind it around, overlapping the layers, until it also connects to the cardboard handle. Wrap slowly and do not leave any gaps in between layers of tape. To make the maraca more decorative, use tape that comes in a bright color or pattern.

Cover the rest of the tube with additional tape. Continue wrapping the tape around the cardboard tube in the same manner until you reach the very bottom. Use one piece of tape to cover the open bottom of the tube.
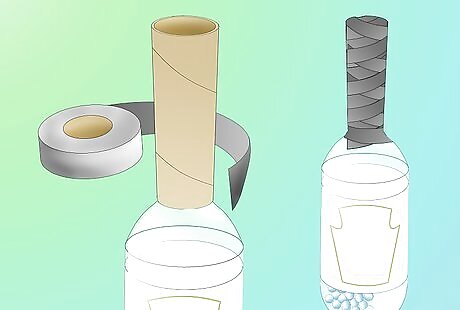
Create a second maraca in the same way. The second maraca is made in the same way as the first, so you will need to repeat the previous steps with a second 8-oz (250-ml) plastic bottle. Consider using a different filling for your second maraca. Many real maracas have different pitches, and using different filling materials can mimic these different pitches. For instance, if you place beans in one and rice in another, the rice maraca will have a higher pitch.
Play the maracas. Grab the handle of one maraca in your right hand and the handle of your second maraca with the left. Give them both a shake to hear them play. Experiment with rhythm and sound by shaking them at different intervals.
Tambourine Sticks
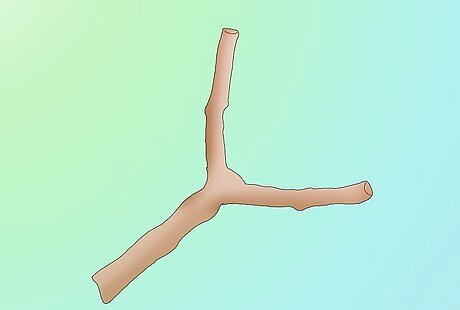
Find a y-shaped stick. The stick must be y-shaped, with a distinguishable forked top and a single lower branch that can act as a handle. Make sure that the stick is very sturdy. Use a hardwood branch, if possible. To make the instrument more colorful, you can decorate it with paint, feathers, beads, or other embellishments. Make sure that none of these decorations hang off from the top forked section of the stick, though.Make Musical Instruments with Recycled Materials Step 14Bullet2.jpg
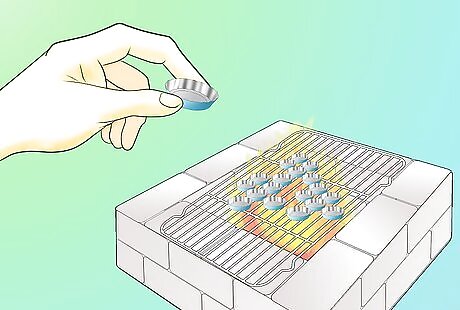
Heat a dozen metal bottle caps. Remove the rubber liners from the inside of each cap, then heat the caps on a hot outdoor grill for about five minutes. This step should be done by an adult. Do not touch the metal caps as they heat up. Only touch them using tongs. This step is technically optional, but following it will improve the final sound of the instrument.
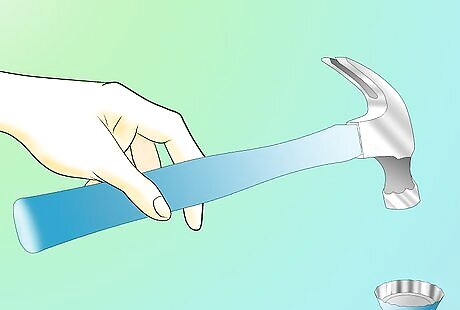
Flatten the caps. After the metal caps cool to the touch, use a hammer to flatten them out as much as possible. Mainly, you'll need to focus on flattening the raised, bumpy ridge around the outside of the cap. Work carefully to avoid striking your fingers. You may need to perform this step with adult supervision, as well.
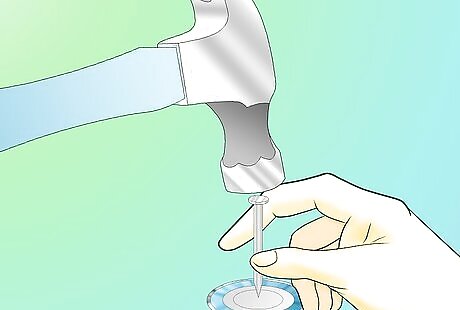
Punch a hole into the center of each cap. Place a nail in the center of each flattened cap. Use a hammer to gently poke the tip of the nail through the metal, creating a hole. Remove the nail after creating each hole. Work with an adult during this step to minimize the risk of injury.
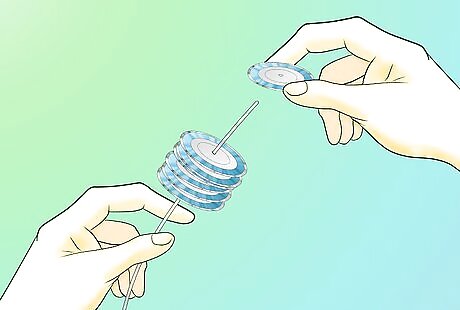
Thread the caps onto a wire. Slide a sturdy piece of metal wire through each hole until all of the caps are lined up. The wire should be a little longer than the distance in between the widest part of the forked portion of the stick.
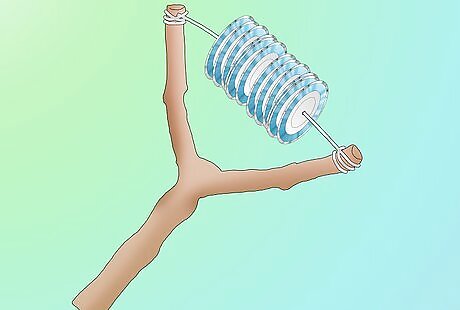
Wrap the wire around the arms of the stick. Wrap one end of your threaded wire around one of the forked arms of the stick. Wrap the other end of the wire around the other arm. The wire should be wrapped around the top of the fork, or around the widest portion (if that portion differs from the top).
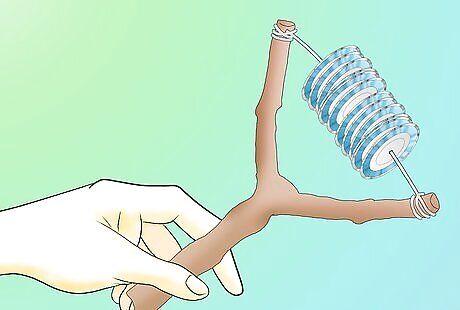
Play the tambourine. Grab the tambourine by its handle portion and give it a good shake. The bottle caps should clang together, producing a musical sound.
Chimes[1] X Research source
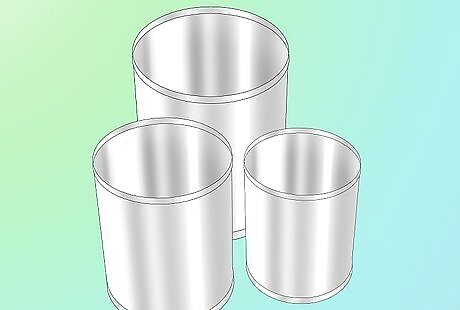
Gather various tin cans. Find four to six empty metal cans of various sizes and shapes. Make sure that the cans are clean and safe to use. Some cans worth considering include soup cans, tuna cans, coffee cans, and pet food cans. If the top edge of the can seems jagged, apply a layer of thick tape to the rim to prevent any accidental cuts.Make Musical Instruments with Recycled Materials Step 21Bullet2.jpg
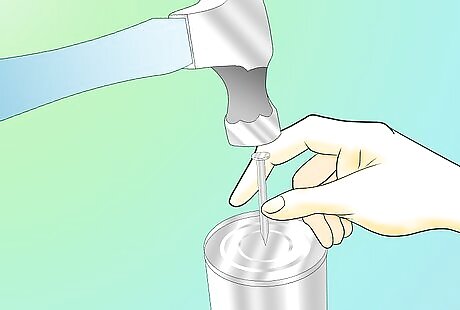
Punch a hole in the bottom of each can. Stand a can upside-down and place a thick nail in the bottom center. Use a hammer to puncture the bottom of the can with the nail. This step should be performed with adult supervision. Repeat this procedure with each can.
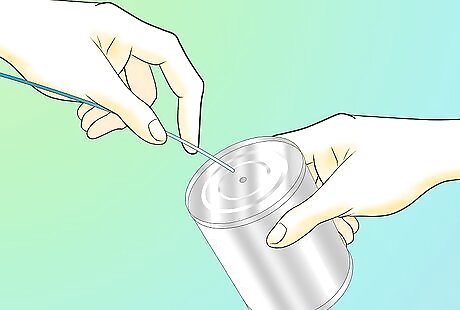
Slide string through each hole. String a long piece of yarn through the hole in one of your cans. Repeat for each can, using a different piece of yarn each time. Use yarn, cord, or another type of thick string for this part of the process. There should be about 8 inches (20 cm) of string sticking out of the flat top of the tallest can. The rest of the lengths can vary, but the cans will need to be able to bump into each other as they hang.
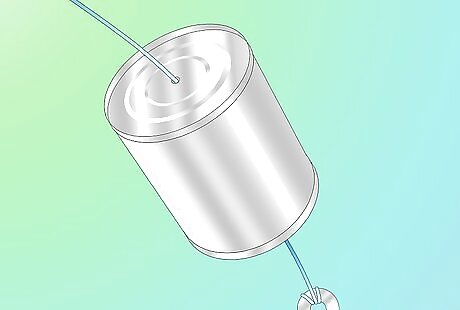
Secure the string with washers. Tie a metal washer onto the end of the yarn sticking through to the inside of the can. You could use another object, like a rock, if washers are not available. The object should be heavy, though, so that it can create additional noise when it hits the side of the can.
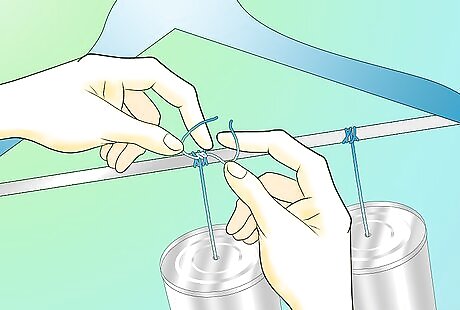
Hang the cans from a clothes hanger. Knot the other end of each string to the bottom of a sturdy clothes hanger. The cans should overlap each other as they hang.
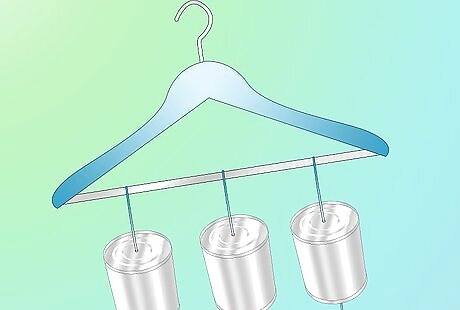
Play the chimes. Place the chimes in a windy area and let the breeze play them for you, or strike the chimes with a chopstick to play them yourself.
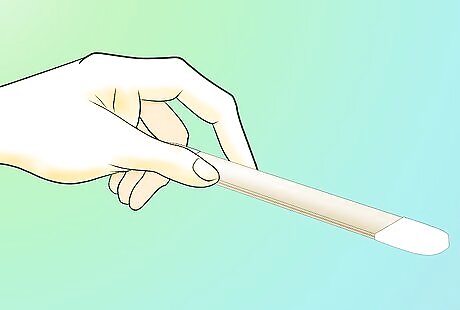
Harmonica[2] X Research source
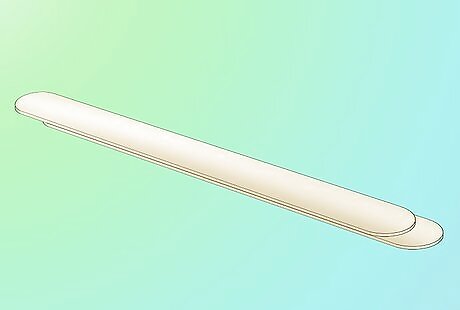
Overlap two popsicle sticks. Place two popsicle sticks together, one on top of the other. If you're recycling used popsicle sticks, make sure that they have been washed and dried before using them for this project. Large popsicle sticks work best, but any size can be used.
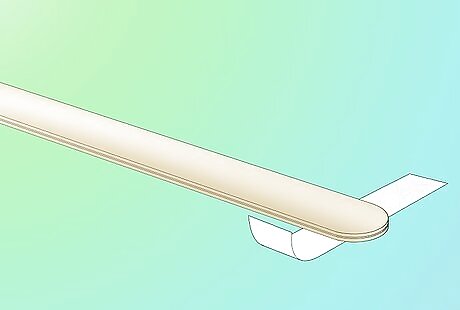
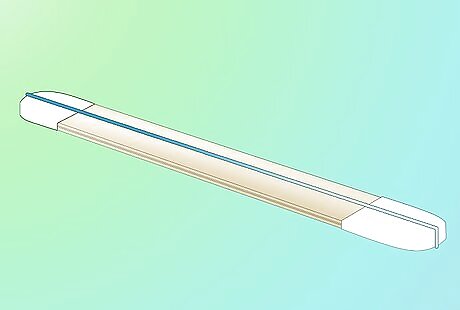
Wrap a strip of paper around each end. Tightly wrap a small strip of paper around one end of the popsicle sticks and tape the loop together. Repeat this with a second strip and the other end of the sticks. Each strip of paper should be about 3/4 inch (1.9 cm) wide and 3 inches (7.6 cm) long. You will need to wrap the strip around itself several times. When taping the paper loop together, only tape the paper to itself. Do not tape it to either popsicle stick.
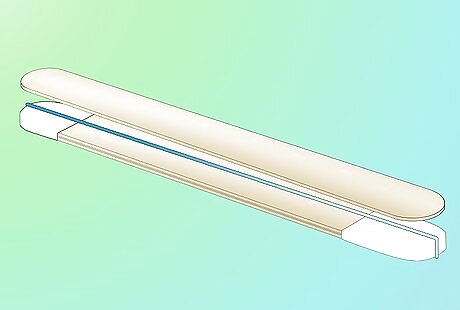
Slide out one of the sticks. Carefully ease out one of the popsicle sticks, working carefully to prevent damaging or disturbing the paper loops. Set this stick aside for now. The other stick should still be inside the paper loops.
Attach a wide rubber band lengthwise. Place one large, wide rubber band over the popsicle stick and paper loops. The rubber band should run from end to end. It should be taut, but not so tight that it can snap or fling off.
Slide both sticks back together. Place the second popsicle stick back on top of the first, sandwiching one side of the rubber band in between the two sticks in the process. The two sticks should line up evenly when viewed from the top, bottom, and sides.
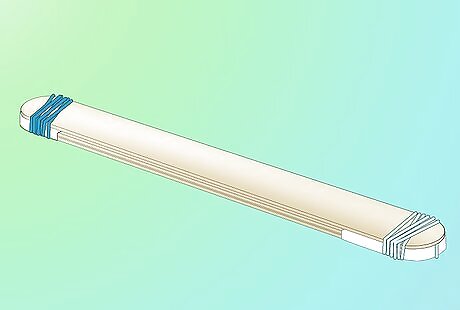
Hold the ends in place with additional rubber bands. Use a small, thin rubber band to fasten the sticks together at one end. Use a second similar rubber band to hold the sticks together at the opposite end. These rubber bands should be placed to the outside edge of the paper bands.
Play the harmonica. The harmonica is done at this point. To play it, blow through the popsicle sticks, focusing your breath so that it is directly completely through the instrument and not around it.


Comments
0 comment