
Installing Your Aquarium's Main Features
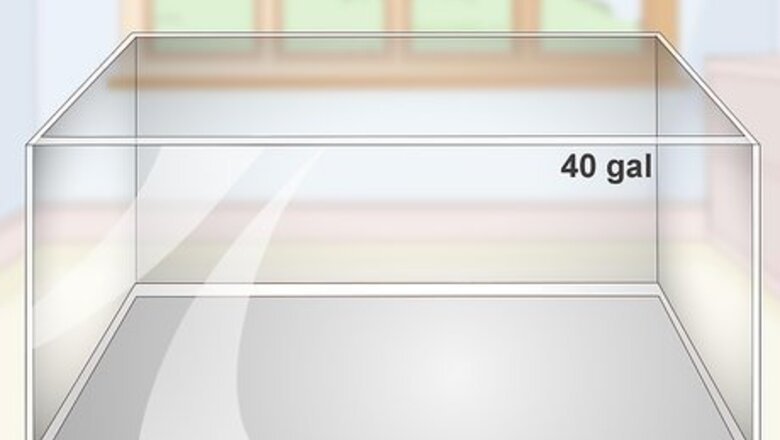
Acquire a fish tank that holds 40 gallons (150 L) or less. Higher-capacity tanks will require more fine-tuning, and are therefore somewhat difficult to keep at home. When shopping around for the right tank, take into consideration your size and style preferences, as well as the amount of available space in your home. You can usually pick up a 40 US gal (150 L) fish tank for a couple hundred dollars at most pet stores. Glass and acrylic are the two materials most common fish tank materials. Glass is more expensive but holds up better to scratches, whereas acrylic is more affordable and less prone to fogging, but tends to show scratches easier.

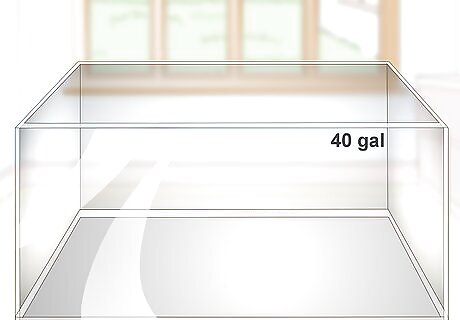
Place your tank in a dim room with plenty of ventilation. Choose a spot that's relatively cool and out of direct sunlight. Ideally, it should be somewhere you pass by often so you'll be reminded to keep an eye on things. A little airflow is also a plus, as it will allow for some gaseous exchange between the aquarium and its surrounding environment. The light and temperature in a reef aquarium must be carefully monitored. Too much of either coming from outside sources will make it harder to maintain ideal water parameters in the tank.
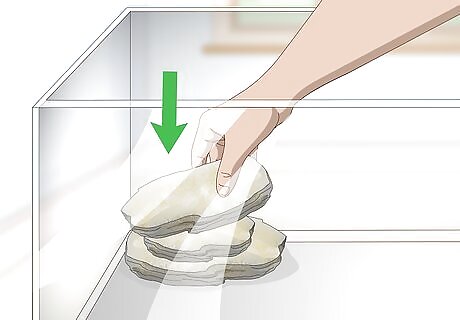
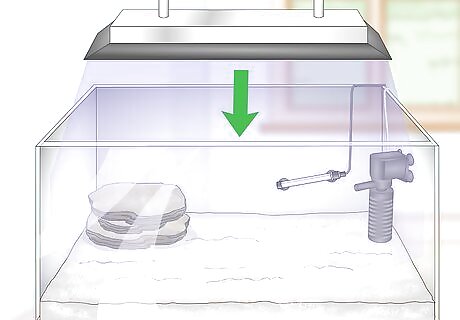
Situate your live rock in the desired position inside the tank. Position your rock wherever you think it looks best. It's easiest to do this before you fill your aquarium, since you won't have to try to maneuver it through thick sand or worry about contaminating the water. For best results, your live rock shouldn't take up more than about 40-50% of your tank's total volume. Live rock is a chunk of the reef structure from an already-established aquarium. The rock plays host to the many marine organisms that will eventually grow and flourish in your aquarium. You also have the option of using an artificial live rock. With a man-made rock, there's less risk of introducing pests, parasites, and other “hitchhikers” that are sometimes found in live rock.Tip: You can buy live rock in various shapes, sizes, and colors from stores that specialize in aquarium accessories. They range in price from a few dollars to a few hundred dollars for larger, more exotic formations.
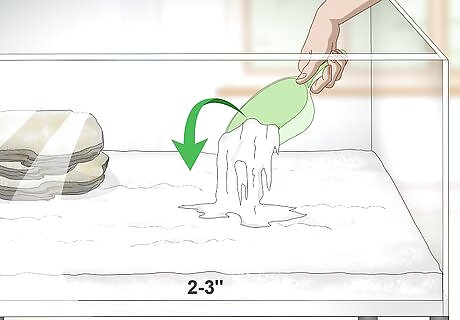
Add 2–3 inches (5.1–7.6 cm) of live sand to the bottom of the tank. Snip open one corner of the bag and slowly sift the sand into the tank from corner to corner, working around your live rock. Make sure the sand is evenly distributed over the tank surface and piled a minimum of 2 inches (5.1 cm) thick in each area. Live sand, like live rock, is full of beneficial microorganisms that will help build up the ecosystem inside your reef aquarium. Never use ordinary sand in a reef aquarium. It's possible that it could contain bacteria, chemicals, heavy metals, or other substances that are harmful to marine life.
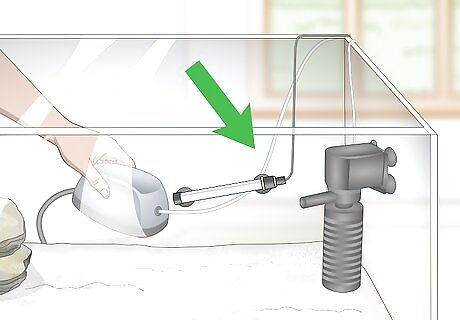
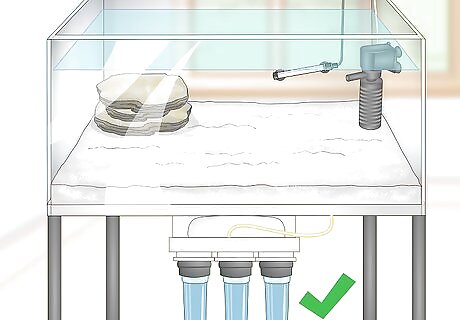
Outfit your tank with a filter, pump, and heating unit. Study the manufacturer's instructions for installing the specific models you've chosen for your aquarium. Most of the time, these pieces simply hook onto the back or side of the tank right out of the box. To guarantee that your equipment will work efficiently, make sure each component is sitting at least 2–4 inches (5.1–10.2 cm) below the top of the tank, which is where the water will reach once the tank is full. There are several different types of filters to choose from when setting up a reef aquarium. To get a better idea of which type will work best for you, talk to a product specialist at the store where you bought your tank or do some reading online. Adjust your heater to keep the water in the tank at a steady 70–82 °F (21–28 °C).
Hook up a separate light source if your tank doesn't have its own lights. It's important to select a lighting solution that disperses bright light evenly throughout your tank. Blue and white LED light bars work best for this purpose. When you've found a light that fits your needs and budget, mount it directly above or behind your aquarium so it will easily be able to illuminate your corals through the glass. For tanks that hold 20 gallons (76 L) of water or less, a compact gooseneck light can come in handy. Their molded mounting arms allow them to be clipped directly to the rim of the tank. Strong lighting is a must in reef aquariums, both for clear visibility and to aid marine plants in photosynthesis.
Filling Your Aquarium
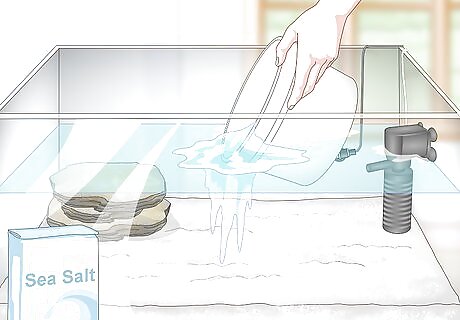
Fill the tank slowly with specially formulated aquarium-grade saltwater. Pour in the water a little at a time. Not only will this make less of a mess, it will also prevent the water from splashing off of your skin and potentially introducing harmful contaminants. Continue adding water until the tank is full, leaving 2–4 inches (5.1–10.2 cm) of room at the top of the tank. You'll find large containers of aquarium-grade saltwater at your local pet shop or aquarium supply store. It's a good idea to keep 2-3 of these containers on hand at all times, as you'll be performing regular water changes. Aquarium saltwater is often sold in big, heavy containers that may be unwieldy to handle on their own. If possible, ask someone for help lifting and maneuvering the container.
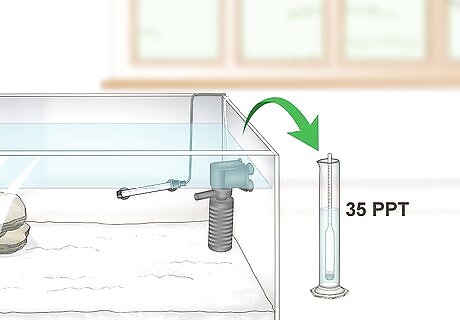
Test the salinity of your water with a hydrometer or other salinometer. Slip the instrument's sensor into the water and wait for it to come back with a reading. For a standard reef aquarium, you're looking for a salinity level of 35 PPT (parts per thousand), which translates to a specific gravity of 1.025. If you discover that your water's salinity is too low, add small quantities of aquarium salt to bring it up to the targeted level. If it's too high, it will be necessary to partially drain the tank and refill it with RO/DI water until you get a reading of 35 PPT/1.025. There are a few different instruments you can use to measure the salinity of your reef aquarium. Hydrometers are the least expensive, but also the least accurate. Refractometers and digital salinity monitors provide more accurate readings, but may run you a little more.Tip: Following your initial test, check the salinity of your aquarium every 1-2 days to confirm that it's where it needs to be.
Use an RO/DI unit and aquarium salt if you'd rather mix your own water. “RO/DI” is short for “Reverse Osmosis/Deionization,” which are the names of two different highly-effective water filtration methods. Call your local pet store or aquarium supplier and ask them if they sell RO/DI systems. If the answer is no, you may have to buy one online. In most cases, you can get a unit for $100-300. Follow the instructions provided with the specific filtration system you're using to get it up and running. Combine the clean, purified water produced by your RO/DI system with the necessary amount of aquarium salt to bring it to the target concentration.
Maintaining Optimal Conditions in Your Aquarium
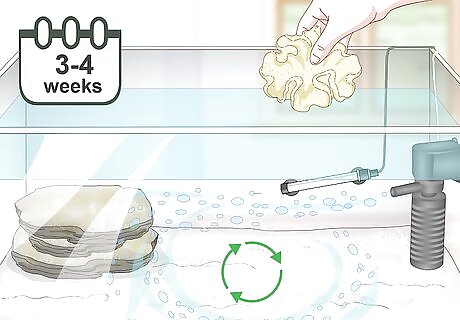
Let your aquarium cycle for 3-4 weeks before adding your first corals. This will give your live rock plenty of time to acclimate to its new environment. During this period, allow your filter and pump to run uninterrupted to keep water circulating throughout the tank. Leave your light source off until it's time to add your corals. Otherwise, it could cause excessive algae growth, which can throw off the chemical balance of the aquarium.
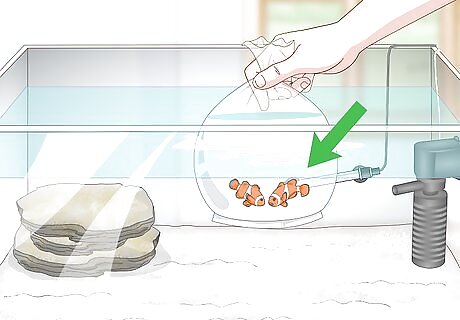
Introduce 1 or 2 fish to your reef aquarium if desired. In the beginning, it's best to start with a pair of saltwater fish of the same species. Popular starter fish for reef tanks include clownfish, damselfish, cardinalfish, royal gammas, and blue-green chromis. Be sure to choose a hearty species of fish that's well-suited for tank-living. It's important to properly acclimate your fish to their new environment. This will involve adding about ⁄4 cup (59 mL) of tank water to the bag of water your fish came in every 10 minutes to see how they respond before finally releasing them into the aquarium. As your fish go about their day-to-day business in the aquarium, they'll produce ammonia as a natural byproduct. Ammonia is essential for initiating the nitrogen cycle and kick-starting major growth of aquatic plants and microorganisms.
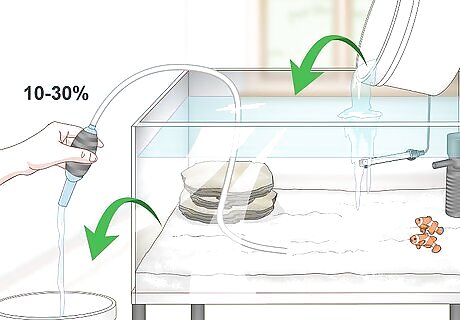
Change out 10-30% of the water in your aquarium monthly. Use an automatic or manual siphon pump to drain up to 1/3 of the water in the tank into a large bucket or series of buckets. Replace the missing volume with an equal amount of pre-mixed saltwater from one of your reserve containers. Don't forget the test the salinity of your aquarium when you're finished. Remember, it should be right at 35 PPT, with a gravity of 1.025.Tip: Get in the habit of performing regular water changes every 3-4 weeks, even if the water in your aquarium doesn't appear particularly cloudy or dirty.

Check the water parameters in your aquarium on a weekly basis. Once you've finished setting up your aquarium, your primary responsibility will be keeping the various chemical compounds found in the water at safe concentrations. For this, it's recommended that you invest in a quality reef aquarium test kit. One of these will include everything you need to keep the levels of substances like ammonia, nitrates, nitrites, acids, phosphates, and calcium in check. Reef aquariums are sensitive micro-ecosystems. Too much (or too little) of any of these substances could endanger the organisms you've worked so hard to prepare your aquarium for.


Comments
0 comment