views
Downloading and Installing TeamSpeak

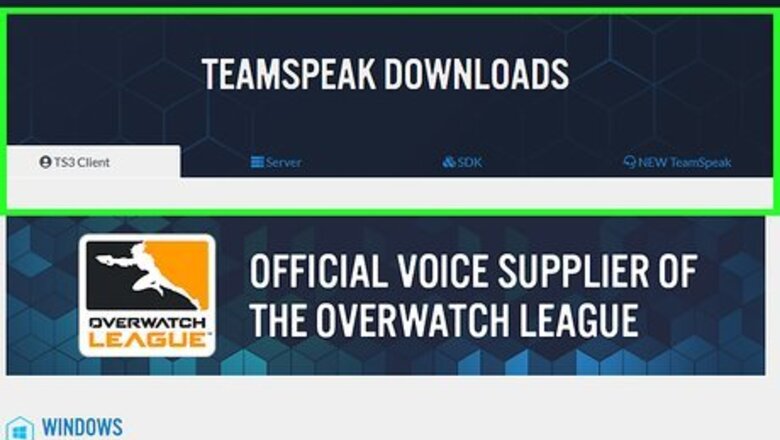
Go to https://www.teamspeak.com/en/downloads/ in a web browser. You can use this web site to download the TeamSpeak installer for any operating system you are using.
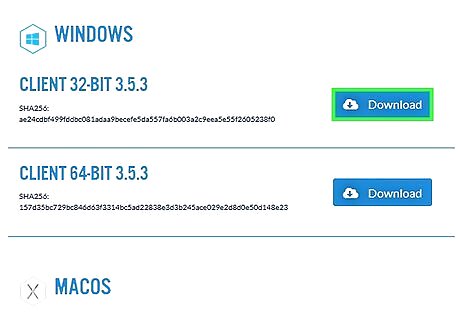
Click Download next to the operating system you use. If you are using Windows, click Download next to "Client 64-bit" or "Client 32-bit" below the "Windows" header, depending on what version of Windows you use. If you are using Mac, click the Download next to the MacOS client. There is also a version of TeamSpeak available for 32-bit and 64-bit versions of Linux. You can download the mobile version of TeamSpeak for $0.99 from the Google Play Store on Android, or the App Store on iPhone and iPad. If you are using a 64-bit version of Windows, download the 64-bit client for best performance.
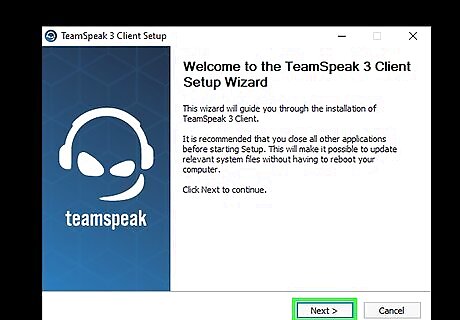
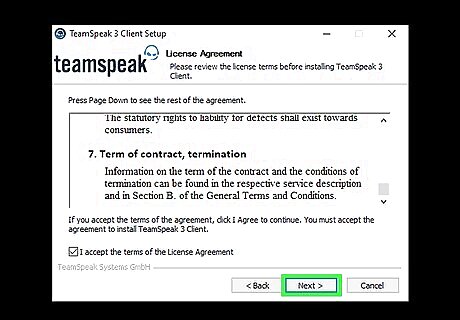
Install TeamSpeak for Windows. Use the following steps to install TeamSpeak for a Windows PC: Click TeamSpeak3-Client-win64-3.5.3.exe in your web browser or Downloads folder. Click Next. Scroll to the bottom of the License agreement. Click the checkbox next to "I agree to the terms of the License Agreement". Select "Install for anyone on this computer" or "Install just for me" and click Next. Click Browse to select an install location (optional). Click Next. Click Next. Click Install. Click Finish
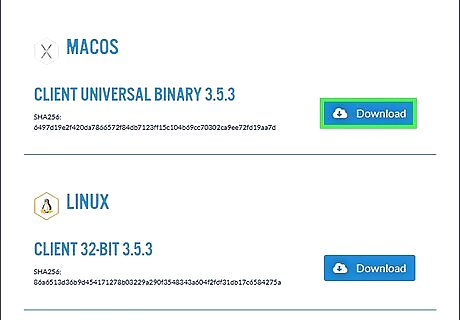
Install TeamSpeak for Mac: If you are using a Mac, use the following steps to download and install TeamSpeak: Click TeamSpeak3-Client-macosx-3.5.3.dmg in your web browser or Downloads folder. Click Agree to agree to the terms in the License agreement. Drag the TeamSpeak 3 Client icon to the Applications folder.
Configuring TeamSpeak

Launch the TeamSpeak client. After the installation is complete, launch TeamSpeak for the first time. It has a blue icon that resembles a person wearing a headset and microphone. Click the icon in the Windows Start menu, or Applications folder on Mac to launch TeamSpeak. Before you connect to a server, you will need to configure TeamSpeak to get the optimal quality from your headphones and speakers.
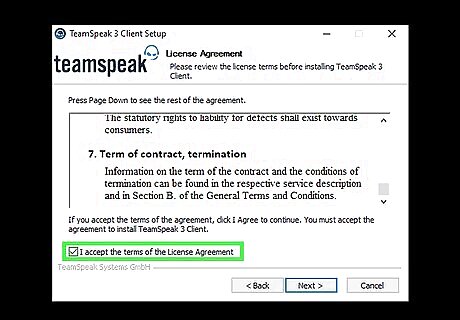
Scroll to the bottom of the License Agreement and click I accept. The I accept button is in the lower-right corner of the install wizard. You must scroll to the bottom of the License agreement before you can click this button.
Click Continue. It's at the bottom of the my TeamSpeak introduction window.
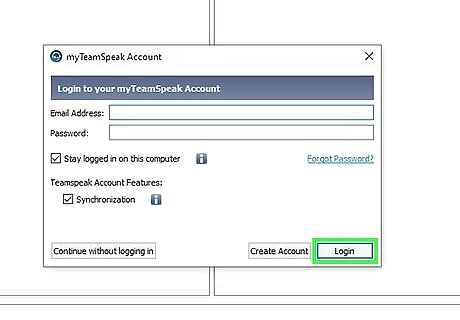
Login or create an account. If you already have a TeamSpeak account, enter the email address and password associated with your TeamSpeak account and click Login in the lower-right corner. If you do not have an account, use the following steps to create an account. Click Create account in the lower-right corner. Enter a valid email address in the top line. Enter your desired password. Enter your desired password again. Enter your desired username. Click Create. Check your email and open the verification email. Click the link in the email. Enter your email address and password to log in. Click Login on the TeamSpeak client. Enter your email and password and click Login
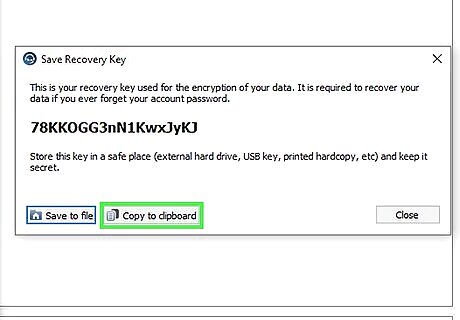
Save the recovery key. The first time you open TeamSpeak, it asks you to save a recovery key that you can use if you forget your password. It is recommended that you store the recovery key on a USB flash drive and keep it in a safe location. Click Save to file if you to save the recovery key as a text tile. Click Copy to clipboard to copy the recovery key and paste it to a separate file.
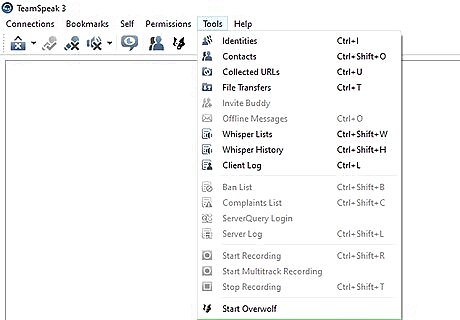
Open the Options menu. The options menu allows you to set up your hotkeys, microphone activation and sensitivity settings, and more. Use the followings steps to open the options menu. Click Tools in the menu bar. Click Options.
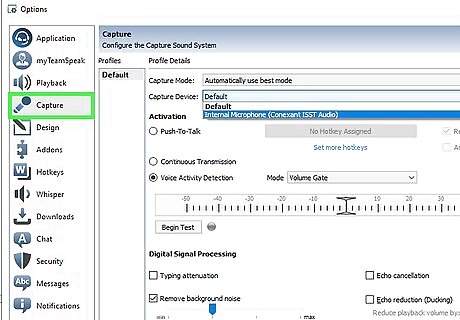
Click Capture. This allows you to set up your Microphone settings. It's in the panel to the left of the Options menu.
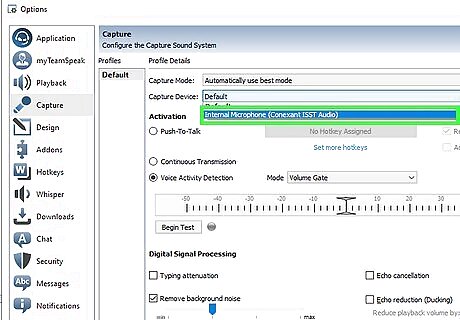
Choose your microphone activation settings and click Apply. There are three different ways to activate your microphone so that you can talk: Voice Activity Detection (VAD), Push-to-Talk (PTT), and Continuous Transmission (CT). VAD automatically activates your microphone when it detects sound. PTT requires you to set a hotkey which will activate the microphone while it is being held down. Continuous transmission means your mic is always on. Most TeamSpeak servers prefer that people use PTT to prevent accidental broadcast of background noise. Use one of the following steps to set your microphone activation settings: Push-to-Talk (PTT): Click the radio option next to Push to talk. Then click the button that says No hotkey assigned. Press the keyboard key you want to use to activate your microphone. Voice Activity Detection (VAD): Click the radio option next to "Voice Activity Detection". Then use the drop-down menu to select the mode. If you select "Volume Gate" or "Hybrid", use the slider bar to select what decibel level you want to activate the microphone. Click Begin Test to test your settings. Note: If you are getting an echo or feedback, click the checkbox next to "echo cancelation" and/or "echo reduction".
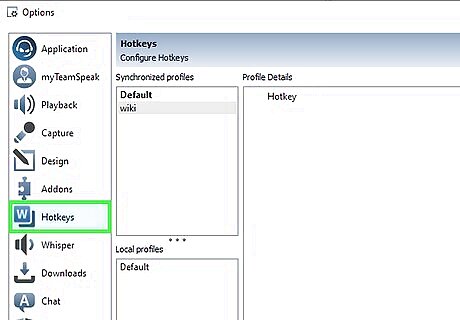
Create hotkeys. Hotkeys assign functions to keyboard keys. If you use VAD, it's recommended you assign a hot key to mute your microphone incase it gets too loud, or you need to mute something you don't want others in the server to hear. Use the following steps to assign hotkeys: Click Hotkeys to the left in the Options menu. Click + Add at the bottom of the menu. Click > next to function category (i.g "Microphone") to expand the options. Click a function (i.g. "Toggle Microphone Mute") to select it. Click No hotkey assigned at the top. Press the keyboard key you want to assign the function to. Click Ok.
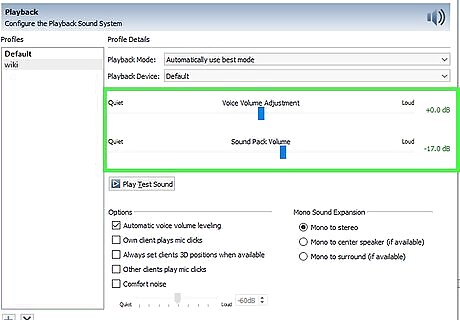
Adjust the sound volume. Use the following steps to adjust the sound settings: Click Playback in the Options menu. Use the slider bar below "Voice Volume Adjustment" to adjust the voice sound. Use the slider bar below "Sound Pack Volume" to adjust the sound of the sound packs. Click Apply Click Ok.
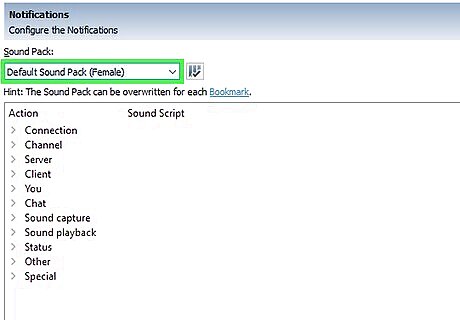
Choose the sound pack. TeamSpeak will say when users join or leave the channel, as well as notify you when you have been "poked". You can choose between a male or female voice for the notifications. You can hear the example for each notification by pressing the Play button. Use the following steps to select a sound pack: Click Self in the menu bar at the top. Click Sound packs. Click Default sound pack (male) or Default sound pack (female).
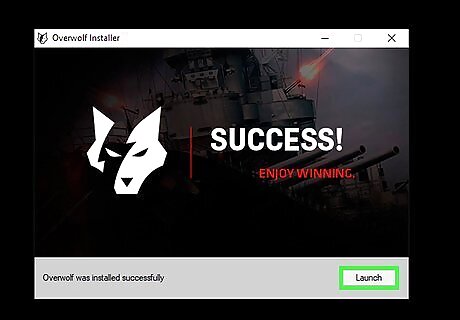
Download and install the Overwolf overlay (optional). This Overlay allows you to access the TeamSpeak interface on top of your current program, which can allow you to see who is speaking. This is particularly useful in large groups. Volume Control will automatically lower the volume of your game while a teammate is speaking, which can be useful for loud games or music players. Use the followings steps to download and install the Overwolf overlay: Click Tools. Click Install Overwolf Overlay. Click Download. Open the install file in your web browser or Downloads folder. Agree to the terms in the license agreement. Follow the instructions to complete the installation.
Settings up a Teamspeak Server
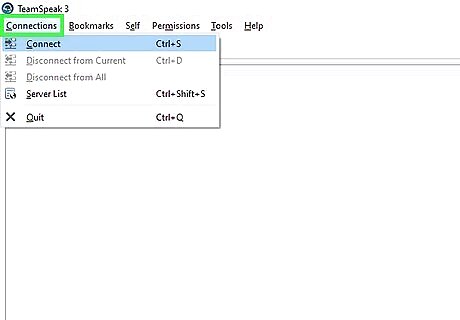
Click Connections. It's the first menu in the menu bar at the top of TeamSpeak.
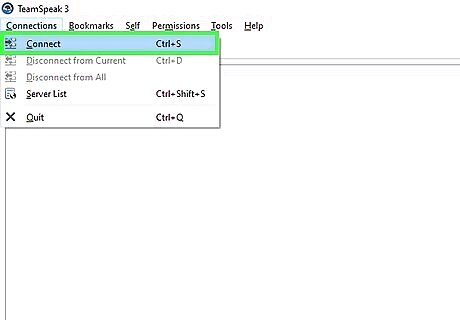
Click Connect. This opens the Connect window. This window will allow you to enter in the server information. Alternatively, you can press You can also press "Ctrl + S" to quickly open the window.
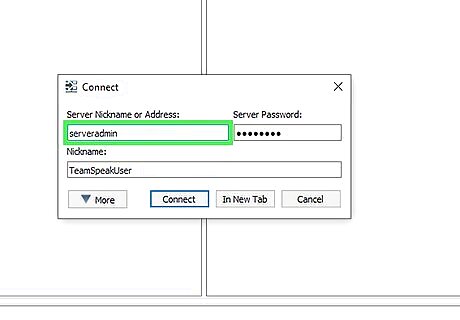
Enter in the required information. You will need to enter the channel address, which may be a name or it may be an IP address. Make sure to include the port of the server, denoted by a ":" followed by the port number. If the server requires a password, you will need to enter it into the "Server Password" field. The nickname displayed will be your requested nickname. If that name is already taken by someone in the server, your name will be altered.
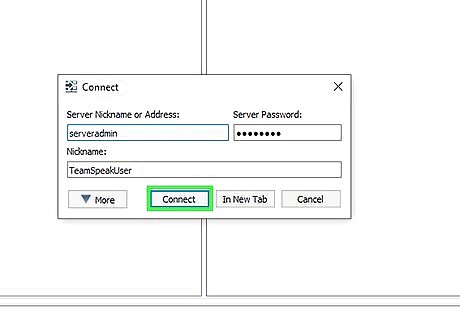
Click the Connect button. TeamSpeak will attempt to connect to the server, and you will see the main window start to fill with information. You can check the status of the connection in the status frame at the bottom of the window.
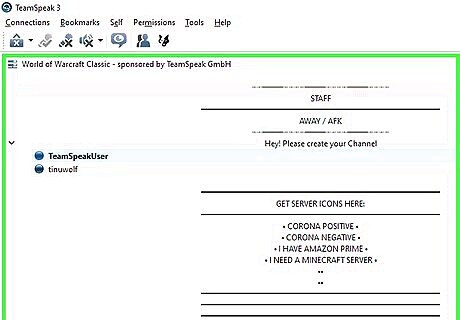
Navigate the server. On the left side of the window, you will see a list of channels on the server. Channels can be password protected, and you may need to be granted access by an admin. A list of users will be displayed beneath each channel. Most larger gaming groups will have the server broken into channels for different games that the group plays, along with an Senior-only section if the group is particularly large. Server setups will vary wildly from group to group.
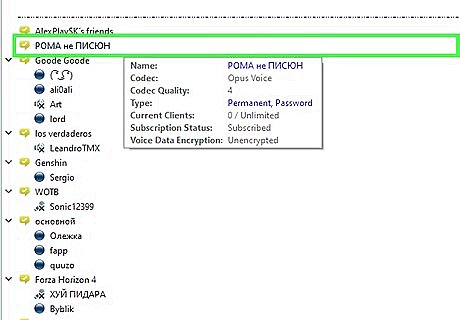
Double-click on a channel to join it. You will only be able to talk with users in the same channel as you.
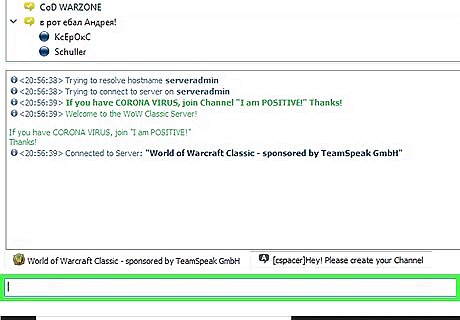
Text chat with other users. Besides being able to voice chat, there is a basic text chat for each channel. This can be accessed by clicking on the tab at the bottom of the window. Avoid putting important, time-sensitive information or commands in the text chat, as many players will not see it in-game.
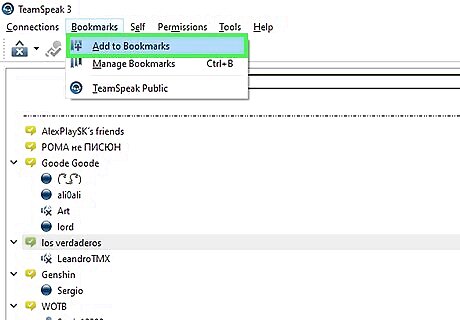
Bookmark frequently used servers. If you plan on connecting to the server you are using on a frequent basis, you can make connecting much easier by bookmarking it. This will allow you to connect in the future with a single click. If you are currently connected to a server, use the following steps to bookmark it: click Bookmarks. Click Add to Bookmarks. to add the current server to your bookmark list. Click Ok.
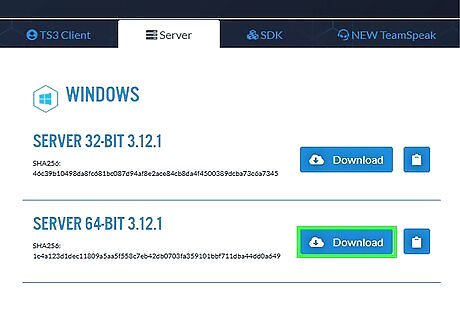
Download the server client. The TeamSpeak server client is free to anyone using it for non-profit use, such as gaming groups. You can run the server client on your own machine or hosted server for up to 32 people, or you can run it on a dedicated hosted server for up to 512 people. If you need a server larger than this, you will need to rent one from TeamSpeak. Use the following steps to download the TeamSpeak server client: Go to https://www.teamspeak.com/en/downloads/#server in a web browser. Click Download next to your operating system.
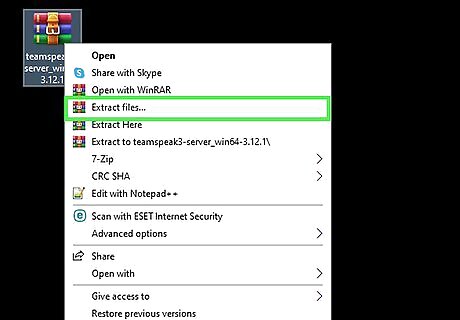
Extract the zip file. The file that you downloaded is an archive that contains multiple files. Extract the archive so that you can use the files contained within. Extract it somewhere that is easy to access, such as your desktop.
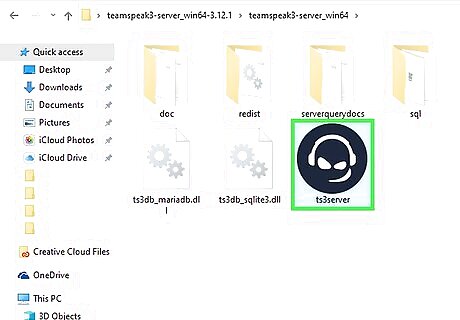
Start the server client. Run the application in the extracted folder. You will see several files and folders get created, and then a window will appear with several important pieces of information. You will see your server admin username, password, and privilege key. Use the following steps to start the server client. Click the ts3server application in the extracted folder to start the server. Click Accept to accept the license terms. Click the icon that resembles two sheets of paper to Copy the different values. Paste each value to a blank Notepad document.
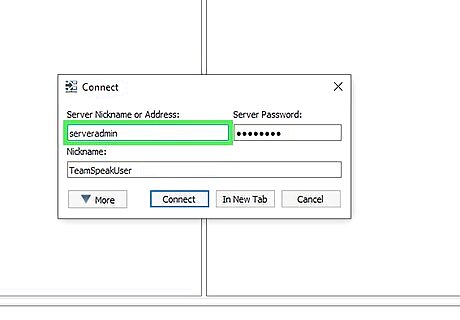
Connect to the server. Open up your TeamSpeak client. Then use the following steps to connect to the server. Click Connections Click Connect Enter localhost into the address bar. Change your nickname to whatever you'd like. Make sure the server password field is empty. Click the Connect button.
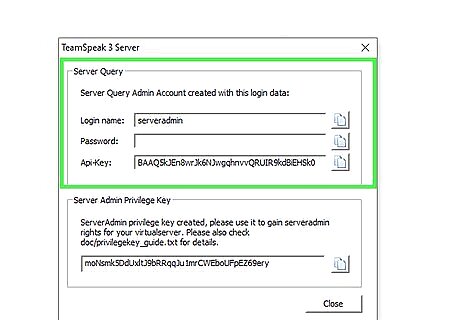
Claim server admin rights. When you first connect to your server, you will be prompted for the privilege key that you copied into Notepad. Copy and paste the privilege key and click Ok. This will allow you to change the configuration of the server and grant permissions to other users. After entering the key, a server administrator icon will appear next to your name on the users list.
Customizing Your Server
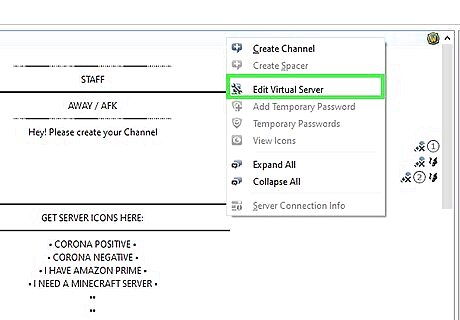
Configure your server. You have a variety of options to help make your server feel more like "yours". Use the following steps to configure your server: Right-click on the server name at the top of the channel list. Select Edit Virtual Server from the menu that appears. Enter in the name for your server in the "Server Name" field. Set a password for your server in the "Password" field. Write a short message In the Welcome Message field.

Add customizations. While you are still in the "Manage Virtual Server" menu, use the following steps to add customizations to your server. Click the More in the lower-left corner of the "Manage Virtual Server" window. The Host tab, you can set a banner image for your server that all of your users will see. You can also create a Host button that will appear in the upper-right corner. Many servers use this button to direct users to the team's website. The Integration tab allows you to link your Twitch account to your server. The Transfer tab allows you to set limits on downloads and uploads. The Anti-flood tab allows you to set policies that limit the number of posts people can posts to prevent bots from flooding your server. The Security tab allows you to select a security level for your server. The details of each level are listed in the tab.
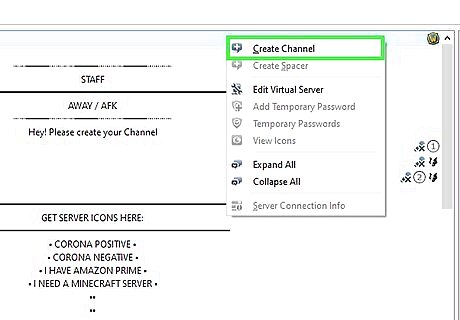
Create new channels. If your group has a variety of interests, you may want to create multiple channels to help keep people on topic for the game at hand. For example, if your group primarily plays two games, you can create a channel for each game, as well as a general "lounge" channel. When people are playing, they can move to the appropriate channel, and when they're relaxing between games, they can use the lounge and not bother people who are playing. You can even create sub-channels within channels. Use the following steps to create channels for your server: Right-click on the server name in the channel Click Create Channel. Enter channel name in the "Name" field. Enter a description for the channel in the "Description" box. Enter a password in the "Password" field. Set the channel type (i.g. Temporary, Permanent, Semi-permanent) below "Channel Type".
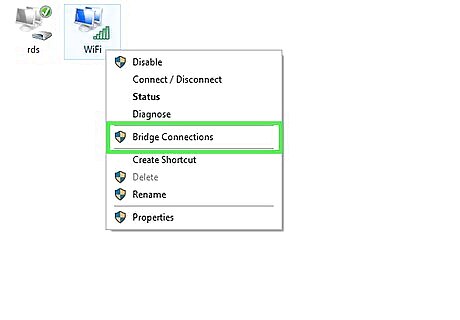
Open ports. While most clients should be able to connect to your server, opening a few ports can make sure the most people possible can connect without issue. Access your router settings, and open the following ports: UDP 9987 & TCP 30033. UDP 9987 helps allow incoming connections, while TCP 30033 allows for easier file transferring between users.
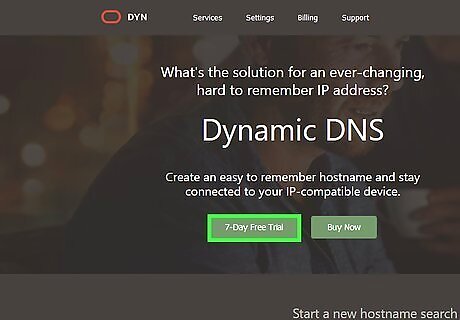
Set up dynamic DNS. You can give your teammates your server's IP address so that they can connect, but this IP address is liable to change sometime in the future. It's also not very easy to remember. You can use services such as DynDNS to assign a hostname to your IP address, which will automatically forward people even when your IP address changes.


Comments
0 comment