
X
Expert Source
Jesse KuhlmanMaster Electrician, Kuhlman Electric
Expert Interview. 29 April 2020.
In this article, we’ll show you how to install GFCI receptacles.
- Disconnect the fuse for the outlet you’re replacing before you work on the outlet.
- Remove the faceplate, unscrew the outlet, and disconnect the wires connecting the old outlet to the electrical.
- Use the LINE terminals on the GFCI to connect the hot and cold wires. Connect the green wire to the grounding nut at the bottom.
Prep, Safety, & Setup
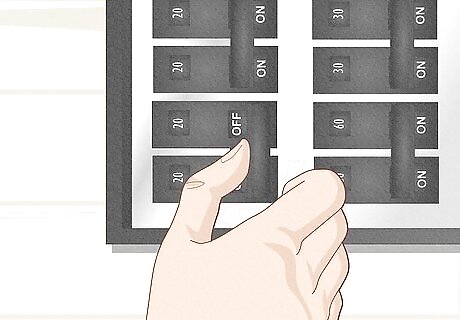
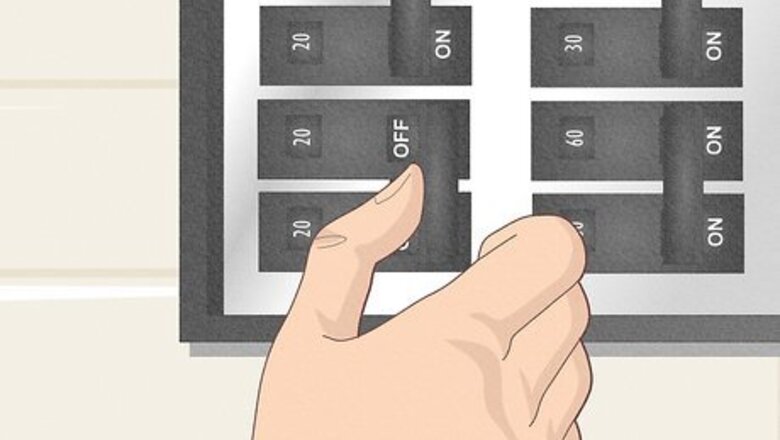
Turn off the power to the outlet at the circuit breaker. Locate the fuse box for the home. Then, flip the circuit breaker for the room or area where you’re installing the GFCI receptacle. If the circuits aren’t labeled, just turn the main power off. Alternatively, you can plug a lamp into the outlet and start turning the breakers off one by one. Eventually, you’ll find the fuse for the outlet. When you do, label it.
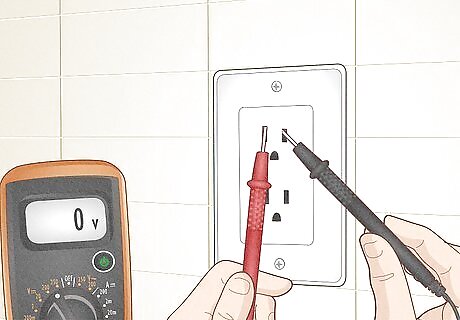
Confirm the power is off using a multimeter. Grab a multimeter and turn it on. Set it to “voltage” and insert the probes into the outlet you’re replacing. If you don’t get a reading, the power is cut to the outlet and you’re free to work. If you don’t have a multimeter, try plugging a few things into the outlet and testing them to see if they turn on. If nothing happens, you’re good to go.
Removing the Old Outlet
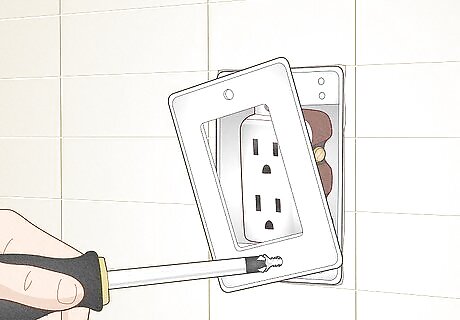
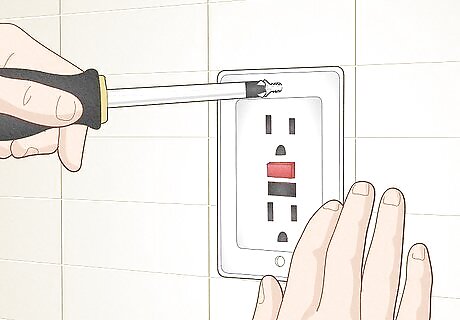
Unscrew the cover plate on the receptacle. Grab a flathead or Phillips screwdriver and unscrew the fastener in the middle of the faceplate. Set the face plate and screw aside somewhere where you won’t lose it. If you don’t see any screws (probably because you’ve got a fancy faceplate), use a flathead screwdriver or putty knife to pry a corner of the plate up. Then, use some gentle force to pop the cover out.
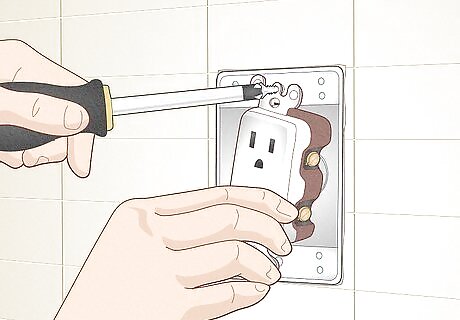
Remove the screws holding the outlet in the box. With the faceplate gone, look at the top and the bottom of the outlet to see how it’s secured to the outlet box. Grab a flathead or Phillips screwdriver depending on the fastener and remove those screws to free the actual outlet plugs. Set those screws aside somewhere where you won’t lose them.
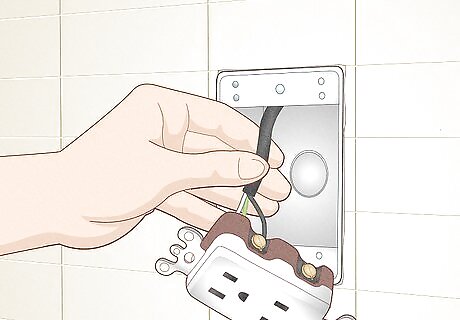
Pull out the old receptacle gently to inspect the wires. Use a light-to-moderate amount of force to pull out the outlet and all of the wires connecting it to the home’s grid. The wires might be a bit of a rat nest depending on how long they’ve been back there, so take your time and spread everything apart. Take a photo of how the wires are connected just in case you need to see how the cables in the wall used to be connected to the old outlet. Warning: Do not install a GFCI outlet if you have more than 4 wires in the outlet box or if you do not see a green or bare copper grounding wire. Some receptacles are configured to be switched and there may be extra wires in the box for that function. If the receptacle is intended to be “half-switched,” meaning one outlet is switched and the other is not, you cannot use an ordinary GFCI receptacle in that location. Contact a qualified electrician to complete the work if you have identified more than 4 loose wires (not counting grounding wires) or more than 2 cables, or for switched receptacles.
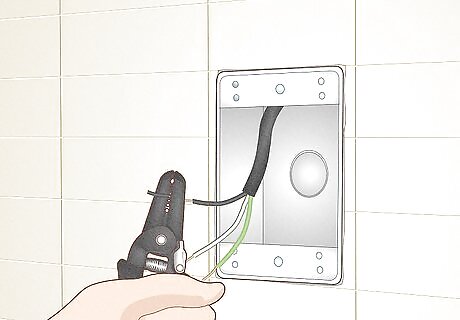
Disconnect the wires and toss the old outlet. Depending on how the old electrician installed the outlet, there are three potential ways your wires are connected. The removal process is slightly different for all three: If the wires are connected with wire nuts: By hand, unscrew the wire nuts by twisting them counterclockwise. Once each nut is off, separate the wire connections by hand. If a screw is holding the wires against the outlet: Unscrew each of the fasteners on the outlet with a screwdriver. Once the wires are free, pull each wire out. If the wires feed directly into the outlet: Use a wire stripper to cut each wire and free the outlet. Then, strip the last 1 in (2.5 cm) of each wire to expose the copper ends.
Installing the GFCI
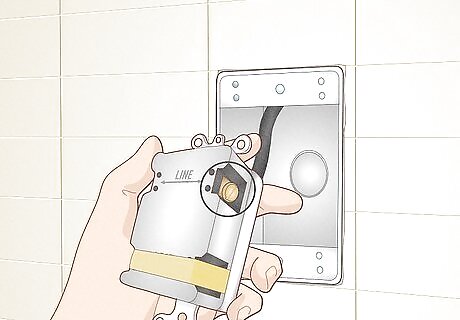
Identify the “LOAD” and “LINE” sections on the back. Every GFCI outlet has 4 terminals for wires. Two of these terminals sit on either side of the “LINE” indicator at the bottom, and two of them sit on either side of the “LOAD” indicator at the top. There is also a green screw at the bottom for the grounding wire. LINE is for wires that feed electricity from the main circuit board to the outlet. There may be a sticker over each of the LOAD terminals. LOAD is for wires that move an electrical current to another device on a chain.
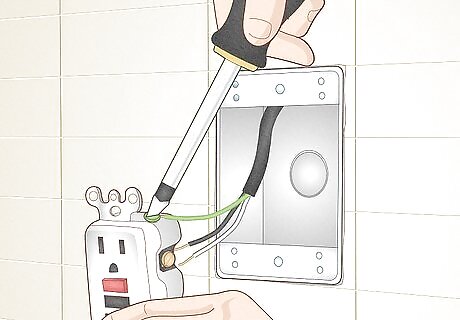
Attach the bare or green wire to the green grounding screw. Use needle-nose pliers if you can’t attach the wire by hand. Wrap the tip of the grounding wire around the grounding screw and tighten the screw with a screwdriver. Many electricians wrap the receptacle with a layer of insulating electrician's tape to protect the terminals from accidental contact with metal objects.
Connect the hot (black or red) wire to one of the LINE terminals. Remove the sticker if it’s still on. Insert the copper end of the wire into one of the terminal openings on the LINE level (it doesn’t matter if it’s left or right. If there are wires coming out of the outlet, use a wire nut to screw the outlet wire to the wire in the wall. If there is a screw, wrap the copper around the screw and tighten it with a screwdriver. Variation: If your GFCI receptacle has color-coded screws or labeled openings, use them. Install the black or red cable to the black or red screw/terminal. If there are two sets of wires: If there are two sets of wires, use the black or red wire that has a green grounding wire with it. The other set of wires is for daisy-chaining outlets together.
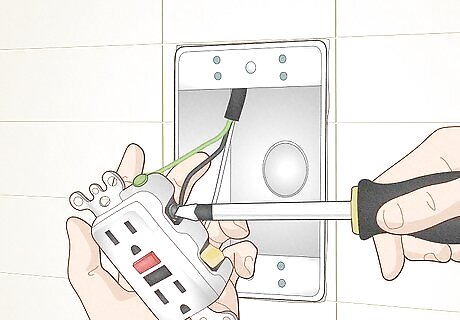
Install the neutral (white or yellow) wire to the other LINE terminal. Remove the sticker on the other remaining LINE terminal. Then, connect the neutral wire in the wall to the remaining LINE terminal the exact same way you connected the positive wire. Variation: If the receptacle is color-coded or labeled, use the white or yellow screw/wire. If there are two sets of wires: Use the neutral wire that is connected to the green and black wire you already used. If you want to daisy-chain outlets: If you are going to continue the chain, connect the second set of wires to the LOAD terminals. In your next GFCI installation, use the wires from the LOAD lines here as the LINE wires in the next outlet.
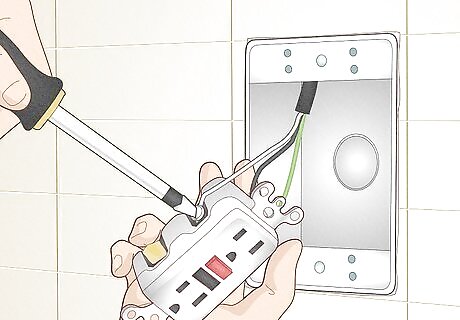
Tuck the wires into the box and screw it in place. Gently and carefully coil the connected wires and any wire nuts back inside the electrical box in the wall. Take extra care to avoid letting any of the nuts or wires touch.
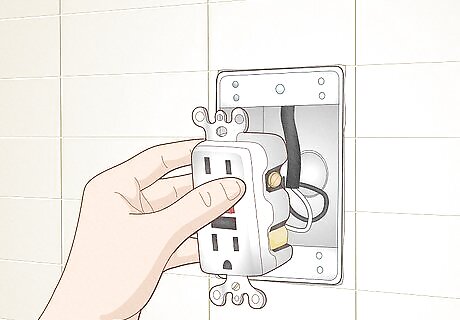
Attach the outlet to the box and put the faceplate back. Use the screws you removed from the outlet you took out to reattach the GFCI receptacle to the outlet box. Then, grab the old faceplate and reinstall it the same way you removed it.
Testing the GFCI
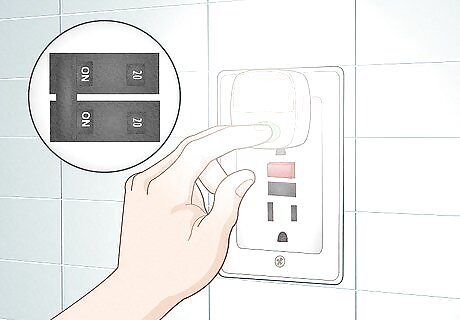
Turn on the power at the main panel and test the outlet. Plug in a lamp or night light into the outlet and switch it on. If you have a multimeter, insert the prongs into the outlet to see if you get a reading. If nothing happens, press “Reset” on the GFCI if necessary to make the light come on. If the device does not light up, turn the fuse box off again and check all of your terminal connections. The odds are high that one of the wires isn’t inserted correctly into the terminals.
Press the “Test” button on the GFCI to make the light turn off. The “Reset” button should also pop out. Press the “Reset” button again to restore the power to the device.

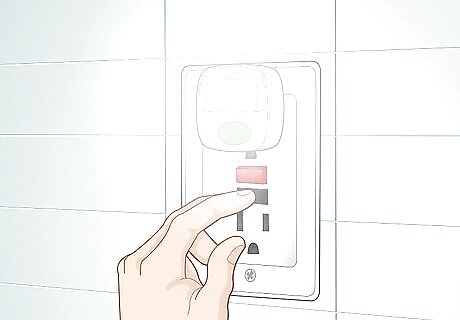
Test the lights in the surrounding outlets if you daisy-chained them. If you used the LOAD terminals to connect multiple outlets, test all of them in the order you connected them. This way, if you have a failure you can identify the problem immediately. Confirm the “Test” and “Reset” buttons work on each GFCI. If you intend to replace a lot of outlets, get an outlet polarity and GFCI tester. It plugs into an outlet directly and lights pop on to confirm the amperage is flowing correctly. Note that a GFCI tester plugged into a receptacle without a properly attached grounding wire will not trip the GFCI because the tester is designed to "leak" a test current to the ground. If you cannot get an outlet to work properly, contact a licensed electrician to have them inspect your work and fix any mistakes.


Comments
0 comment