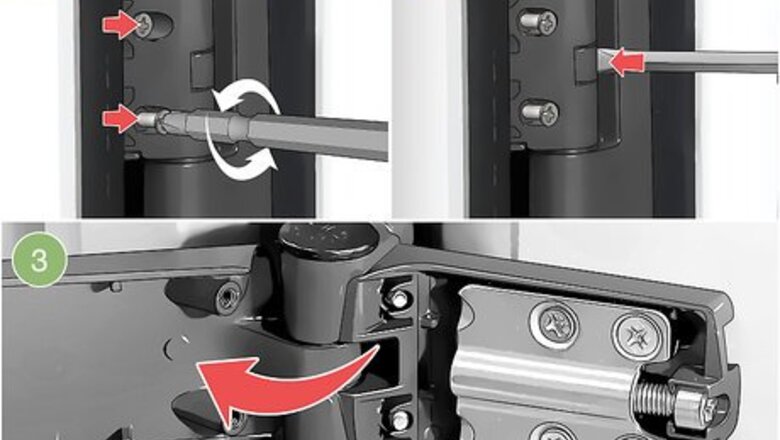
views
- Use an Allen Wrench to turn the adjustment slots clockwise or counterclockwise, as needed, ensuring that you adjust all the door hinges similarly.
- Fix a crooked door by turning the adjustment slot(s) on the top hinge clockwise 1-2 full rotations with an Allen wrench. Remember to check the door to see if it still drags.
- Fine-tune the slack plate by using a screwdriver to loosen the screws until the strike plate is free to move slightly. Then, nudge the strike plate forward or back as needed.
Making Horizontal, Vertical, or Depth Adjustments
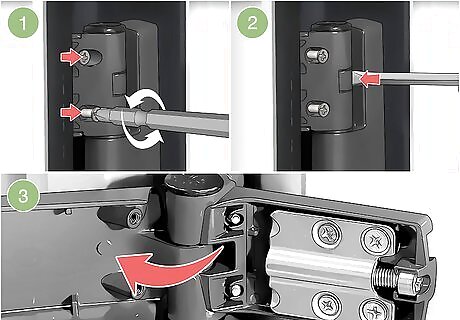
Access the adjustment slot or slots in each hinge. Refer to your owner’s manual to determine if your uPVC door has 1 or more adjustment slots, which are usually hexagonal in shape, in its hinges. If it does, you may need to lift off a protective cap on each hinge to expose the adjustment slots. The adjustment slots allow you to slightly alter the door's horizontal location, vertical location, and depth within the door frame. Some door models have 1 slot per hinge to make all 3 adjustments at once, while other models have 2 or 3 slots per hinge so you can make the adjustments separately. With some door models, you may need to first open the door and slightly loosen the screws that hold the each hinge to the door frame in order to remove the adjustment slot caps. If your door doesn't have adjustment slots in the hinges, contact the manufacturer for guidance on adjusting the door.
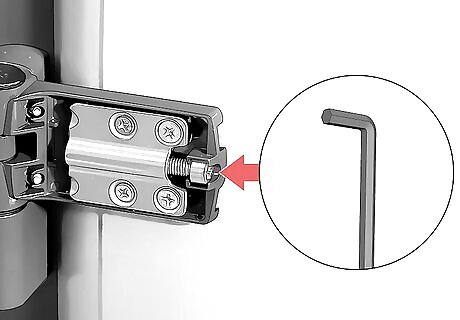
Choose an Allen wrench that properly fits the adjustment slots. Most models of uPVC doors use Allen wrenches for adjustments, which are also known as hex keys due to their hexagonal shape. Use the Allen wrench that came with your door, or buy a set of Allen wrenches of different sizes at your local hardware store. Make sure the head of your chosen wrench fits snugly into the slot. Allen wrenches commonly come with furniture that requires assembly, so you may already have a collection of them in your junk drawer!
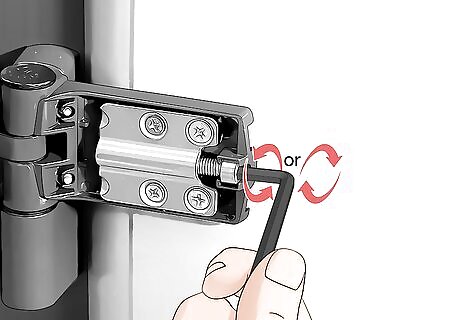
Turn the Allen wrench clockwise or counterclockwise, as needed. Depending on the adjustments that you need to make to the door, you’ll either have to turn your wrench clockwise or counterclockwise. Start by making 1-2 full rotations, and keep track of how many rotations you make. Unless your door has only 1 adjustment slot per hinge (to control all adjustments), refer to your user's manual or contact the manufacturer to determine which slot controls which adjustment (horizontal, vertical, depth). To adjust the door horizontally, turn clockwise to move the door closer to the latch side, and counterclockwise to move it closer to the hinge side. To adjust the door vertically, turn clockwise to raise the door and counterclockwise to lower the door. To adjust the door’s depth, turn clockwise to move it deeper into the door frame, and turn it counterclockwise to move it slightly out from the door frame.
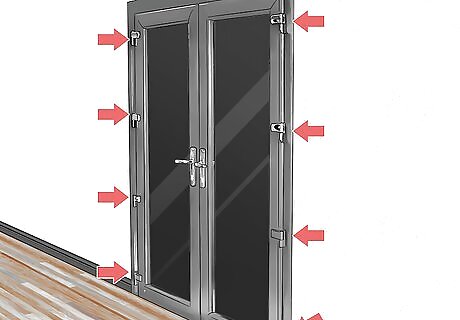
Adjust all the door hinges in the same manner. For example, if you need to raise the door slightly in the frame, rotate the vertical slot on every door hinge clockwise 1 full turn. Or, if you need to slide the door towards the hinge side of the frame, rotate the horizontal slot on every door hinge counterclockwise 1 full turn. Making the same adjustments on all hinges maintains equal pressure on all of them. This will improve the longevity and performance of your door. Most uPVC doors have either 3 or 4 hinges. Start with only 1 or 2 full turns, then make additional adjustments as needed.
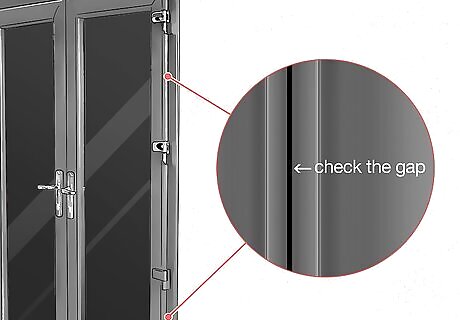
Check the door and adjust it further if necessary. Take a look to see if the gap between the door and the frame is even all around. Then, open and close the door and see if it moves freely and latches securely. If so, re-cap the adjustment slots, if your model has such caps, to complete the job. If the door still needs raised vertically, for example, turn the vertical adjustment slots on all hinges another 1 full clockwise rotation. Check again, and make ½ turn adjustments as needed after that. If your door is out of square—that is, it rests crooked within the frame—you may need to further adjust the hinges by differing amounts. Use a trial-and-error process until the gap between the door and frame is even all around.
Tweaking a Crooked Door That Drags on the Floor
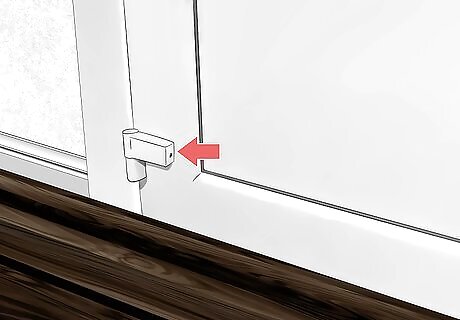
Locate the adjustment slots on the front side of the hinges. Nearly all types of uPVC doors allow you to make minor adjustments to the door’s positioning via slots on the hinges. With the door closed, check the exposed part of the hinges for small, hexagonal slots. If there aren't any slots, contact the manufacturer for guidance on making adjustments. With some door models, the adjustment slot or slots may be covered by a cap or cover that lifts off. Check your owner’s manual for directions on removing this cap or cover. Your door may have 1, 2, or 3 slots per hinge in order to make vertical, horizontal, and depth adjustments. The number of slots and their location on the hinges vary by manufacturer, so refer to your owner's manual to figure out which slot or slots to adjust. This method of adjustment works best if the bottom of the door on the latch side drags on the floor when you open it, while the hinge side stays clear of the floor.
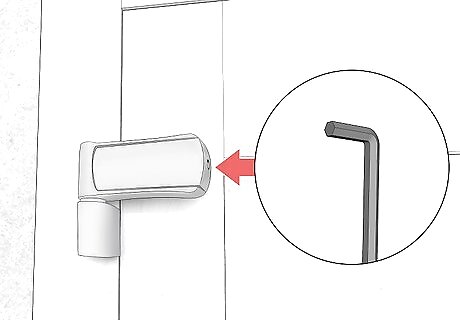
Find an Allen wrench that fits snugly into the adjustment slots. An Allen wrench is also known as a hex wrench because its head has a hexagonal shape. If you have the wrench that came with your door, use it. Otherwise, find one that slides fully but securely into the slot. If you’ve ever put together furniture from Ikea or a similar retailer, you probably have a collection of Allen wrenches lying around somewhere. Otherwise, you can buy an Allen wrench set at any home improvement store. Most uPVC door models have hexagonal shaped adjustment slots, but some may require the use of a Phillips/cross head screwdriver instead.
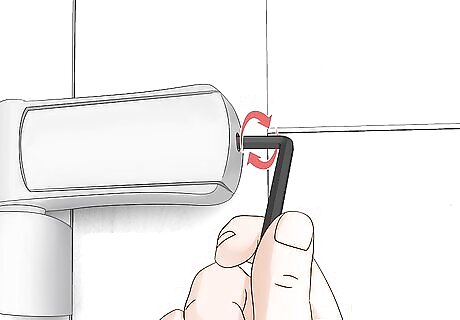
Turn the slot(s) on the top hinge clockwise 1-2 full rotations. If each hinge on your model has only 1 slot for both vertical and horizontal adjustments, insert your Allen wrench and turn it in 1 or 2 full clockwise circles. If each hinge has 2 or 3 slots, adjust both the horizontal and vertical adjustment slots on the top hinge by the same amount. Clockwise turns pull the door in toward the hinge side, up from the floor, or both. Start by making only 1 or 2 full rotations of the Allen wrench. You can make further adjustments later if necessary. Make your adjustments while the door is closed and latched.
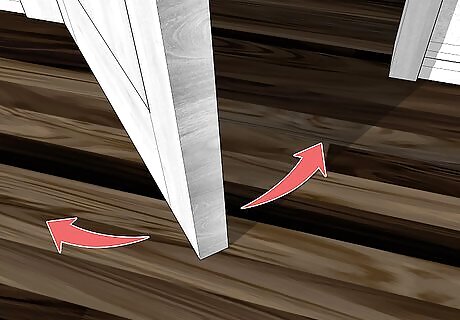
Check how the door opens and closes, and see if it drags. If the bottom of the door on the hinge side still drags on the floor when you open it, adjust the top hinge’s slot(s) another 1 full turn and try again. If the door is off the floor but it “sticks” a little in the frame when you open or close it, try adjusting the slots on the other hinges slightly. For instance, say your door has 4 hinges, you adjusted the top hinge’s slot(s) 1 full clockwise turn, and the door no longer drags but sticks in the frame a little. Try turning the second hinge’s slot(s) ¾ of a turn, the third hinge’s slot(s) ½ of a turn, and the bottom hinge’s slots ¼ of a turn. Keep making minor adjustments until the door opens and closes smoothly, without dragging on the floor.
Fine-Tuning the Strike Plate to Improve Latching
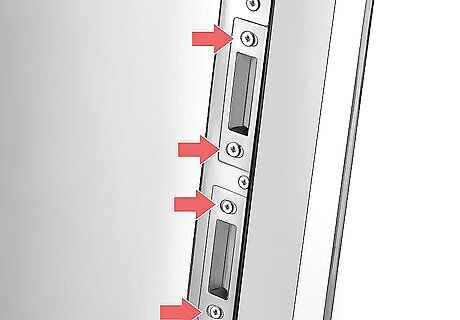
Find the heads of the 2 screws that secure the strike plate. With any uPVC door, the strike plate is on the latch side of the door jamb, is made of steel or another sturdy metal, and has 1 or more openings that accept the door’s latch and any deadbolt lock. The strike plate is nearly always secured in place by 2 screws, one at the top, one at the bottom. Open the door so you can find and access the strike plate on the jamb. For some doors, there may be 2 strike plates—one for the door latch, and one for the deadbolt. In this case, adjust both plates in the same manner.
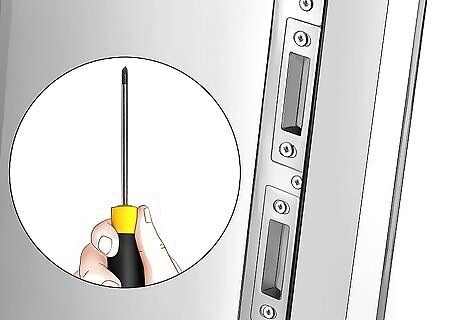
Grab a screwdriver or Allen wrench that matches the screw heads. Most strike plates are held in position with Phillips/cross head screws. Some uPVC doors, however, may use screws with a hexagonal indentation in the screw head. In this case, an Allen wrench, also called a hex wrench, is the proper tool. If your door came with an Allen wrench, use it. Otherwise, rummage through your toolbox for Allen wrenches from prior furniture assembly tasks, or buy an Allen wrench set at a home improvement store. Make sure your screwdriver or Allen wrench fits snugly into the indentations on the heads of the screws.
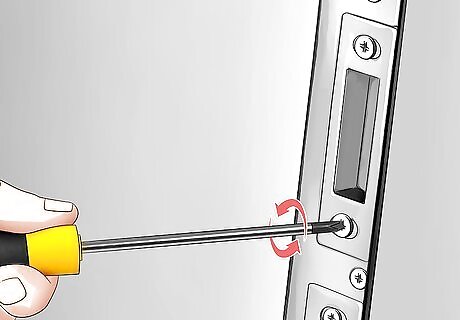
Loosen the screws until the strike plate is free to move slightly. Typically, if you loosen both screws 1-2 full counterclockwise turns with your screwdriver or Allen wrench, the strike plate will be free to adjust. Loosen the screws a bit more if necessary, but don’t remove them completely. Always remember—a clockwise turn tightens a screw, while a counterclockwise turn loosens it.
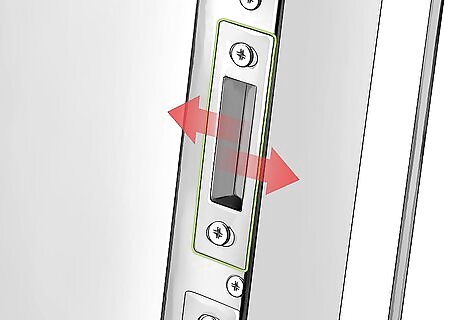
Nudge the strike plate forward or back, depending on your needs. If you can rattle the door when it’s securely latched, slide the strike plate in the direction opposite to the way the door opens about 0.25 cm (0.098 in). If you have to push or pull on the door to get it to latch, slide the strike plate in the direction the door opens in the same fashion. The slots in the strike plate that accept the screws should be oblong shaped, which allows for some minor fine-tuning of the position without completely removing the screws and drilling new holes.
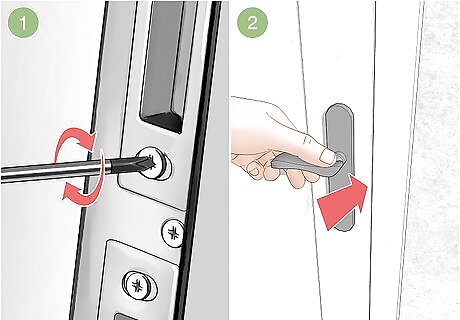
Tighten the screws and test how well the door latches. Turn the screws clockwise until they’re secure but not completely snug. Close the door and see how well it latches. If it needs additional fine-tuning, open the door, loosen the screws, and slide the strike plate further forward or back as needed. When you’re finished, tighten the screws fully. If the door still doesn’t latch properly and you’ve adjusted the strike plate as far as it will go, you can remove the strike plate, drill new screw holes that are just forward or back of (but not overlapping) the old ones, and reinstall the plate in its new location.


Comments
0 comment