
Using Carl Bot
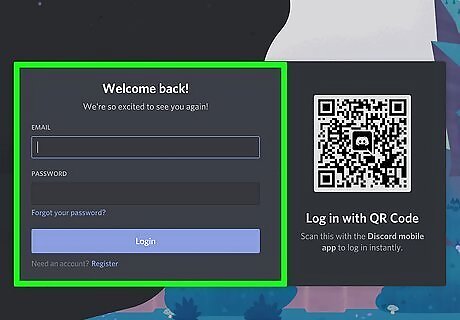
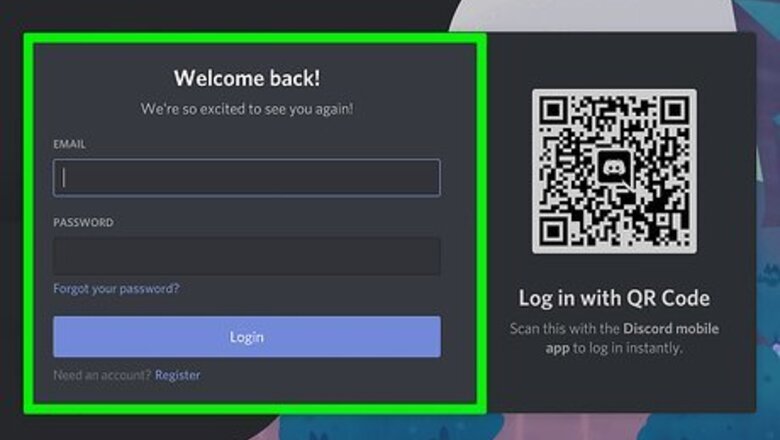
Log in to Discord. You can use the Discord app on your computer or log in at https://www.discord.com/app.
Select the server on which you want to create reaction roles. You must be an owner or have certain administrator permissions to add a bot. If you're an owner, you are all set. Otherwise, you'll need the administrator to assign you the Manager Server permission for the server or give you an owner role.
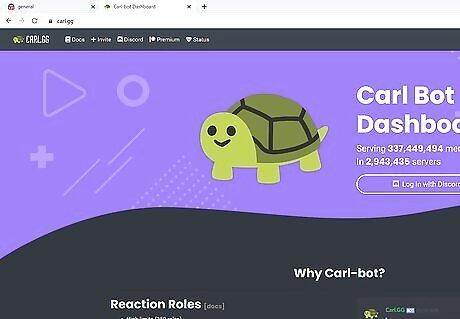
Go to https://carl.gg in a web browser. This takes you to the Carl Bot website.
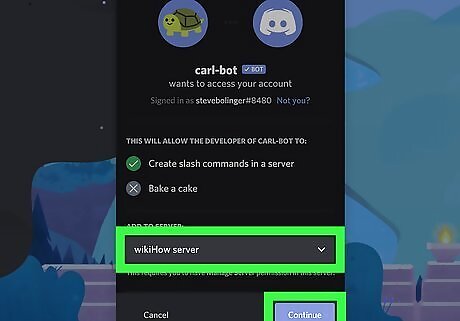
Add Carl Bot to your server. Here's how: Click Invite at the top of the page. Select your server and click Continue. Click Authorize. This gives the bot the permissions it will need for your server. Once authorized, Carl-bot will join your server. Check the box to prove you aren't a robot. When Carl-bot joins your server, you can change the commands to include "\" and anything else you'd like to use instead of the defaults, "?" and "!." You can also change Carl-bot's display name.
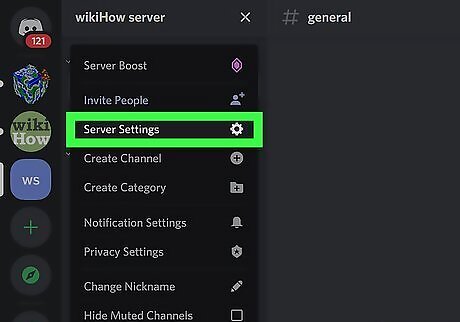
Click the drop-down menu next to the server name and select Server Settings. This is the small triangle at the top of Discord directly to the right of the server's name. Server Settings is near the top of this menu.

Click the Roles tab. It's in the left column.
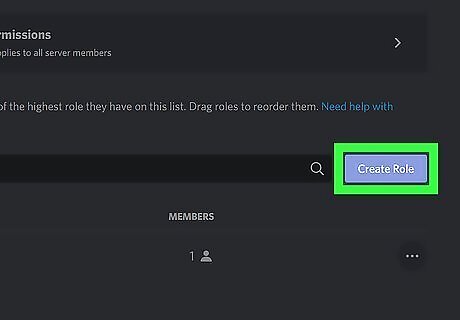
Create the roles that you want others to be able to self-assign. To create a new role, click + Create Role, enter a name for that role, and assign it a color if you'd like. Then, click the Permissions tab to choose which permissions to assign the role, such as whether you'd like to allow members with this role to add reactions, use voice chat, or ban people. Click Save Changes when you're finished. For example, if you wanted to make a role that surrounds the user's name in red, you could create a new role called Red and select a red background.
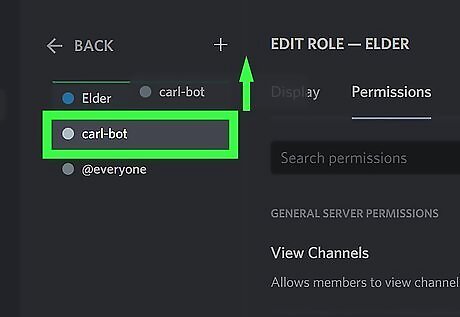
Drag the "carl-bot" role to the top of the list. This role was created when you invited Carl-bot to the server. The position of this role in the list matters—the "carl-bot" role must be above/before the roles it can assign. To drag the role upward, hover the mouse cursor over carl-bot, and then drag it to the top of the list.

Click Save Changes and then close your settings. To close your settings, click the X at the top-right corner.
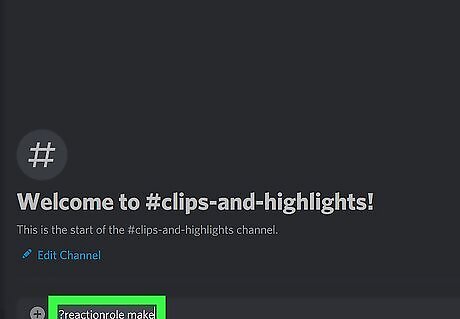
Type ?reactionrole make into any channel and press ↵ Enter or ⏎ Return. It doesn't matter which channel you type this into, as Carl-bot has joined all of them. Carl-bot will respond, asking which channel you want to use.
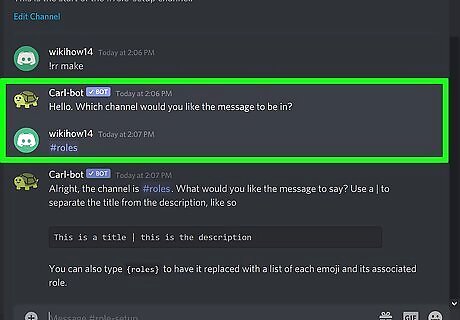
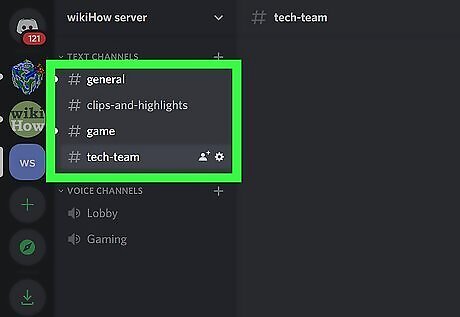
Type the desired chat channel and press ↵ Enter or ⏎ Return. For example, if you want role assignment to happen in #game, you'd type #game.

Create a title and description. Use the format Carl-bot shows in the example: This is a title | this is the description, and press Enter or Return to send it to the channel. For example, if you want to make the title "Roles" and the description of the various emoji you can use to assign each roll, you would type Roles| {roles}.
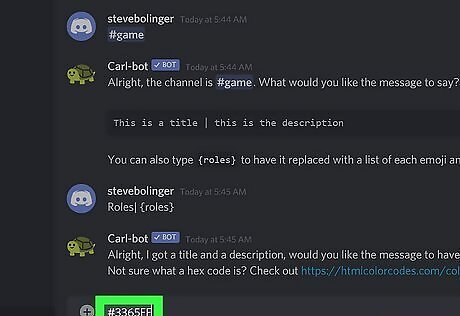
Enter a color hex code and press ↵ Enter or ⏎ Return. Carl-bot asks for a color hex code so it can display the role message in a color that stands out. To find a hex code, go to https://htmlcolorcodes.com/color-picker and click the color you want to use. The hex code begins with a hash (#), and appears next to "HEX" at the top of the screen. Type or paste that code into the channel to set the color. If you don't want Carl-bot to show messages in color, type none instead.
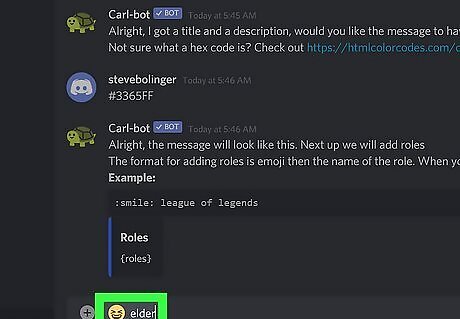
Add your roles. To do this, you'll need to enter the emoji you want people to react with to assign themselves the role, followed by the name of the role itself. The emoji you enter is the one users will need to react with to give themselves the role. To add a role: Enter the emoji you want to assign the role. Press the spacebar once. Type the name of the role (the same name you gave the role in your settings). Press Enter or Return. You will see a checkmark once Carl-bot registers the role. If you created additional roles, you'll add them like you did the first role.
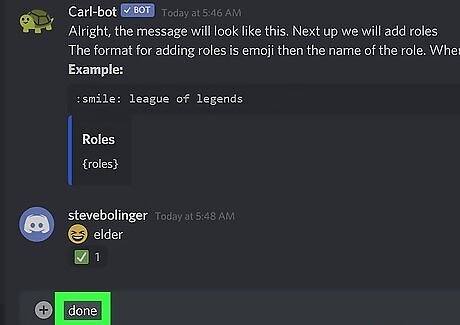
Type done and press ↵ Enter or ⏎ Return. This closes the role assignment chat with Carl-bot. Now, when a user joins the channel on which you set up roles, they'll be greeted by Carl-bot, who will show the role options. To be assigned a role, the user will just need to select the react option for the role they want.
Using Zira

Log in to Discord. You can use the Discord app on your computer or log in at https://www.discord.com/app.

Select the server on which you want to create reaction roles. You must be an owner or have certain administrator permissions to add a bot. If you're an owner, you are all set. Otherwise, you'll need the administrator to assign you the Manager Server permission for the server or give you an owner role.
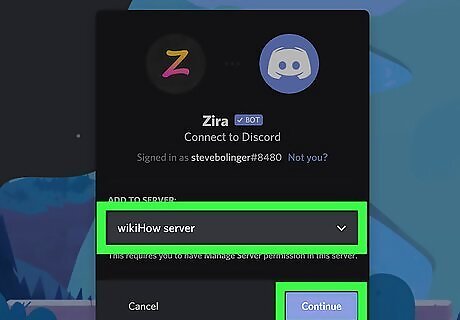
Go to https://zira.gg in a web browser. This is the website for Zira, a Discord bot you can use to set up reaction roles. Click Add to Server at the top of the page. Select your server and click Continue. Click Authorize. This gives the bot the permissions it will need for your server. Once authorized, Carl-bot will join your server. Check the box to prove you aren't a robot.

Click the drop-down menu next to your server's name and select Server Settings. This is the small triangle at the top of Discord directly to the right of the server's name. Server Settings is near the top of this menu.
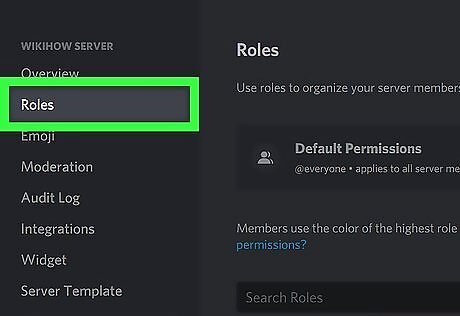
Click the Roles tab. It's in the left column.

Create the roles that you want others to be able to self-assign. To create a new role, click + Create Role, enter a name for that role, and assign it a color if you'd like. Then, click the Permissions tab to choose which permissions to assign the role, such as whether you'd like to allow members with this role to add reactions, use voice chat, or ban people. Click Save Changes when you're finished. For example, if you wanted to make a role that surrounds the user's name in red, you could create a new role called Green and select a green background.
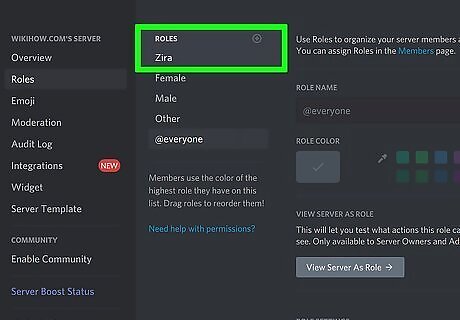
Drag the "Zira" role to the top of the list. This role was created when you added Zira to the server. The position of this role in the list matters—the "Zira" role must be above/before the roles it can assign. To drag the role upward, hover the mouse cursor over Zira, and then drag it to the top of the list.

Click Save Changes and then close your settings. To close your settings, click the X at the top-right corner.
Join a text channel. Any channel will do, since Zira is everywhere.
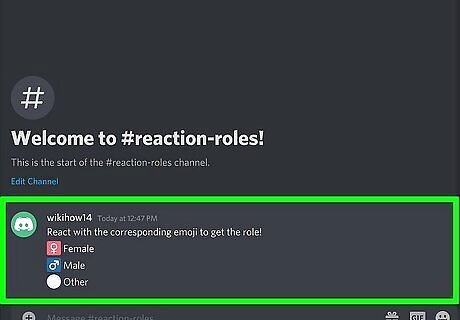
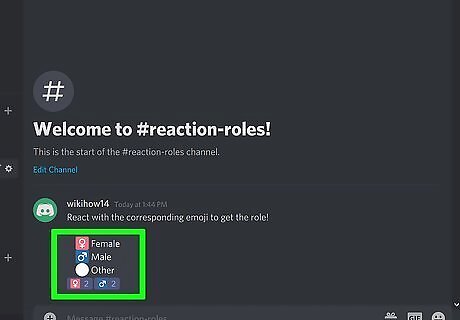
Send a message to the channel you can use for reaction roles. Now, you'll create the message that Zira posts containing the reaction roles. Once the message exists, you can assign it to Zira to share on the channel. For example, let's say you created roles for Male, Female, and Other, and you want users to be able to react to Zira's message with certain emojis to get assigned those roles. Your message may look something like this (but with actual emojis instead of the descriptors below): React with the corresponding emoji to get the role! :female_sign: Female :male_sign: Male :white_circle: Other
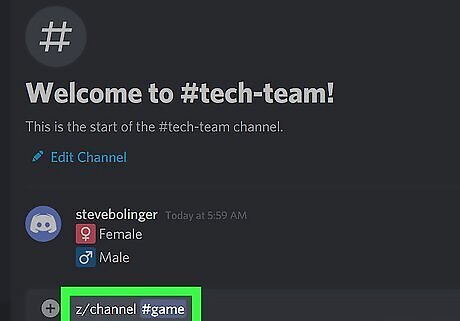
Tell Zira which channel to use for reaction roles. Zira will post the reaction role information in the channel you enter here. Users will then join that channel and react to Zira's message to assign themselves the role. To tell Zira the channel, type z/channel #channel, but replace "#channel" with the name of the channel. Press Enter or Return to send the message to Zira.

Use the z/message command to give Zira your message's ID. After assigning the channel, you need to give Zira the message ID for the message you shared earlier (the one with the emojis and corresponding roles). Type z/message ID, replacing ID with the ID of the message you created, and then press Enter or Return. To get the message ID, right-click the message and select Copy ID. If you don't see a Copy ID option, you'll need to enable Developer Mode. To do this, click the gear icon at the bottom of Discord next to your name, click the Advanced tab, and then click the "Developer Mode" switch.
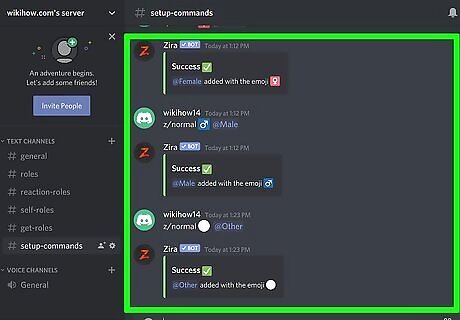
Use the z/normal command to assign emoji reactions to roles. If you want members to actively be able to assign and unassign with reactions, use the command z/normal :emoji: role, replacing ":emoji:" with the corresponding emoji, and role with the role name. For example, if you want users to be able to react with the female symbol to be assigned a role called Female, you'd type z/normal :female_sign: Female and press Enter or Return. Replace ":female_sign:" with the female symbol emoji. Use the same command to enter emojis for all roles you want people to be able to assign themselves. If you only want the user to be able to assign themselves a roll once, use z/once instead of z/normal. To allow a user to use an emoji to remove a role, use z/remove to specify the emoji and role to remove. You can remove a reaction role at any time using z/delete.
Test to make sure the reaction role works. Enter the channel you told Zira to assign roles on, and then react to the message with an emoji. Zira will then assign you the role associated with that emoji.


Comments
0 comment