
Open your image in Photoshop.
Do so by pressing Ctrl+O (PC) or ⌘ Command+O (Mac) in Photoshop and selecting the file.
Open the Hue/Saturation adjustment tool.
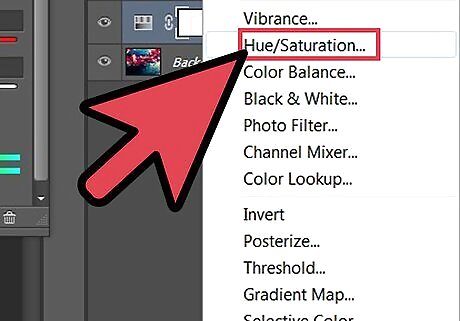
Click the Create Adjustment Layer icon and select Hue/Saturation…. The Create Adjustment Layer icon is the half-shaded circle at the bottom of the Layers panel. You'll also find the Hue/Saturation tool at Image > Adjustments > Hue/Saturation, or by pressing Ctrl + U (PC) or Command +U (Mac).
Use the Hue slider to adjust the color.
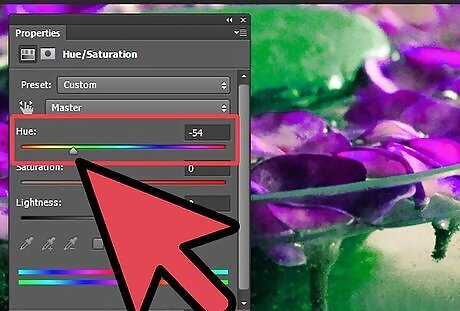
Move the Hue slider left or right. The adjustment layer should be beside your image file. By moving the Hue slider, you will be able to see the gradual change of colors on your image.
Use the Saturation slider to make colors more vivid or muted.
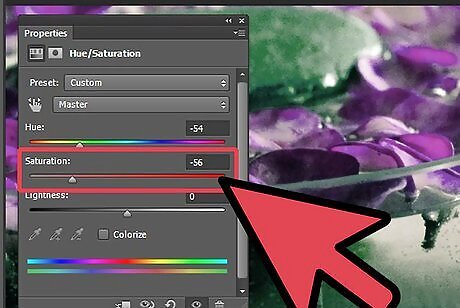
Experiment with the Saturation slider. Drag the slider to the left for a lesser amount of color on the picture or for a duller gray image, or right for more vibrant colors.
Use the Lightness slider to control blacks and whites.
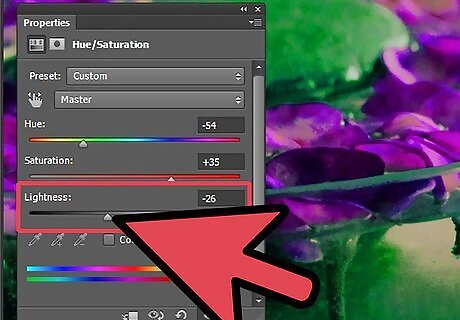
Experiment with the Lightness slider. Drag the slider to the left for a darker image, or right for more white.
Check the Colorize box to change the Hue/Saturation control.
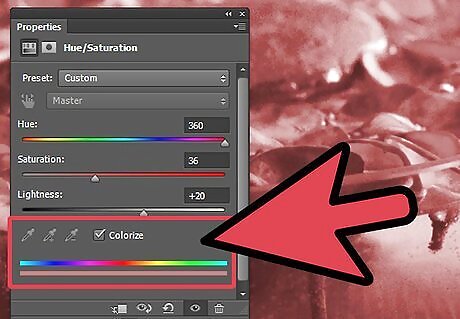
Colorize removes the colors from an image and instead overlays the desired saturation or tint. After choosing this option, play with the hue slider to look for the color you want to apply on your image.
Paint over the image with the brush tool.
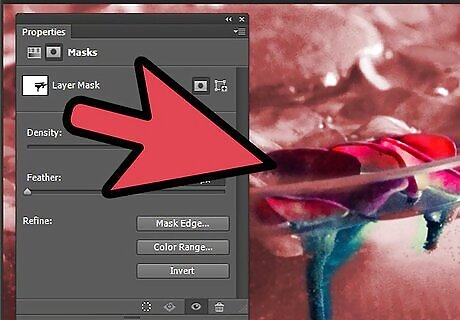
Using the Brush tool(B), paint over your image to reveal some of the original colors of the image. Paint over your image by unlinking and selecting the layer mask on your adjustment layer. Make sure also that the color you're using is black as you paint over the image and on the layer mask.


Comments
0 comment