
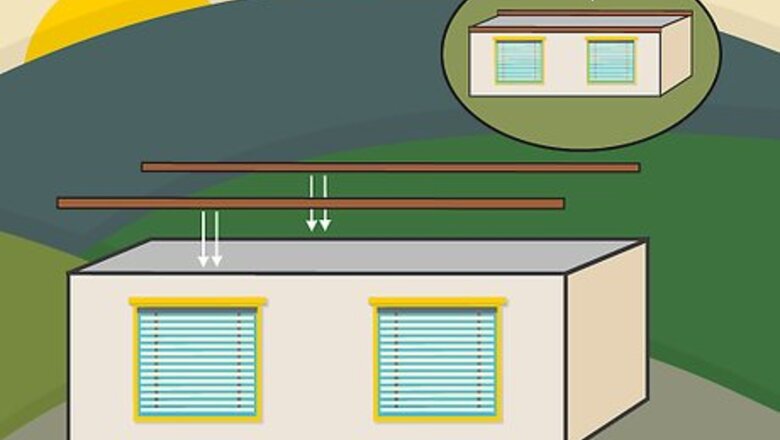
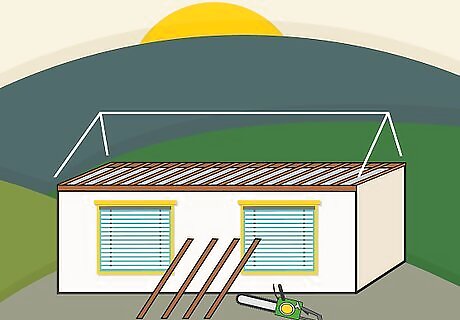
Framing the Gable Ends
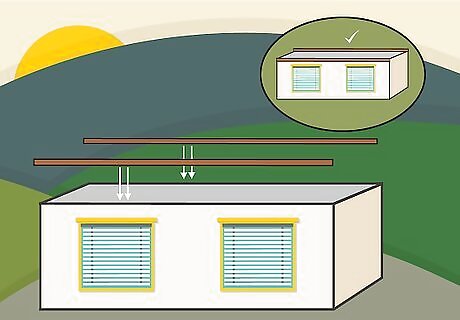
Nail 2 boards onto your walls as top plates. Use 8-penny nails to attach the first 2 in × 4 in (5.1 cm × 10.2 cm) board to the wall studs. Nail the first boards on top of your wall where you plan to build your roof. When you nail in the second boards, offset the seams of the upper and lower layers by at least 24 in (61 cm). Top plates cannot be less than 2 in (5.1 cm) thick. The top plates need to be at least as wide as your studs. If your studs are wider than 4 in (10 cm), use matching-sized boards as your top plates.
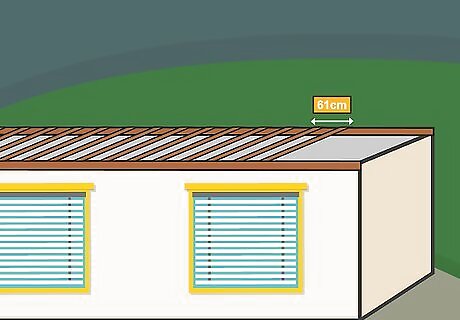
Add ceiling joists every 24 in (61 cm) on your top plates. Ceiling joists span between parallel walls for added structural support. Measure 24 in (61 cm) from the ends of one of your top plate and mark each measurement with a pencil. Use construction nails to attach 2 in × 4 in (5.1 cm × 10.2 cm) to the top plates so they’re on center with your measurements. Make sure the edges are flush with the outside of the top plates. Make your measurements along both walls to ensure your boards will line up. On center means the middle of each joist will be on your measurement. This creates even spacing between your boards.
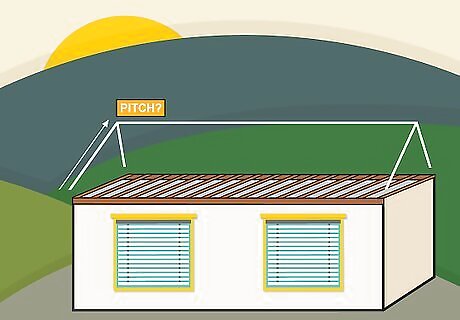
Determine the pitch you want for your roof. Roof pitch or slope is measured in a vertical to horizontal ratio. Most gable roofs have a slope between 3–12 in (7.6–30.5 cm) vertical rise for every 12 in (30 cm) horizontally. Steeper roofs require more materials to build.
Cut your rafters to fit your slope. After determining your slope, find the length of your rafters using the Pythagorean Theorem. Hold a framing square so the measurements of your slope line up along the top of your 2 in × 4 in (5.1 cm × 10.2 cm) boards. Make a line with your pencil so you know the angle you need to cut using a handsaw or circular saw. Make all of your rafters at the same time so they’re ready to use. If you want an overhang, add extra length to one side of your rafter.
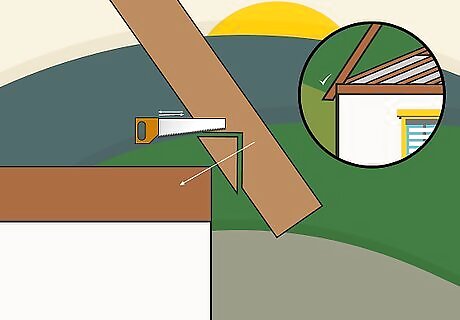
Make a seat cut on the end of your rafter so it lays flat on your top plate. Measure about ⁄8 inch (22 mm) from the end of your rafter using your framing square. Line up your framing square again to make a triangle with the mark. Cut the small triangle out with a hand saw or circular saw. If you added an overhang, make your seat cut where your rafter would have ended without one.
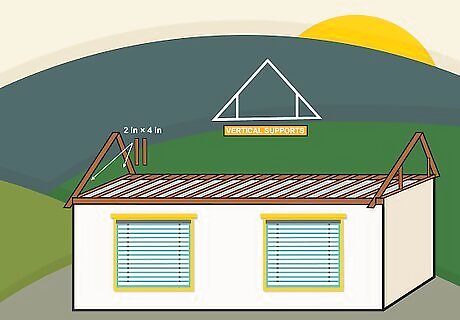
Add vertical supports to the outer walls using 2 in × 4 in (5.1 cm × 10.2 cm) boards. Have a friend help you hold your rafter so the seat cut sits flat in the corner. Measure from the highest point of the rafter to the bottom of your top plate to determine how long you need to make your supports. Cut a support and line it up with the edge of the rafter. Use construction nails to secure it to the outside of the top plates. Place another vertical support 2 in (5.1 cm) apart from the first. Build supports on each gabled side of your roof.
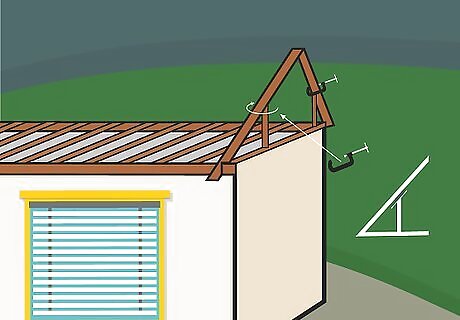
Clamp the rafters onto the vertical supports so the edges are flush. Use hand clamps to secure the rafters to each support so they hold in place. Make sure the seat cut lays flush with the top plates.
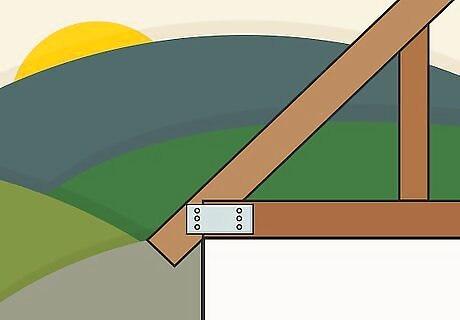
Attach the rafters to your top plates using hurricane clips. Place the hurricane clips so one side is flush with the rafter and the bottom is flush with the top plates. Use 1 ⁄2 in (3.8 cm) nails through the holes in the hurricane clips to secure them in place. Use 2 hurricane clips for each of your 4 end rafters. A hurricane clip is a slightly misleading term, because it doesn’t really clip onto anything. Typically, it is a metal strap that gives you a strong connection between the roof system and the walls. To make this connection even stronger, you can use a double hurricane clip instead of a single one. Hurricane clips can be purchased at your local hardware store. You can also toenail the wood by driving the nail in at an angle through the rafter into the top plates.
Adding a Ridge Board and Rafters
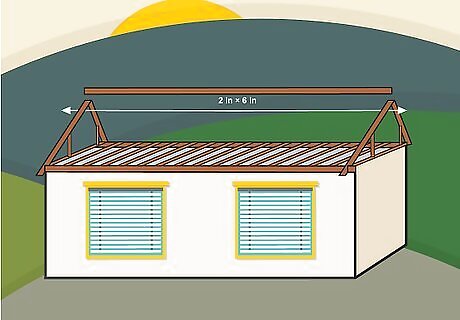
Use a straight 2 in × 6 in (5.1 cm × 15.2 cm) board for your ridge board. Purchase the straightest board that you can find that spans the entire length of your roof. If you can’t find one board that’s long enough, use multiple. Make sure the seams between boards meet between a set of rafters. The ridge board will form the peak at the top of your roof.

Secure the end rafters to the ridge board using 8-penny nails. Line up the top of the ridge board between the supports with the tops of the rafters. Make sure the ridge board sits level so your roof is straight. Use your hammer and nail the rafter in at an angle from the opposite side. Use 3 nails per rafter so they are completely secured. Repeat the process for every other end rafter. Have a friend help support the ridge board while you’re nailing it in place.

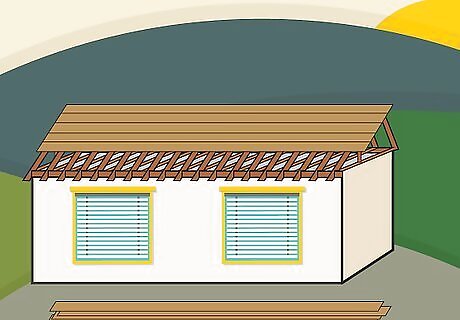
Put rafters in the center of your roof to support the ridge board. Find the ceiling joists closest to the middle of your structure. Attach your rafter to one side of the ceiling joist using construction nails, then hammer nails from the ridge board into the rafter. Repeat the process on the other side so the rafters line up with one another. The center rafters help distribute the weight of the ridge board so it doesn’t slouch or bend.

Fill in the rest of your rafters on each ceiling joist. Use construction nails to attach the rest of the rafters to the joists and ridge board. Continually check with a level to make sure your roof is straight. Stay consistent with which side of the ceiling joist your attach your rafters. If you don’t, your roof won’t be supported as well.
Installing Shingles
Put roof sheathing on top of your roof. Use ⁄2 in (1.3 cm) plywood to cover the entire surface of your roof. Place a piece of the plywood on the bottom corner of your roof, making sure the edges are on a rafter beam. Use construction nails 6 in (15 cm) apart to secure the plywood around the outer perimeter and along each support. Offset the seams between the plywood by 24 in (61 cm). Never get on top of your roof if you don’t feel comfortable working on it. Hire a professional instead.
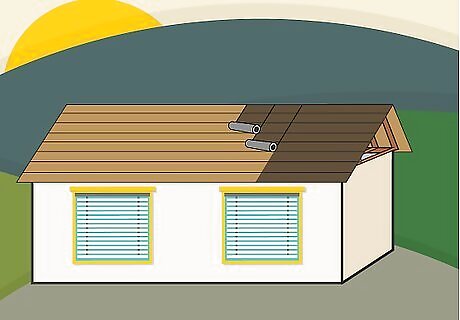
Cover the sheathing in a layer of felt paper. Use 30 lb (14 kg) felt paper to help protect the wood from condensation. Lay the paper flat across the roof’s surface and pound in a construction nail every 24 in (61 cm). When you need to add another piece of paper, overlap the edges by 2 in (5.1 cm). Felt paper can be purchased at your local home repair or construction store.
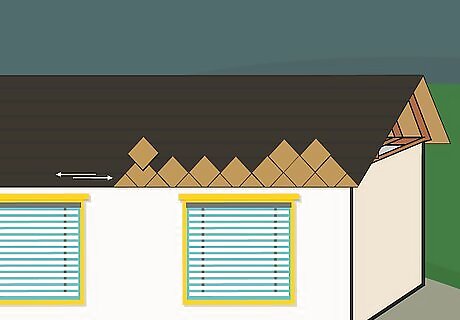
Secure your shingles starting from the bottom. Line your shingles up with the bottom of your roof. Use 3 nails per shingle sheet to secure them to the roof. Work your way up towards the peak of your roof. Make sure the seams between shingles never line up so you have the best protection against water and condensation. If a full shingle sheet doesn’t fit on the end of one of your rows, use a utility knife to cut it to the correct size.
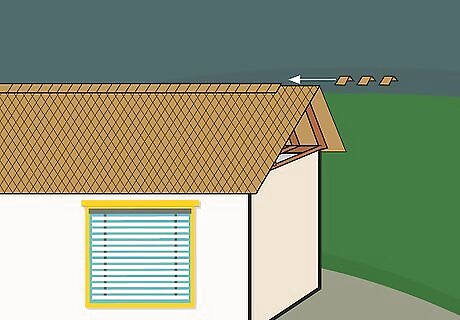
Place cap shingles on the peak of your roof. Cut the individual shingles from your sheet and place them over the peak of your roof. Attach them to the ridge board using construction nails. Make sure to overlap the shingles by 5 in (13 cm) so they’re watertight.


Comments
0 comment