
- Replace the loose screw with a longer and/or wider one for the quickest and simplest fix in many situations.
- Push a plastic anchor, wooden dowel, or toothpicks into the opening to re-use the same screw by giving it a tighter grip.
- Fill the hole with auto body filler and embed it with the screw’s threads to make a very permanent and secure repair.
Larger Screw
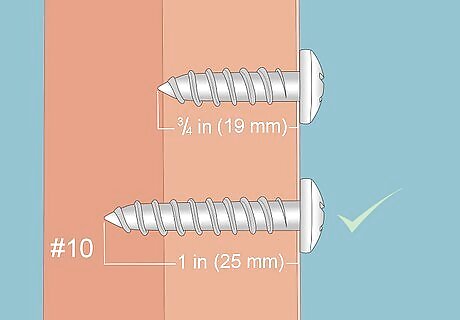
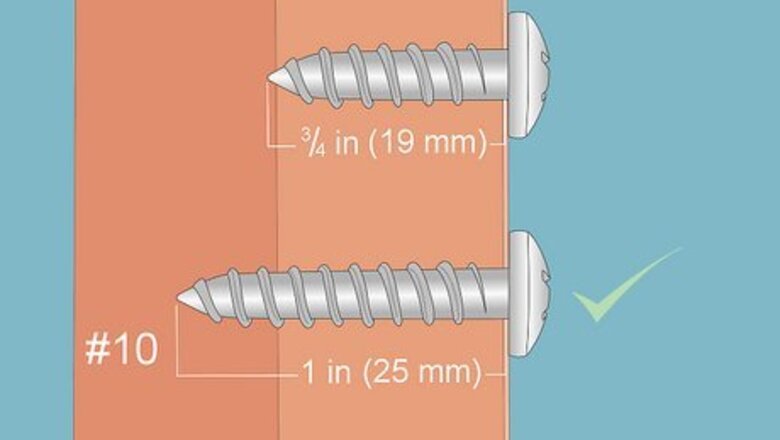
Use a longer screw with the same diameter. This is the simplest solution, and it usually works great! Say, for instance, you have a ⁄4 in (19 mm) long #10 wood screw that won’t hold. The odds are good that a 1 in (25 mm) long #10 screw will hold tight in the same opening. Choose a replacement screw that’s at least ⁄4 in (0.64 cm) longer. If you go much longer than that, use a drill to create a deeper pilot hole into the screw hole so you don’t split the wood. Obviously this easy method won’t work if you don’t have a thick enough piece of wood to accept a longer screw. But don’t worry—you have many other options to try!
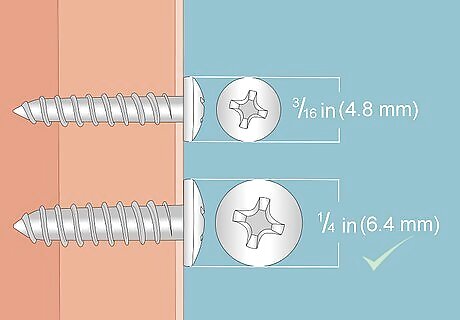
Pick out a thicker screw with a bigger diameter. If you can’t go longer, go wider! Switching from a #10 wood screw (about ⁄16 in (4.8 mm) in diameter) to a #14 screw (about ⁄4 in (6.4 mm) in diameter) of the same length may give you the solid grip you’re looking for. Test out various diameters of replacement screws until you find one that “bites” snugly into the surrounding wood when you twist it into place.
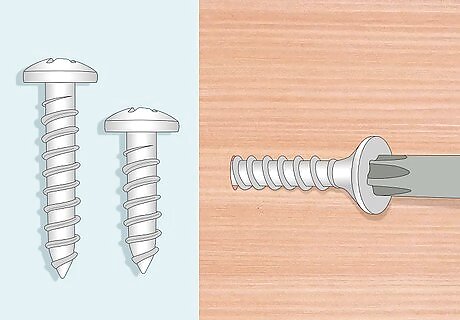
Try out a screw that’s both longer and wider. You know what they say: Go big or go home! Seriously, though, a screw that is longer than the old one and also has a greater diameter will almost certainly hold tight. Just make sure the bigger screw won’t go all the way through the wood and will fit into any hardware (like a hinge or cabinet handle) you’re using. Albert Jackson and David Day Albert Jackson and David Day, Master Carpenters and Woodworking Educators When a screw spins freely in wood, resist the temptation to overtighten it. First, remove the screw and inspect the hole for debris. If the sides are intact, dip a toothpick in wood glue and insert it in the hole, breaking off the excess. If the hole is stripped, redrill for the next screw size up and secure with a combination of glue and matchsticks. Take care not to overfill. Once the repair has dried, the new screw can be reinserted to hold fast.
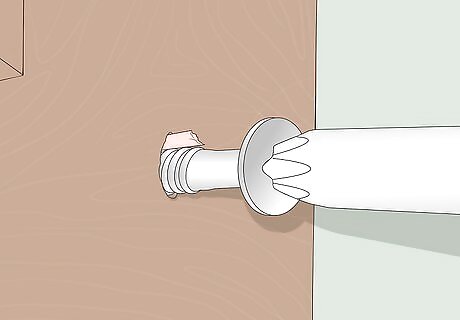
Plastic Anchor

Pick out a plastic wall anchor that fits the size of the screw. Plastic wall anchors come in a wide range of sizes, so check the packaging and pick out one that matches the length and diameter of the loose screw. (If you’re not worried about re-using the same screw, just pick out a wall anchor and a new screw that are approximately the same size.)
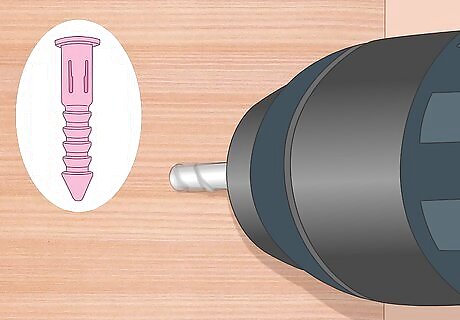
Drill out the hole, if needed, so the anchor will fit. The wall anchor obviously has a larger diameter than the screw that slots inside of it, so it may not fit into the existing hole in the wood. If the anchor doesn’t fit, use a drill bit that matches the diameter of the shaft of the anchor to widen the hole. If the existing hole has been completely stripped out by the screw, the anchor may fit in place with no adjustment needed.
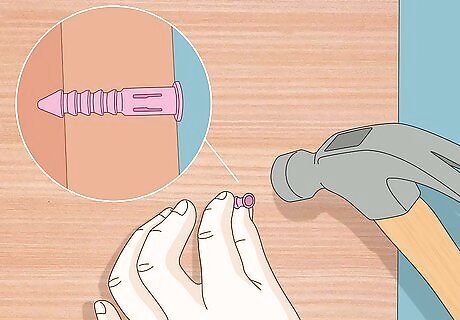
Tap the anchor into the hole with a hammer or mallet. Press the anchor straight into the hole with your finger as far as you can, then tap it into place very gently with your hammer or rubber mallet. Don’t bash away at the anchor, or you’ll either break or deform it. Tap it in until the lip at the top of the anchor is flush (even) with the surrounding wood. Some people like to add a bit of wood glue to the hole to help hold the anchor in place even more firmly. However, if you’ve picked the right size of anchor and drilled out the hole to the proper diameter, this shouldn’t be necessary.
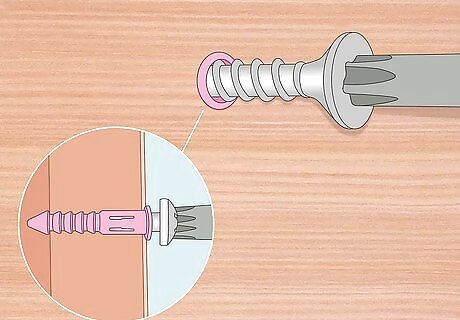
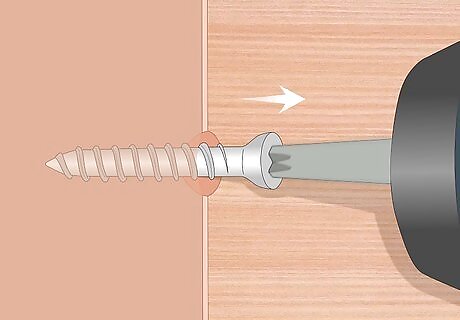
Drive in the screw to expand the anchor inside the hole. All you need now is a screwdriver to finish the job! As you twist the screw into place, the diameter of the anchor will expand and bite into the surrounding wood, locking the anchor and screw into place.
Toothpicks
Trim a toothpick to match the depth of the hole. Stick the toothpick all the way into the hole, mark the depth on it with a pencil, then pull it out and snap or cut it off at the mark. Follow the same process if you’re using multiple toothpicks or an alternate hole wedge like the following: Matchsticks (with the heads removed) Chopsticks Bamboo skewers Thin wooden dowels Thin slivers of scrap wood

Put the trimmed toothpick in the hole, adding glue if desired. Gluing isn’t absolutely necessary here, but it may give you some extra peace of mind to squeeze some wood glue into the hole before slipping the toothpick back into place. (If you do add wood glue, give it at least 10-15 minutes to dry before proceeding.)
Replace the screw and tighten it back up. With the addition of just one or a few toothpicks, the screw should bite into the wood as if you drilled a new, perfectly sized pilot hole. However, if the screw is still a bit loose, add a few more toothpicks and try again. The toothpicks get compressed between the hole and the screw, wedging and locking the screw into place.
Dowel Plug
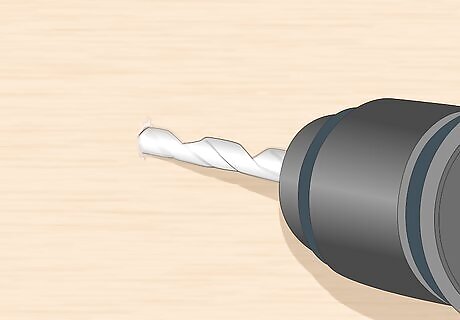
Drill out the screw hole with a ⁄8 in (9.5 mm) bit. Go with the ⁄8 in (9.5 mm) drill bit for any screw hole ⁄4 in (6.4 mm) or less in diameter. For larger holes, choose a bit that’s at least ⁄8 in (3.2 mm) larger than the screw you’re using—for instance, a ⁄2 in (13 mm) bit for a ⁄8 in (9.5 mm) diameter screw.
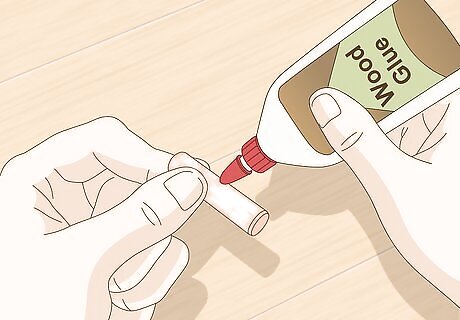
Spread wood glue on the end of a ⁄8 in (9.5 mm) wood dowel. Pick up a round wood dowel at any home improvement or craft store, or online. Spread the wood glue on the dowel roughly equal to the depth of the screw hole.

Tap the dowel into the hole with a hammer or mallet. Work carefully so you don’t snap the dowel before tapping it fully into the hole. Wipe away any extra glue with a damp rag.
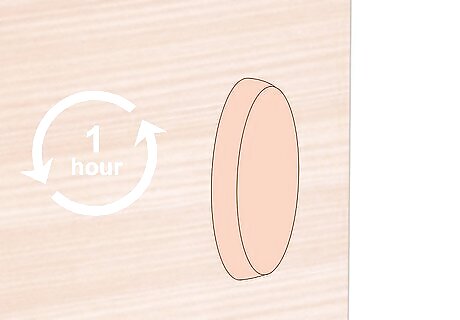
Wait at least 1 hour for the glue to dry. Yes, waiting for glue to dry is just as dull as waiting for paint to dry—but you gotta do it anyway! Take a walk, read a book, or get started on another DIY project.
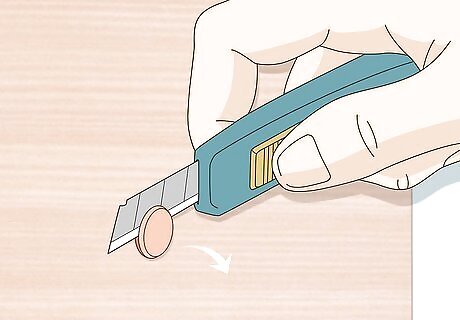
Cut off the dowel so it’s flush with the wood surface. Use a utility knife or a chisel to bring the tip of the dowel flush with the surrounding wood surface. Use sandpaper to smooth out the tip of the dowel if needed.
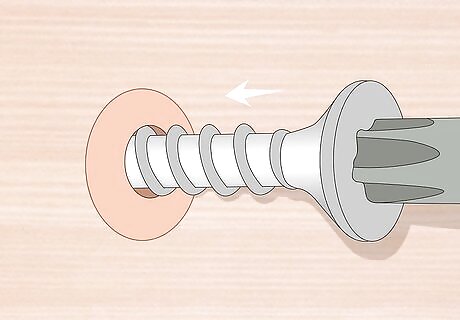
Drill a ⁄8 in (3.2 mm) pilot hole and drive in the screw. Center the pilot hole in the dowel and use a drill bit that’s ⁄4 in (6.4 mm) smaller in diameter than the dowel—⁄8 in (3.2 mm) for a ⁄8 in (9.5 mm) dowel, ⁄4 in (6.4 mm) for a ⁄2 in (13 mm) dowel, etc. Drive the screw straight down into the dowel. The combination of the wood glue and the expansion of the dowel’s diameter caused by the screw will keep both the dowel and screw in place for a very long time.
Auto Body Filler
Drill out the screw hole with a ⁄8 in (9.5 mm) bit. Choose this size of bit if you’re using a screw that’s ⁄8 in (3.2 mm) in diameter or less. Otherwise, use a drill bit that’s ⁄4 in (6.4 mm) larger in diameter than the screw. For example, if you’re installing a ⁄4 in (6.4 mm) diameter screw, drill out the hole with a ⁄2 in (13 mm) bit. This method is ideal if you need to re-secure a bolt into wood after the prior threads have been stripped out, but auto body filler also works well with wood screws.
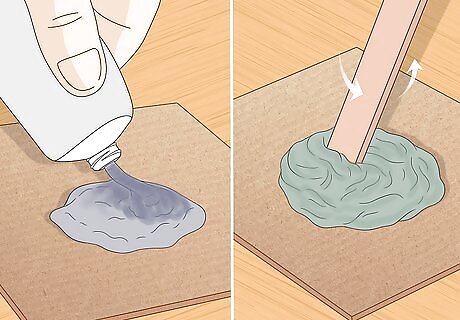
Mix the 2-part filler according to its instructions. Squeeze out a glob of the filler component (enough to fill the hole twice) onto a scrap of cardboard, then squeeze on a small amount of the hardener component and quickly stir the mixture together with a stick. Follow the product instructions to determine how much of the hardener to use. Auto body filler typically comes in a pack with a pair of squeeze tubes. Don’t mix the filler and hardener together until the moment you’re ready to use them.
Pack the filler into the hole completely. Scoop up the mixture with a putty knife and press it firmly into the screw hole. After you’re confident the hole is completely filled, scrape any excess filler off of the wood surface. Use the filler immediately after you mix it—it dries really fast!
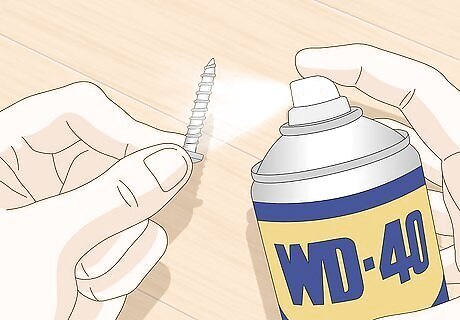
Apply a lubricant spray to the screw. Choose a lubricant spray such as WD-40 and give the threads of the screw a full coating. This will keep the screw from getting stuck in the hardening auto body filler.
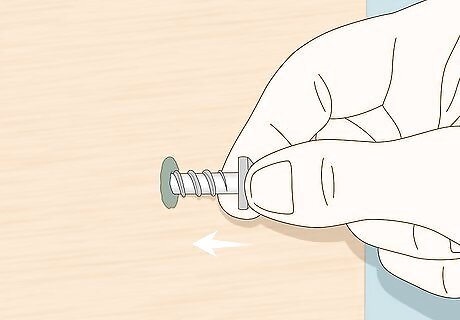
Press the screw all the way into the filled hole. Don’t twist the screw into the hole—instead, just push it straight down into the auto body filler. Scrape and wipe away any excess filler that squeezes out of the hole.
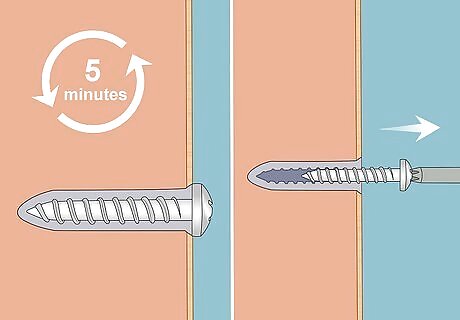
Wait 5 minutes, then slowly turn out the screw. In just 5 minutes, the auto body filler should be semi-hardened. Use your screwdriver to carefully twist the screw out of the filler. When you’re done, you’ll see that the threads of the screw have been perfectly imprinted into the filler on the inside of the hole.
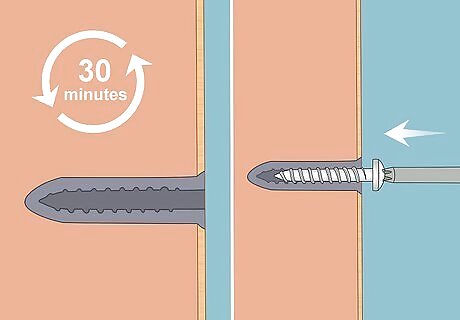
Let the filler fully dry, then reinstall the screw. The filler will probably be fully hardened within 30 minutes, but give it at least 2 hours to cure if possible. Then, simply line up the screw and twist it into the imprinted threads—it won’t be going anywhere now!


Comments
0 comment