
Repairing Peeling Wallpaper Seams
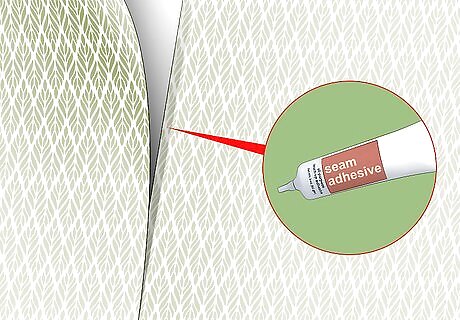
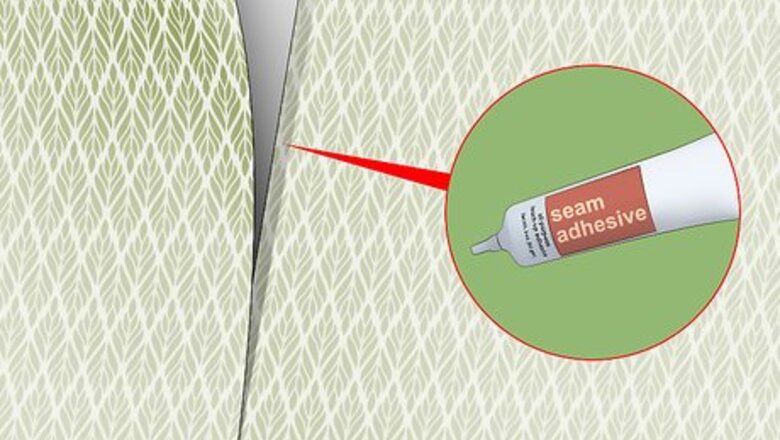
Paint a thin layer of seam adhesive on the back of the wallpaper. Don’t apply the adhesive to the wall or it won’t stick as well. Use a small paintbrush to evenly coat the underside of the peeling piece. You can buy wallpaper seam adhesive from a hardware store or an online retailer. Be careful when lifting the paper up to paint it so that you don’t end up pulling more of the paper off the wall.
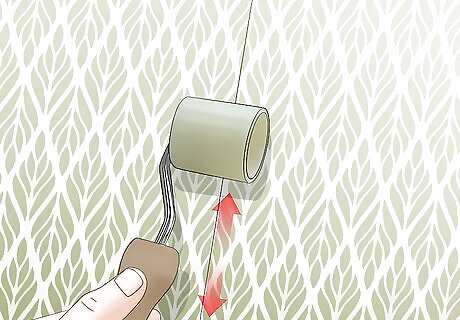
Press the paper against the wall with a seam roller. This will flatten the seam so that it adheres smoothly to the wall. Firmly roll the seam roller back and forth along the piece of wallpaper, making sure to smooth out any bumps or bubbles. If you don’t have a seam roller, you can use a squeegee instead. How to Hide a Small Tear in Peeling Wallpaper If you notice a tiny horizontal rip in the loose strip, arrange it so that the tear isn’t visible. Place the piece with the ragged edge down first, then lay the other piece on top of it. Align them so they fit seamlessly together, then press down to adhere them to the wall.
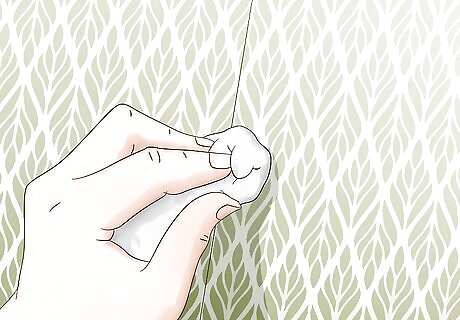
Wipe off any extra adhesive with a damp cloth. After using the seam roller, there might be some glue that seeped out around the edges of the paper. Remove this excess by wetting a clean cloth and dabbing off the adhesive before it dries. A damp paper towel will also work instead of a cloth. Don’t scrub the area vigorously. You don’t want to lift the wallpaper that you just pressed down.

Let the adhesive dry overnight. Check the package of your adhesive to see how long it takes to dry. Most seam adhesives require at least 24 hours. Don't hang anything on the wall or place any furniture against it until it's completely dry.
Patching Damaged or Ripped Wallpaper
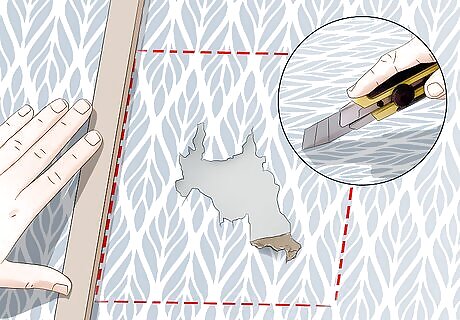
Remove the damaged paper by cutting it with a razor blade. Cut off just the area that's ripped or punctured. Press down as you drag the razor blade around the damaged spot, then peel the paper off of the wall. If there's any residue or fuzz left on the wall from the back of the paper, wipe it off with a damp cloth. Then dry it thoroughly with another cloth or paper towel. Check that the wall isn't damaged, too. If it is, fill in any holes or dents with spackling compound and let it dry for at least 24 hours before placing new paper on the wall.
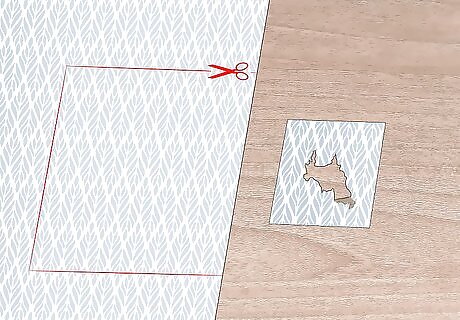
Cut a new piece of wallpaper that’s larger than the damaged area. A good rule of thumb is to have a piece that extends beyond the rip or puncture by 6 inches (15 cm) on each side. Make sure the section that you cut matches the print or pattern of the area that you’re replacing. You can use leftover wallpaper if you applied the original paper yourself. If you don’t have any leftover wallpaper, check stores near you that sell wallpaper or look online to find your pattern. Solid colors will be easier to find than unique prints. Use a pair of sharp scissors or a knife to cut the paper.
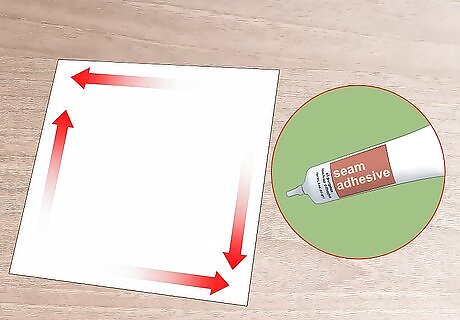
Apply an even coat of wallpaper paste to the back of the new piece. Lay the the wallpaper on a flat surface, then use a foam roller to cover the underside of it with a thin layer of paste. Be sure to coat the edges and corners, too. You can buy wallpaper paste that’s already mixed, or you can buy the powder and mix it yourself. If you opt for powder, follow the directions on the package so you use the right ratio of powder to water. If the wallpaper is pre-pasted, soak the paper in water to activate the paste. Follow the instructions provided with your paper. Most prepasted ones require about 30 seconds of soaking. How to Choose a Wallpaper Paste For the majority of standard lightweight or medium-weight papers, pick an all-purpose paste. If you’re hanging heavy sheets, like embossed paper or paper-backed fabric, use a heavy-duty or thixotropic paste. If you’re using a delicate paper, go with a stain-free paste that won’t ruin the wallpaper. For the most convenient option, choose a ready-to-use paste instead of a powder you have to blend yourself.
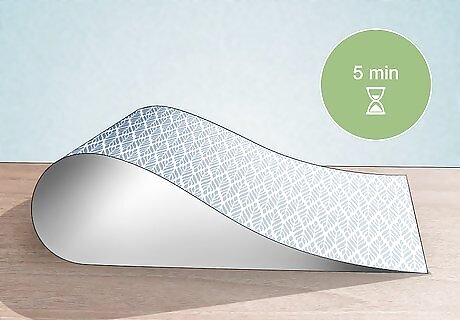
Fold the piece of paper over itself and let it sit for 5 minutes. This is a process known as booking, which softens the wallpaper and prevents it from expanding once you place it on the wall. Bring 1 side over and lay it down gently onto the other to rest so that the pasted sides are touching. Avoid creasing or crumpling the paper when you fold it. Check the directions for your wallpaper to determine the exact booking time.
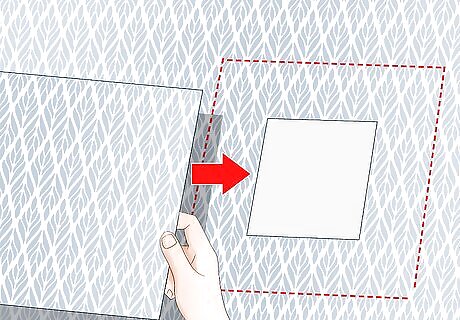
Place the piece onto the wall so it blends into the original paper. To hang the new wallpaper, center the piece of paper on top of the damaged spot. Align the edges so that they fit seamlessly with the paper underneath. You don’t want to be able to tell there’s a new piece of paper there. It may help to have someone else stand behind you while you hold up the paper. It will be easier for them to see when the paper is lined up from further back. You can trim off some of the paper if necessary for it to blend into the pattern underneath. Don't worry if the pattern is just slightly off. Wallpaper stretches a little when you press it on. Line them up as close as possible.
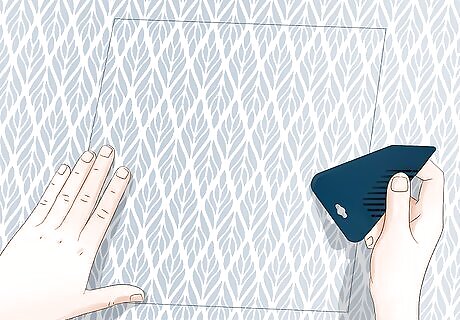
Run a paper smoother over the entire piece, pressing down firmly. This will get rid of any ripples or bubbles in the paper before it dries. Start in the center, then sweep the smoother out to each edge and corner until the paper lies flush against the wall. Find a paper smoother at a paint store or hardware store. It's a flat plastic tool used for hanging wallpaper. You can also use a seam roller or squeegee instead of a paper smoother.
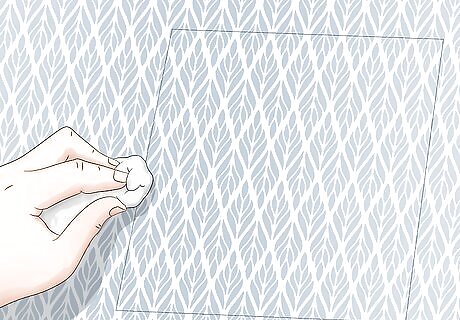
Use a damp cloth to remove any excess wallpaper paste. Some of the adhesive will likely be squeezed out by the paper smoother. If it dries, it will be visible on your wall, so wipe if off with a clean cloth dipped in water. Do this immediately before the paste starts to dry. Be careful not to lift the wallpaper when you wipe by avoiding any harsh scrubbing.
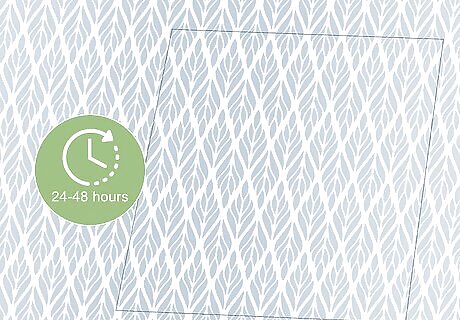
Allow the wallpaper paste to dry for about 24 to 48 hours. The drying times vary by brand and type of paste. Look on the packaging to determine the exact time for your specific paste. Avoid touching the paper while it dries. This includes leaning anything against it or hanging anything, like a picture frame or hook, on the wall.
Getting Rid of Bubbles in Wallpaper
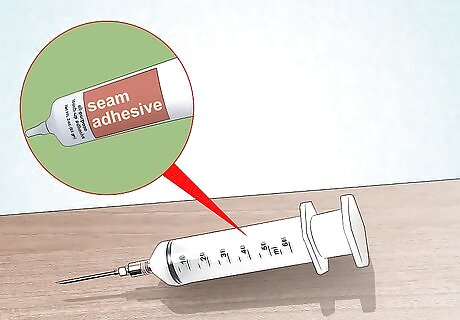
Fill a glue syringe with wallpaper seam adhesive. Choose a syringe with a small tip, like a 21 gauge, so it won’t leave a mark in your paper. Remove the plunger from the end and squeeze the adhesive directly into the body of the syringe. Then replace the plunger before using. You can buy a glue syringe at most hardware or paint stores, or from an online retailer.
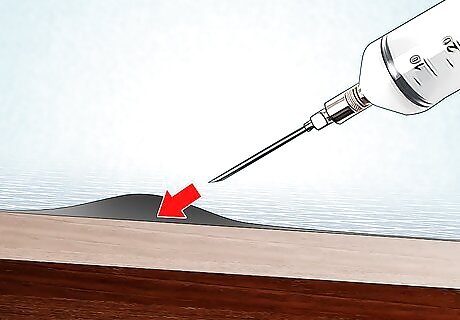
Insert the tip of the syringe into the bubble. Poke a hole into either the top or the middle of the air bubble using the sharp tip of the syringe. You only need to stick it in far enough that the glue will go into the center of the bubble. If you’re having trouble inserting the syringe, use a razor blade to cut a very small slit in the bubble. Make the hole just big enough for the tip of the syringe to fit in it.
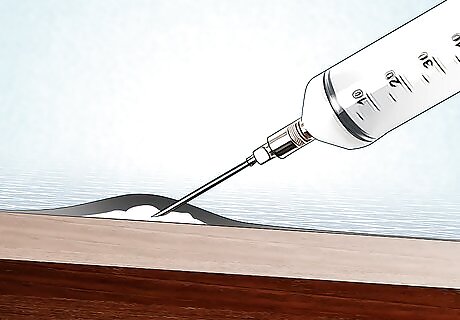
Squirt a small amount of adhesive into the bubble. The larger the bubble, the more glue you’ll have to use. Slowly press down on the plunger at the end of the syringe to push the glue out. Use only as much glue as you need to coat the inside of the bubble. If the glue isn’t coming out, you may need a larger tip for your syringe. For example, if you’re currently using a 21 gauge, try increasing it to a 15 or 18 gauge.
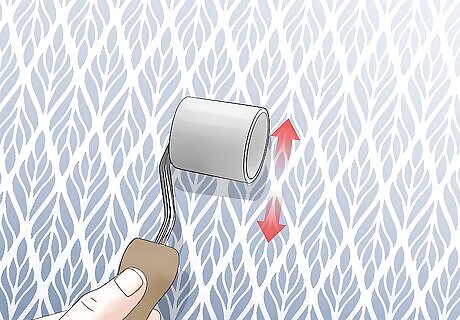
Use a seam roller to flatten the bubble against the wall. This tool is more effective than your hands at getting rid of bubbles and bumps. Press down as you roll it back and forth over the bubble so the paper sticks to the wall. A squeegee will work if you don’t have a seam roller. If any extra glue seeps out from the slit, carefully wipe it off with a damp cloth or paper towel before it hardens.
Let the adhesive dry for at least 24 hours. While most wallpaper seam adhesive will get tacky within a few minutes, they often need a full 24 hours to dry completely. Don't hang anything on the wall or place any items, like furniture, against the spot until it's dry. Look on the adhesive package to find out the exact drying time for your specific brand and type.


Comments
0 comment