
Checking for Leaks and Damage
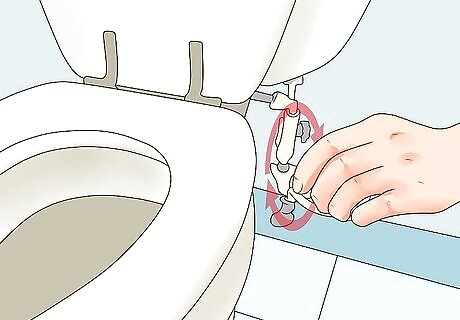
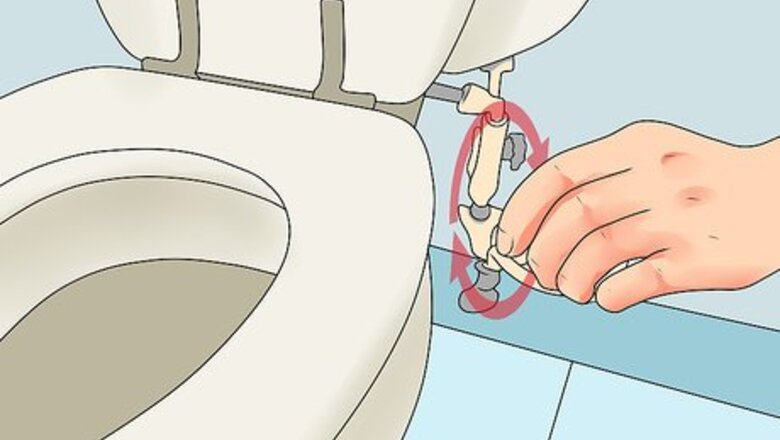
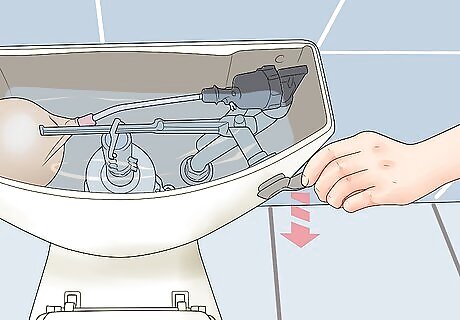
Turn off the water to the toilet. Before you get started, you’ll want to make sure that there’s no water running to your toilet while you’re examining it or making adjustments. Find the shutoff valve on the wall near the base of the toilet and turn it clockwise to stop the flow of water. Then, flush the toilet to drain the tank. Prior to draining the toilet tank, test for possible leaks by squeezing a few drops of food coloring into the tank and checking back the following morning. If the water in the bowl has changed colors, it means you’ve got a leak. Rotate the shutoff valve until it stops turning to ensure that the water is completely off.
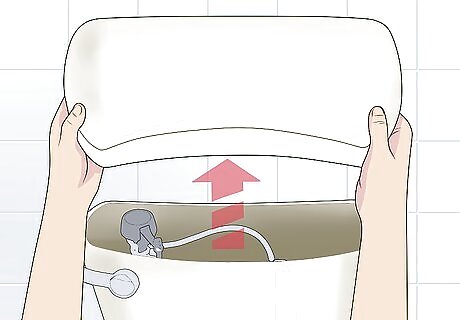
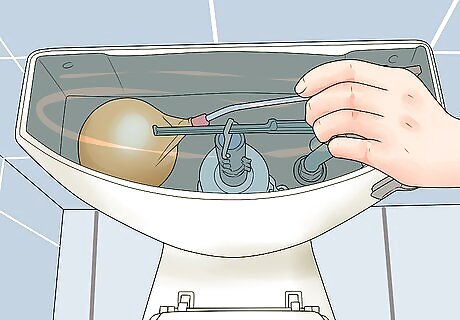
Remove the toilet tank lid. Lift the lid carefully off the back of the toilet and rest it on a flat, stable surface. You should now have an unobstructed view of the inner workings of the toilet. From here, you can start searching for the culprit of a weak flush or low overall water level. The majority of water flow problems can usually be traced to the components located in the tank of the toilet. Be careful not to drop the lid or handle it carelessly, or it could break.
Inspect the toilet’s internal flushing mechanisms. Take stock of each of the individual pieces in the tank. Look carefully for any signs of cracking, chipping, warping or tearing. Gradual wear can eventually lead to leaks and improper filling. When these issues occur, it can cause malfunctions in the toilet’s flushing action. While the toilet tank contains many small parts, your attention should be focused on the two main components: the fill valve and the flush valve. The fill valve is a narrow vertical tube that refills the tank, while the flush valve is an opening at the bottom of the tank fitted with a rubber or plastic flapper on a chain that releases water when the toilet is flushed. Pay particular attention to the condition of the ballcock arm (balloon-like rubber ball on the fill valve that gauges the water level), and the chain on the flush valve. Shake it to ensure there is no water inside. If there is, it needs to be replaced or the toilet won't fill properly.
Repair or replace faulty parts. After identifying the part responsible for the feeble flush, make a note of its exact specifications, then take a trip down to your local home improvement store to purchase a replacement. You can attempt to put in the new part yourself by following a basic instructional guide, or call a plumber, who will have the part you need along with the know-how to install it professionally. Broken and damaged parts should always be replaced as soon as they’re brought to your attention to avoid more extensive repairs later on. Only buy parts that are compatible with the model of toilet you're repairing.
Raising the Water Level in Your Toilet
Empty the toilet tank. In order to increase the amount of water released with each flush, you’ll need to have access to the tank. Shut off the water supply, remove the lid and hit the plunger to drain the tank. Once this is done, you’ll be able to work unobstructed. Do not attempt to change your toilet’s fill level while there’s still water in the tank.
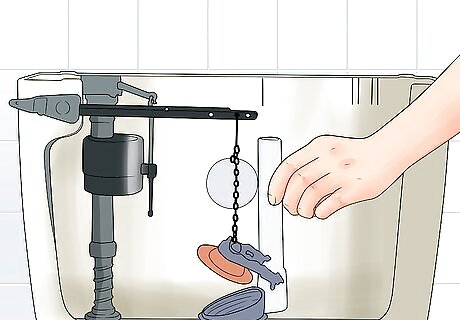
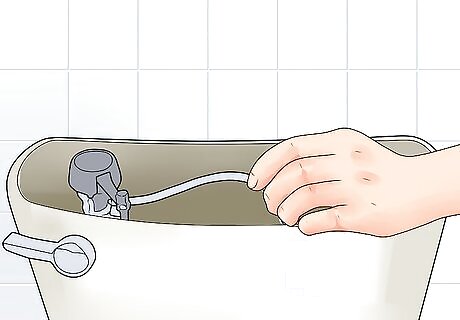
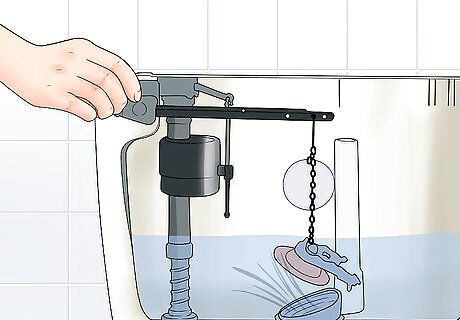
Locate the fill valve. On most standard toilets, this will appear as a large upright tube positioned on one side of the tank. This is the part that controls how much water enters the tank when the toilet refills. Your toilet’s fill valve will most likely have either a ballcock or floating cylinder construction—both can be tweaked manually in just a couple of minutes. Ballcock valves make use of a floating rubber ball to gauge the water level, while cylinder valves can be set to designate the cutoff point. If there’s any obvious damage to your toilet’s fill valve, the wisest option is to simply purchase a new one.
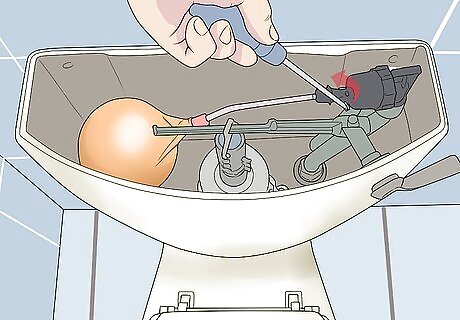
Reset the height of the fill valve. If your toilet uses a ballcock design with a floating rubber ball attached to a separate arm, you can manually adjust the water level by twisting the stem at the top of the arm counterclockwise. If it uses a newer sliding cylinder construction, simply pinch the clips on the edge of the cylinder and raise or lower it to the desired height. You may need to use a screwdriver, coin or some other slender object to change the position of a ballcock stem. For newer toilets with a sliding cylinder, the adjustment for water level is a small screw located on the top of this cylinder. Take note of the normal water level, as indicated by hard water discoloration. This will give you an idea how much water is typically needed to achieve a satisfactory flush. On some newer toilets, the manufacturers specify the optimal fill level with a line etched on the interior wall of the tank.
Test the toilet’s flush. Turn the water supply to the toilet back on and wait for the tank to refill. Lift the toilet seat and flush. If you’re satisfied with the flush, replace the toilet tank lid and continue using your toilet as usual. If not, continue adjusting the height of the fill valve to improve the flushing power to your liking. It may take you a few unsuccessful tries before you finally get the water level exactly where you want it. Be careful not to set your toilet tank to overfill. This will cause it to run incessantly in an effort to drain excess water, which is wasteful and expensive.
Clearing Out the Siphon Jets
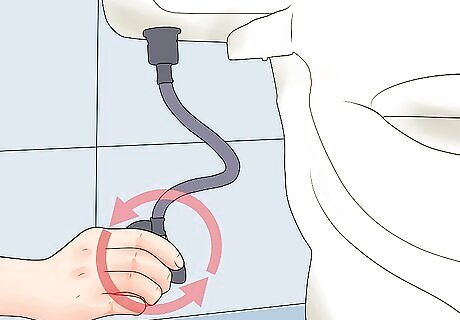
Shut off the toilet’s water supply. Locate the shutoff valve and turn it clockwise to cut off the water flow to the toilet. Remove the toilet tank lid and set it aside. Since your toilet will be out of commission for half an hour or more while you clean it, schedule the project for a low-traffic time so that it won’t be an inconvenience.
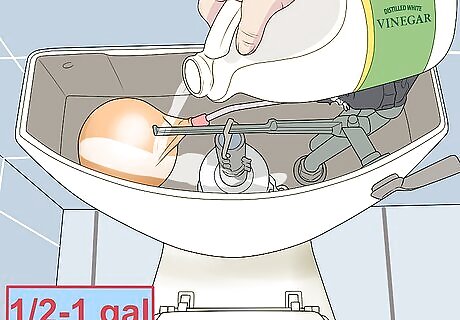
Fill the tank with vinegar. Pour in roughly ½-1 gallon of pure distilled white vinegar. Depending on the exact size of your toilet tank, you may need to use slightly more vinegar—it should be enough to totally submerge the flush valve. Vinegar contains mild natural acids, which makes it perfect for disinfecting and dissolving dirt and grime safely. Make sure the rubber flap of the flash valve is securely closed before pouring in the vinegar.
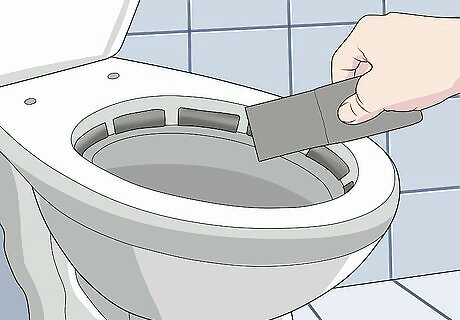
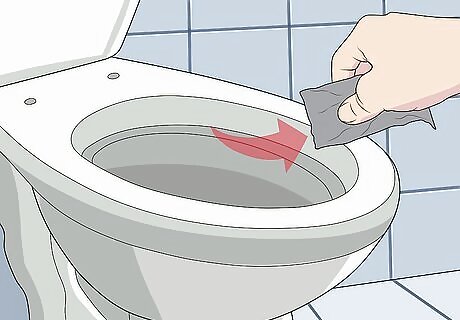
Place duct tape over the siphon jets. The siphon jets are the small openings around the rim of the toilet bowl that release the water from the tank into the bowl when the toilet is flushed. Work your way around the bowl, smoothing a strip of tape over each of the jets. You may have to use several pieces of tape to cover every last jet.. Over time, mold, mineral deposits and other gunk can build up in the siphon jets. This makes it more difficult for water to flow through them, and the result is a much weaker flush. If you’re having trouble getting the tape to stick, try dabbing the area around the jets with a towel before applying it.

Flush the toilet. As the vinegar drains from the tank, it will fill the siphon jets. With the duct tape in place, however, it will have nowhere to go. It will therefore stay in the jets, clearing them of troublesome clogs. Leave the vinegar to sit for at least an hour. For best results, allow the vinegar to soak the clogged jets overnight.
Remove the tape and clear the jets. After ample time has elapsed, peel off the strips of tape and turn the water to the toilet back on. Scrub the area around the siphon jets vigorously with a stiff-bristled brush to clear away any remaining surface buildup. Then, flush the toilet a couple of times to get water moving through the jets. You should discover that the toilet’s flushing power has improved considerably. Plan on cleaning out the jets of all the toilets in your home about once a year, or whenever you observe that flushing power is suffering. Baby bottle brushes are great for cleaning the jets.


Comments
0 comment