
Obtain your under car neon light kit, all the tools, and other supplies you will need for the installation.
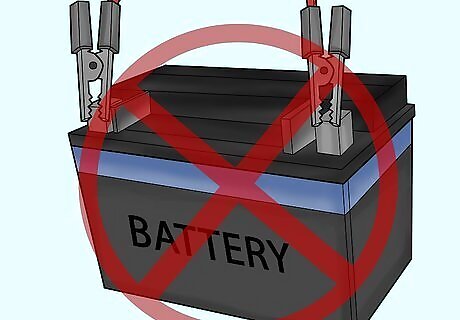
Disconnect the vehicle's battery. Pull off the negative battery cable. This is a safety precaution since you will be doing electrical work.
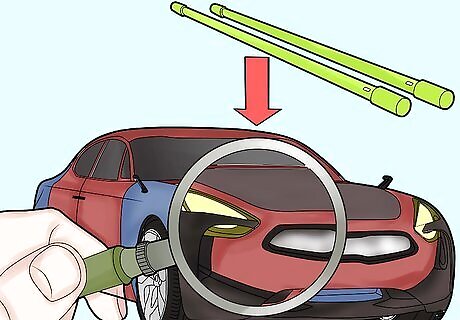
Find the best location for your neon light tubes. Do not attempt to place neon lights near brake lines, fuel lines, electrical lines, hot areas, moving parts, or areas where a lift jack may be used to raise the vehicle.
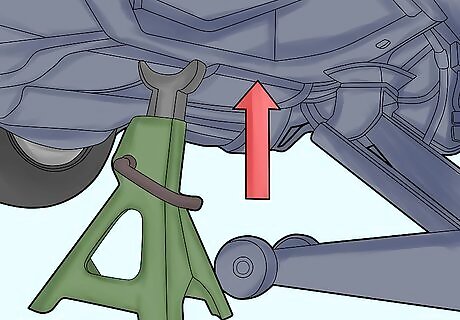
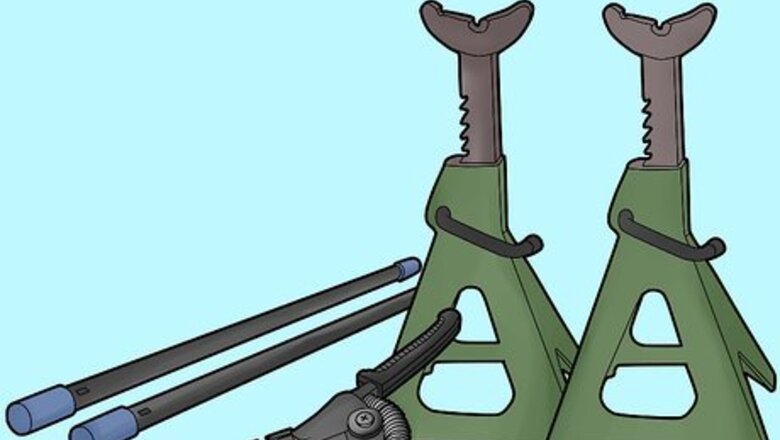
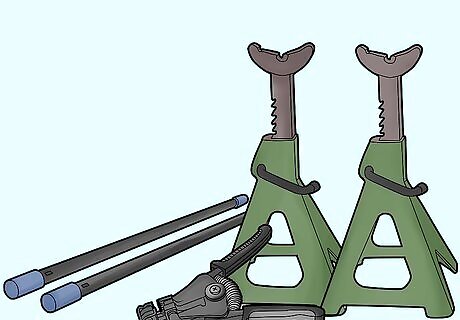
Raise up your vehicle with a lift or jack, and make sure the vehicle is secure. Go under the vehicle, and do a test fitting with the neon tubes. Reference the kit diagrams for optimal placement.
Place the neon tubes on the chassis of your vehicle so the lights are not visible on the outside. Sometimes visible tubes are against the law.
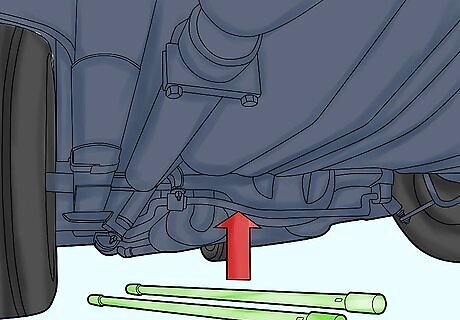
Install the neon light tubes on the chassis for 1 side of the vehicle. Mount the small plastic or metal brackets, which are included in the kit, onto the tubes. Lift the tubes back onto the chassis, and carefully mark the position where you will be drilling holes. Center-punch each hole to get a head start on your drilling.
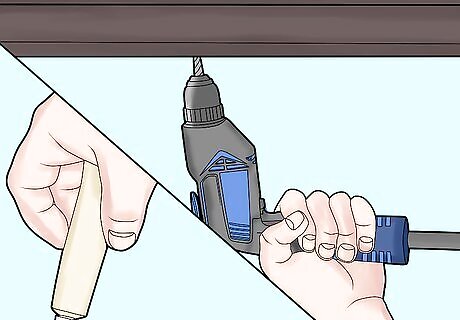
Drill holes at each center-punched location for the mounting brackets. Apply a small amount of silicone sealant to the holes before placing the screws into them. This can help to prevent rust.
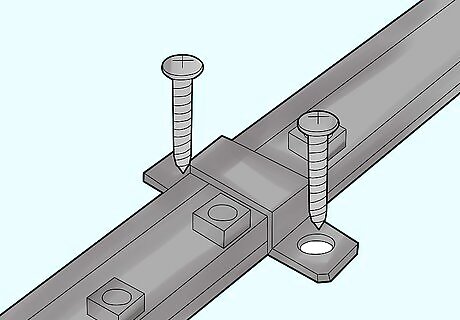
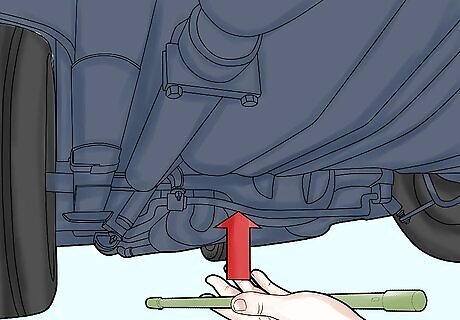
Screw the kit-provided screws into the holes. Hold each bracket in place, and screw them in until they barely hold the brackets. You will finish securing the screws later. Position all the wires that come from the side tubes so that they face toward the front of the vehicle.

Repeat the steps for the remaining 3 light assemblies.
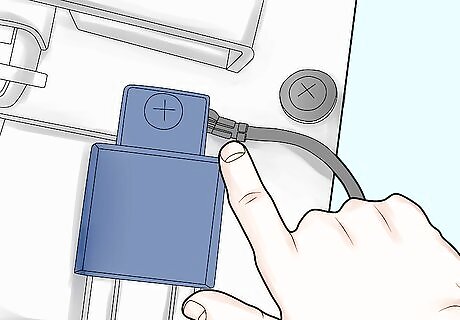
Mount the transformer in the engine compartment. Oftentimes the transformer is located near the battery. You will need to drill mounting holes, so be absolutely certain that you will not damage anything under the area you will be drilling. The kit you purchased will have detailed instructions on how to mount the transformer.
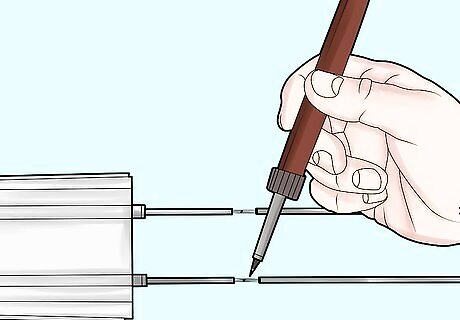
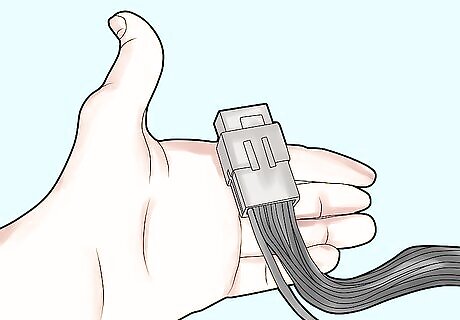
Connect the transformer to the lighting circuit by following the kit's instructions. You will probably use solder, silicone sealant, and shrink-wrap tubing. If the instructions call for cutting and/or joining of wires, strip back the wires you will be joining about .25 inch (0.6 cm), slip shrink-wrap tubing over 1 end of each wire, solder the stripped ends of the wires together with a soldering gun, add a small dab of silicone sealant to the soldered area, and slide the shrink-wrap tubing over the entire wire. Use a heat gun to make the shrink-wrap tubing form a watertight seal over the joined wires.
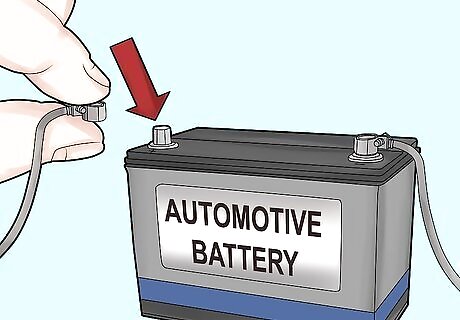
Connect the power wire on the transformer to the positive side of the car battery. You must attach an in-line fuse no more than 18 inches (45.7 cm) away from the battery. Connect the transformer's earth wire, which is also called the negative ground wire, by screwing it into the vehicle chassis to complete the power circuit.
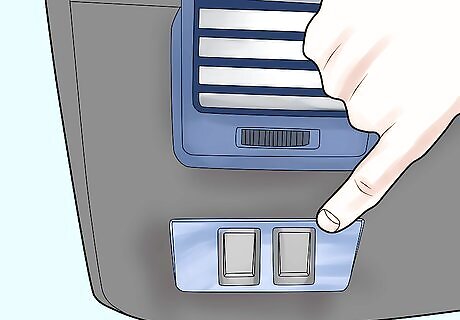
Mount the on/off switch to the dash or other convenient location. Run the wiring for the switch through a grommet in the firewall that goes into the engine compartment so that it can be connected to the battery. Make sure the switch and fuse are connected between the transformer and battery and not to the side of either.
Complete additional wiring if instructed by the kit.
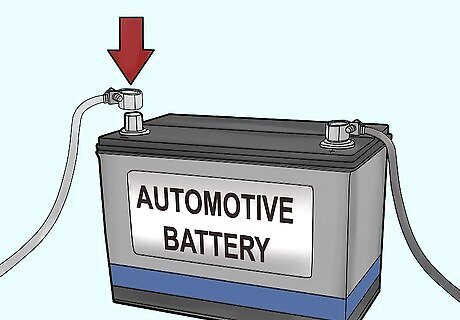
Reconnect the negative battery cable.


Comments
0 comment