
Cutting Your Quartz
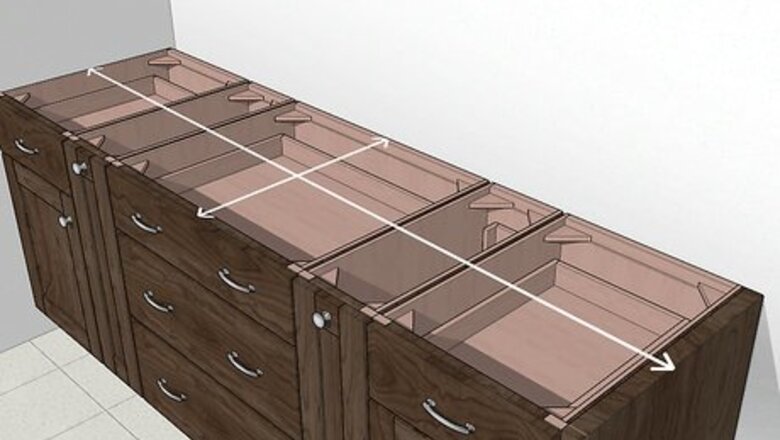
Measure the top of your cabinets and purchase your quartz slabs. Use a measuring tape to get the dimensions of the cabinet tops to determine how much quartz you need. Be sure to account for the sink opening when ordering pre-cut quartz so that it comes with a space for your sink. Always choose quartz with unpolished edges to ensure that there are seams between the slabs. Choose between rounded, curved, and square edges for the outer edges of your quartz. Use 1.25 inch (3.2 cm) slabs for the best results. Select a pattern and color that fits with your space. If you have the tools to cut your countertop yourself, make a large template of your existing countertop with balsa wood or rigid cardboard first. Once all the pieces of your template are glued together, lay them down on your quartz slab and trace around them. Add an extra ⁄2 to 1 inch (1.3 to 2.5 cm) to your dimensions to account for overhang.
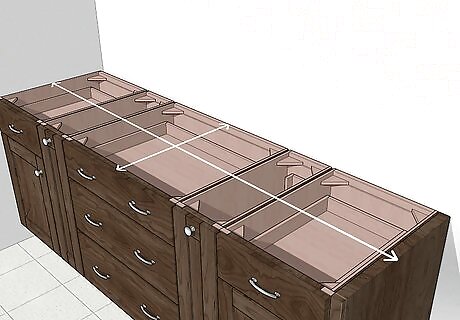
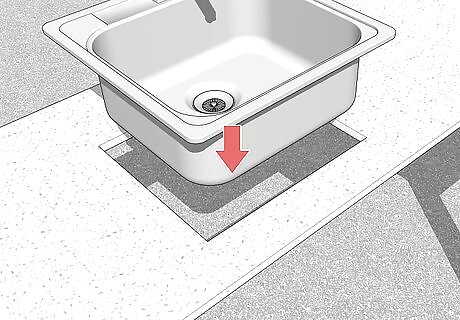
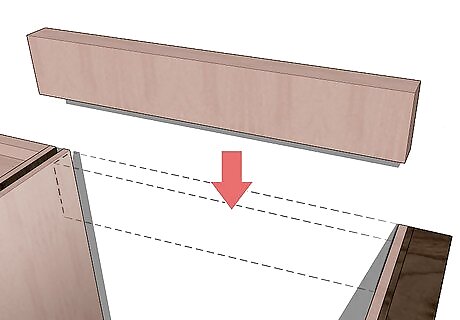
Remove the quartz from the packaging and dry-fit it to the countertop. After receiving your pre-cut quartz slabs, the first thing to do is make sure they fit on your countertop. Place the slabs on top of their installation location—also known as dry-fitting—and make sure that each piece fits into its space without creating any large gaps between its surroundings. Quartz weighs 25 pounds (11 kg) per square foot, so have at least one person help you move the slabs to be safe. If you're using multiple quartz slabs, make sure that each one fits tightly against the other. If you removed your kitchen sink when removing your old quartz, lower it into place after dry-fitting your quartz to make sure that it fits. If your sink is still installed, that's fine too.
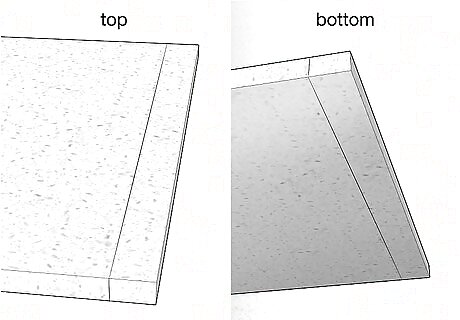
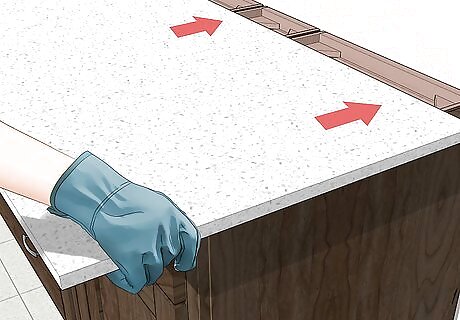
Mark cutlines onto the top and bottom of the quartz to shape it to the countertops. Even with pre-cut quartz, you might have to make some adjustments to their size. Take note of any portions of the quartz that need to be removed or cut to fit the countertops and mark them off on the top and bottom with a straight edge and pencil. Start by placing your straight edge onto the top and draw a line to mark the region to be removed. Afterward, turn the quartz over and mark a line on the bottom parallel to the top one. Now, connect each line via lines on the sides. Make sure that there are 4 lines total—the top, bottom, and 2 side lines.
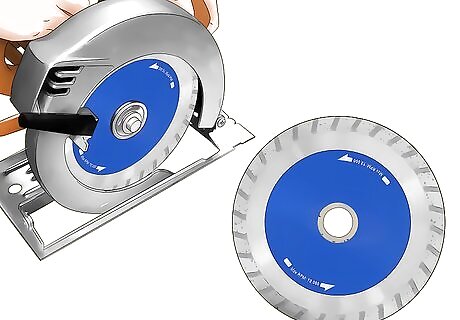
Attach a diamond masonry blade to your power saw. Start by attaching vice grips to your old blade to prevent it from moving. Now, use a wrench to loosen the bolt and remove it. Remove the flange—the small rim located under the bolt—and lift the blade out. Finally, swap in your new diamond blade, reattach the flange, and retighten the bolt. Be sure that your blade is designated for quartz. Skip this step if you already have a diamond masonry blade on your power saw.
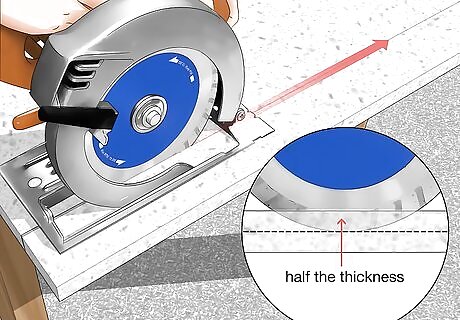
Saw along the marked lines to cut the quartz to size. Set the blade depth to half the thickness of your quartz. Afterward, place your left hand on quartz to keep it steady and your right hand on the handle of the saw to move it forward and backward. With your quartz on a flat surface, start sawing along the top penciled line. Apply gentle pressure downward onto the quartz with your left hand and down onto the saw using your right hand. Always check that the teeth of the diamond blade are pointing opposite to the quartz. Repeat this process with the other side of the quartz to cut it in half. Remove the blade from the quartz every 30 seconds to keep the temperature low.
Attaching Your Quartz
Install your kitchen sink if necessary. If you had to remove your kitchen sink when removing your old quartz, be sure to reinstall it before adding the new material. Start by following manufacturer's directions to install the faucet followed by detergent and dispenser mounts. Now, attach the sink, supply lines, and drain pipes. Before moving on, make sure everything is level. Always apply a ribbon of plumber's putty before installing the faucet and sprayer bases. Use caulk to attach the sink rim to its opening. Seal the drain and tailpipe with caulk or with a gasket—whichever the manufacturer recommends. Be sure to turn your water on and check for leaks before installing your quartz.
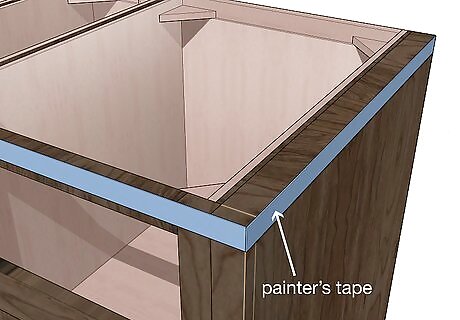
Stick painter's tape to the top edges of the cabinets for protection. Try to cover at least the top 1 inch (2.5 cm) of the cabinets, although the more the better. This will ensure that no silicone adhesive touches their faces. Purchase painter's tape from any home hardware store or online supplier.
Install ledgers in areas of low cabinet support. While quartz countertops can be placed directly on top of cabinets, their weight shouldn't be underestimated. Take a look at your countertop design and look for areas that have the least amount of cabinet support. Now, install 1 to 2 inch (2.5 to 5.1 cm) ledgers into the walls on the sides of the cabinets to add support. Attach each ledger using an electric drill and the screws provided. Purchase ledgers from home hardware stores. Be sure to take measurements of the areas that need ledgers before purchasing any.
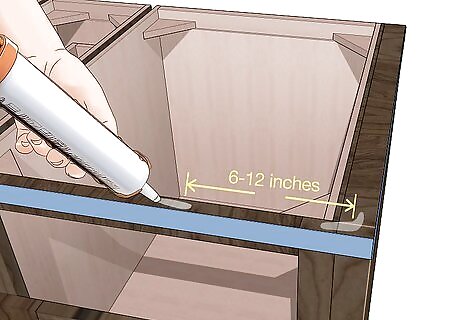
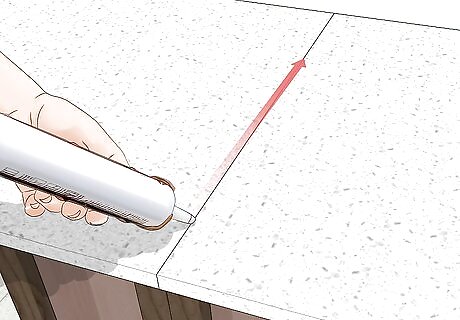
Apply silicone adhesive beads to the top of the cabinets. Start by applying a 2 to 3 inch (5.1 to 7.6 cm) thick bead of adhesive to a corner and then working your way around the top of each cabinet. Space each bead apart by 6 to 12 inches (15 to 30 cm) to make sure that the silicone holds the counter as securely as possible. Always start installing the quartz around the sink region.
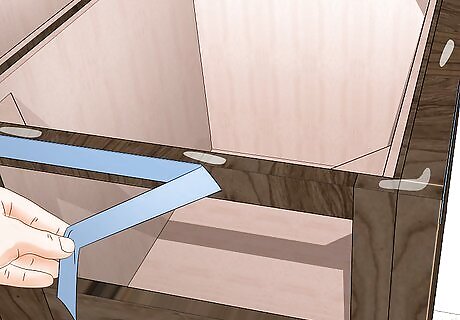
Remove the painter's tape after applying the silicone adhesive and before it dries. Start removing each piece of tape immediately after applying your adhesive beads. Either remove your tape after each bead or all at once after applying all of the beads. Work as fast as you can so that the adhesive is still wet before you lay down your quartz.
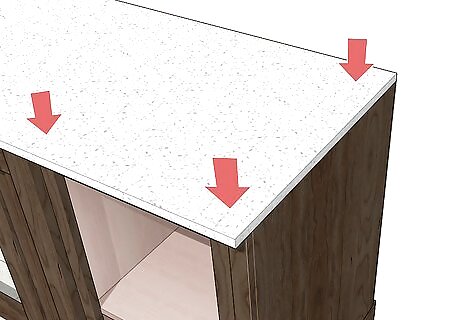
Attach your quartz slabs to the cabinets with the adhesive beads. After applying the adhesive, carefully lower each quartz slab into place over the beads. Now, press them down gently to ensure that they adhere to the cabinets beneath them. Be sure to lower the slab onto the adhesive while it's still wet. Have a friend help you lower each slab into place.
Seal the joints between each slab if there are any. A proper dry-fitting can avoid this step, but sometimes it can't be helped. Start by lining the top of each seam's sides with painter's tape. Now, apply a silicone adhesive (or whatever the manufacturer recommends) into the joints. Be sure to fill it completely and give it time to dry—at least a few hours to overnight. Check the manufacturer's instructions for drying time. Take off the painter's tape before the sealant dries.


Comments
0 comment