

Finding an Easy Solution

Purchase and screw in a motion-sensor bulb to keep things simple. The easiest way to turn a standard light into a motion-activated light is to purchase a motion-activated bulb! These bulbs have a built-in passive infrared sensor, which often looks like a little nub that sticks out at the tip of the bulb. All you need to do is unscrew your standard bulb, screw in the new one, and flip the light switch on. Voila! You now have a motion sensor light. Make sure that the wattage for the light bulb you buy matches the wattage requirements of the fixture. You can purchase one of these online or at a big box home improvement store.
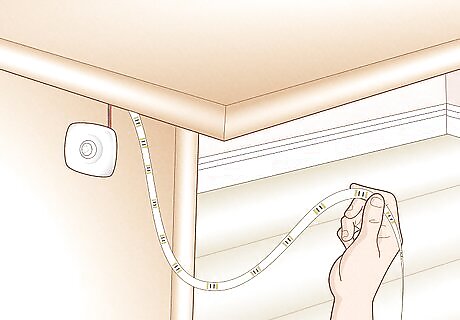
Create motion sensor track lights with LED strips. Purchase a motion sensor that plugs into an outlet alongside some LED strips. Cut the strips to size with scissors based on where you plan on placing the lights. Connect the plug at the end of the strip lights to the motion sensor, and plug the motion sensor into the outlet. Adhere the strips to whatever surface you want them to stick to with glue, Velcro, or adhesive. The end result should look like thin LED lighting that turns on whenever someone passes in front of the sensor. You’ll need to buy the sensor online, but the LED strips are often sold in any big box electronics store. You can adhere these LED strips to the base of your bed frame to create a simple nightlight. Alternatively, you could run them under a desk or behind a TV to create a cool backlight effect. If the LED strips run on a USB cable, connect them to the sensor with a phone charger wall adapter.

Hire an electrician to install a brand new motion sensor fixture. If you want to install a brand-new fixture, you have to hire a professional electrician. It’s illegal and unsafe to run new wires to a fuse box without the proper certifications and licenses. The good news is that this much easier than trying to do it yourself! Contact a licensed electrician in your area and walk them through where you’d like your new motion-activated light. Depending on the type of light and the location of the fixture, this will cost you anywhere from $75 to $500.
Adding a Sensor to an Exterior Light
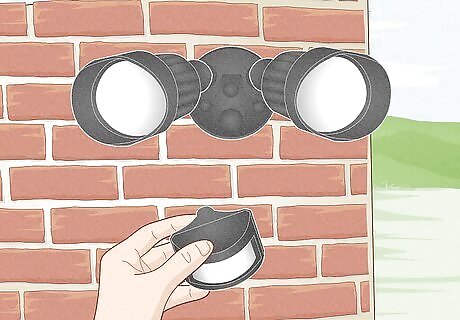
Purchase a motion sensor for your specific light and read the instructions. Motion sensors are not universal, and if you have an exterior flood light you want to make motion activated, you’ll need to buy the attachment from the same company that made your light. Otherwise, you’ll need new wiring to run a separate line for the motion sensor, which will require an electrician. You also need a gasket or opening on the fixture to attach your motion sensor to. If there isn’t a small opening or cover on the outside of the fixture, your light cannot be converted to a motion-activated light without totally installing a new fixture with a built-in motion sensor.
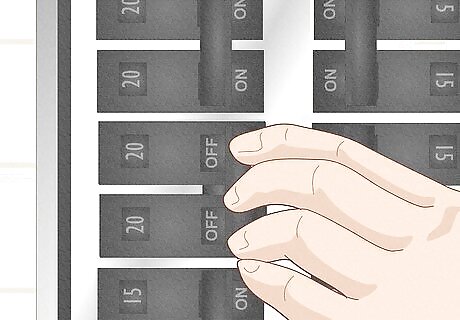
Flip the breaker to turn power to the light off. Go to your fuse box and flip the circuit breaker for the light you’re going to install the motion sensor on. If you can’t figure out which circuit is attached to your light, just flip the main off. This is mandatory, since you must ensure that there’s no electrical signal running to your light. Test the light with a multimeter or flip the light on and off to ensure that there’s no electricity running to it.
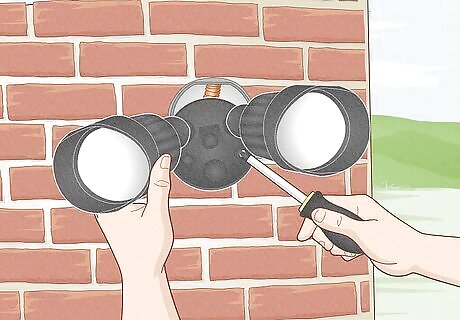
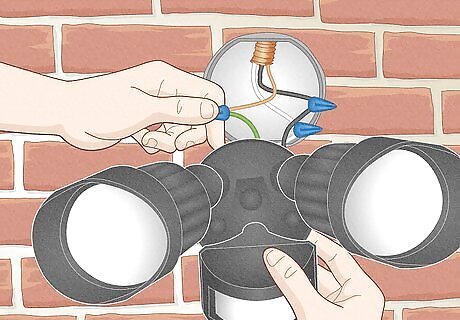
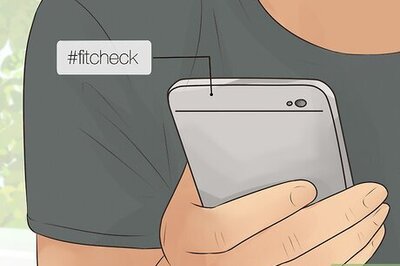
Unscrew your fixture or remove the cover to expose the wiring. Look at the fixture to see how it’s attached to the electrical box behind it. Use a screwdriver or hex key to unscrew the fixture from the wall. If there are no screws at all, you can typically pop the cover off. Gently pull the fixture off of the wall and let it hang loosely by the wires. At this point, it’s best to take a photo of your wiring setup. If you aren’t successful in installing the motion sensor or you need a reminder of which wire connects to what, you’ll be glad you have a reminder!
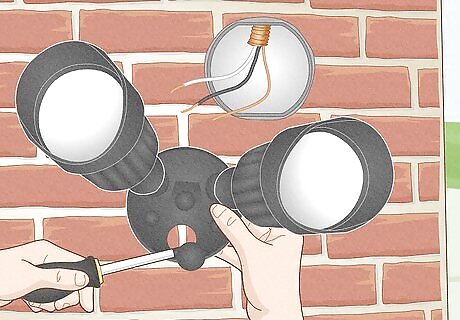
Remove the cover on the gasket for the motion sensor. This is going to vary from fixture to fixture. The slot on your fixture for the motion sensor is usually going to be covered by something. If there’s a screw-shaped cover, use a screwdriver to remove it. If it’s just a flat cap, you can typically pry it off with a flathead screwdriver or by hand. If you don’t have a gasket to attach the light to, you’ll need to hire an electrician to install a brand-new light.
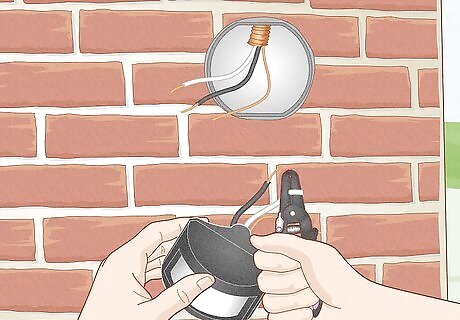
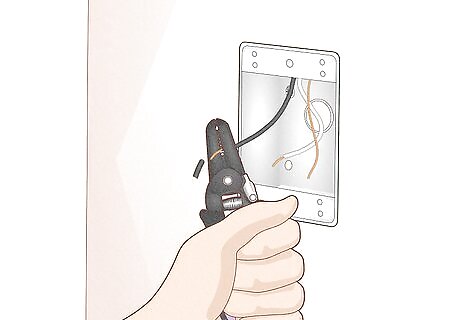
Strip the last ⁄2 in (1.3 cm) of coating off the sensor’s wires. This may already be done for you, but if the copper at the end of the wires isn’t exposed, grab a wire stripping tool. Slide the end of the wire through the opening on your stripping tool. Pull the wire out to remove roughly ⁄2 in (1.3 cm) of the rubber coating to expose the copper. Do this for each of your motion sensor’s wires. If the ends of the wires are already stripped, don’t worry about this. You can reuse the stripped portion of the wires in your fixture, so you shouldn’t need to strip anything for the fixture or wires in the wall.
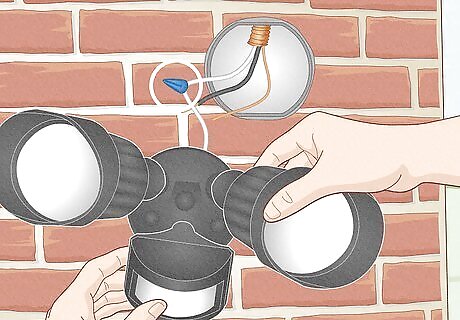
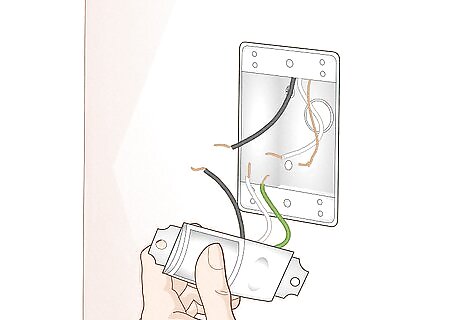
Slide the sensor into the slot and connect the neutral wires (white). Undo the wire nut holding your two neutral wires together. Connect the neutral line for the motion sensor with the other neutral wires by holding the exposed copper together and twisting them together by hand. You can use channel locks if necessary. Cap the wires together with the wire nut. You can technically connect the wires in whatever order you’d like. The actual order you connect the wires shouldn’t matter since power is off. The neutral wires are almost always white. If the wires in your wall aren’t color-coded or labelled, contact an electrician. There’s going to be no way for your to figure out which wire is which. Wire nuts are also known as pigtails. They’re the small plastic caps used to join wires.
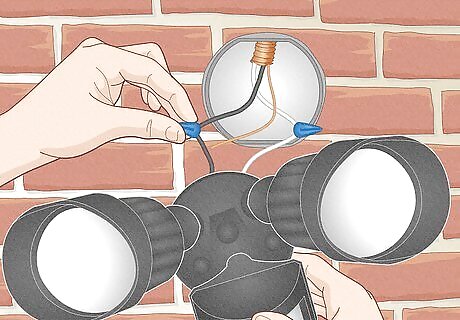
Twist the hot wires (black or red) together and cap them off. Once the neutrals are connected, find your hot wires. These are typically black or red. Connect the motion sensor’s hot wire with the other hot wires by twisting them together the same way you connected the neutrals. Cap them together with a wire nut.
Join the ground wires (green or bare) together and reinstall your fixture. Repeat this process with your ground wires by twisting the motion sensor’s ground together with the fixture and the ground in the wall. Cap them off. Then, gently and carefully slide the wires into the electrical box and slide the fixture back over the screw slots. Screw the fixture back into place and test your motion-activated light! If you just pried the cover off, you should be able to just push it back into place.
Installing an Interior Motion Sensor Plate
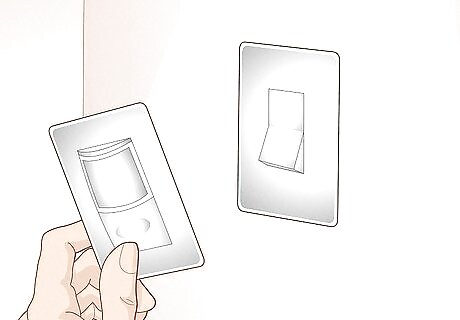
Purchase a motion sensor switch the same size as your faceplate. To turn your standard ceiling light into a motion sensor light, purchase a motion sensor switch. These are pretty common in commercial buildings (if you’ve ever had the lights go off while you were in a public bathroom, these were to blame), but you can totally turn a regular switch into a motion-activated light at home! Unless the motion sensor matches the size of your current light switch (i.e. the button is the same size as the sensor), you’ll need a new faceplate for the sensor. Luckily, most sensors come with one, but you may need to buy one of those if your sensor doesn’t. You can pick these switches up online or from any big box home improvement store. These sensors are perfect for rooms where you often are only in there for a few minutes. Laundry rooms, basements, and garages are all great options here!
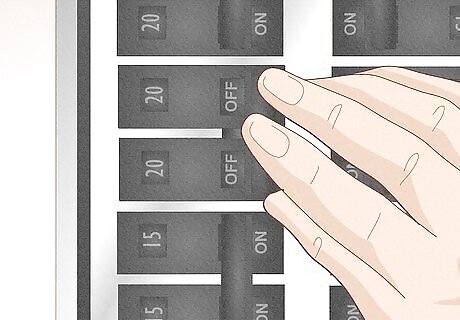
Shut the breaker off to cut all power to the room you’re in. You cannot swap your light out if the electricity is running, so go to your fuse box and flip the circuit breaker for the room that you’re working in. If you can’t find it, just flip the main breaker so the electricity everywhere is shut off. If you start touching live wires, you could potentially shock and injure yourself. It is essential that all electrical lines are closed. Test the light by turning it on and off again, or by checking the terminals with a multimeter before you get started.
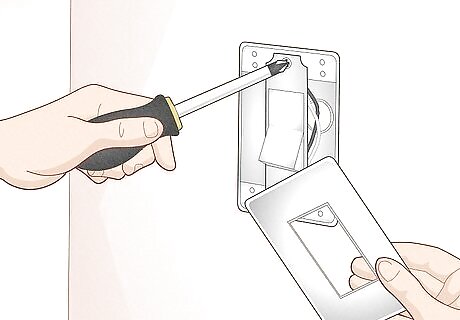
Remove the old faceplate and unscrew the fixture from the box. Grab a screwdriver and unscrew the faceplate. Set it aside for now. With the faceplate off, you should see two screws holding your fixture in place in the electrical box. Remove those two screws with your screwdriver and gently pull your switch out from the wall so that the wires are exposed. Here, take a moment to take a quick photo of your wiring setup. If you can’t get the sensor installed properly or you ever need a reference for how the original wires were setup, this will come in handy.
Cut and strip any wires that feed directly into the switch. Depending on how your light switch was originally installed, there may be 1-2 wires running directly from the wall into your switch. If there are, cut them where they feed into the switch and strip the last ⁄2 in (1.3 cm) of the rubber coating off to reveal the copper inside each wire.
Follow the instructions for your sensor to connect the wires to the box. There’s a lot of variation here from switch to switch and wiring setup to wiring setup for these things. Read the instructions from your sensor carefully and follow the steps to connect the wires in your wall to the new sensor. Typically, you’ll connect hot to hot, ground to ground, and neutral to neutral. The load wire often wraps around a brass terminal on the switch. Connect your wires with wire nuts and follow the instructions to wire the switch. Your wires should be labeled or color-coded. If they are color-coded, these are the common colors: Neutral (white) Hot (black) Ground (bare copper or green) Load (red or blue) If you have “leftover” wires, you can typically just clip them off. Some of these sensors are designed to work in a variety of different buildings, and there may be additional wires you don’t need for your home wiring setup.

Make sure all of the connections are fitted tight with your wire nuts. Once you’ve connected all of the wires leading from your wall to the motion sensor switch, double-check the connections by tugging gently on each wire nut. Once you’ve ensured the wires are correctly and fully connected, slide them back carefully into the electrical box.
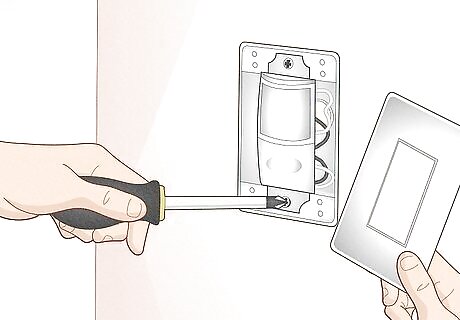
Screw the sensor into the box put your faceplate over it. Hold the sensor over the screw slots where your original light switch goes and screw them into place. Then, grab your faceplate and set it over the sensor. Screw that into the slot on the wall and turn your breaker back on to activate your light. If the motion sensor doesn’t turn on, look on the switch for a little tab that slides back and forth. Try sliding that before testing again. Some of these sensors can be turned on or off.


Comments
0 comment