

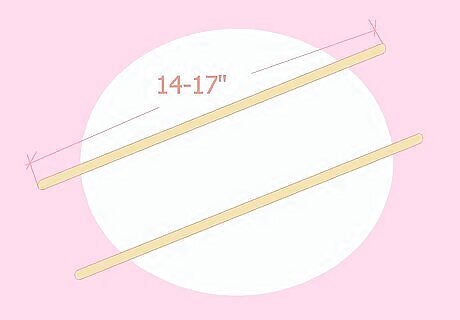
Cut the dowels to about 14"-17" in length. Ensure they are cut to the exact same size.
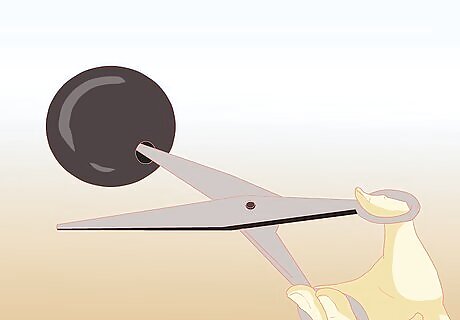
Stick one end of the scissors into the hole in the ball knob, twisting it to shave the inside until to hole is large enough for the dowel to fit into it snugly.
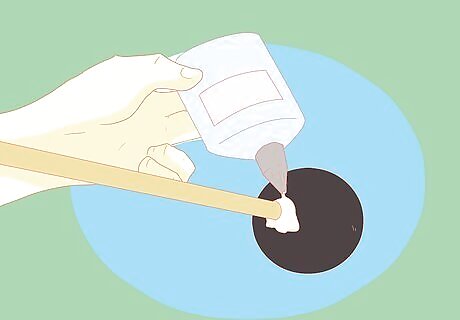
Make sure the dowel will slide about half an inch into the ball knob. Take it out, put a few drops of wood glue in the hole, and push the dowel back in. You can put a little more glue around the base of the ball knob to secure it.

Wrap a few rubber bands around the mallet. (For extra rebound and a bigger mallet. Not extremely necessary)
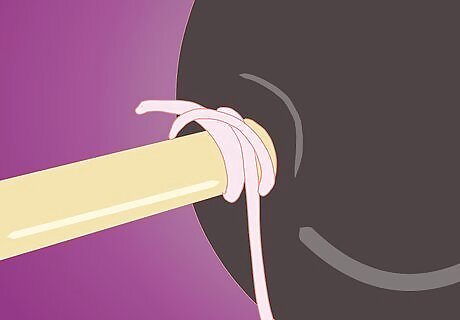
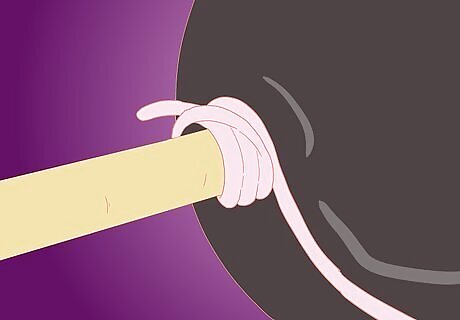
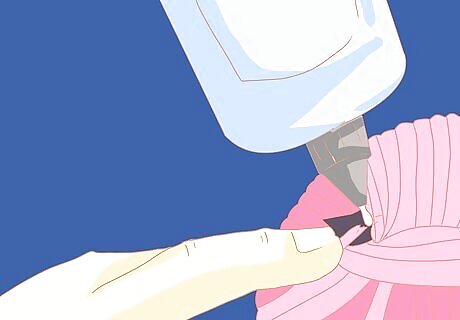
Tie a clove hitch around the bottom of the rubber core. Leave about 3 inches of extra yarn for stitching the bottom.
Wrap the mallet once around the shaft (Over the clove hitch) then wrap it OVER the core. (By OVER, Imagine the mallet core as a globe with the north pole at the top and the south pole where the mallet shaft is inserted. Outline a "Prime Meridian" of the "globe" with the yarn. NOT the equator.)
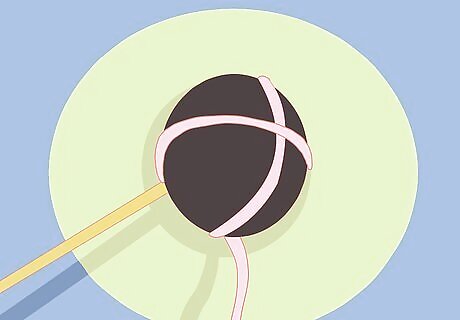
Turn it around the shaft and make a perpendicular "prime meridian" to the first one you made in the previous step. (Looking at the mallet from the top there should be an X)
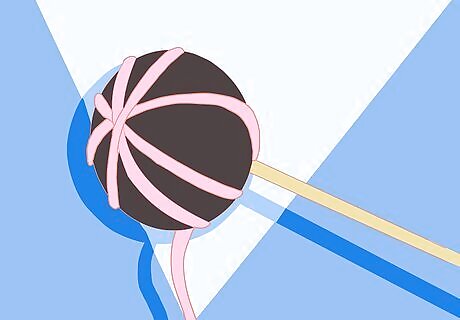
Turn it around the shaft again and follow the previous 2 steps to make another X. This X should be a 45 degree turn compared the first X. Now from above it should like 4 lines intersecting at the middle. Kind of like a pizza pie with 8 slices.

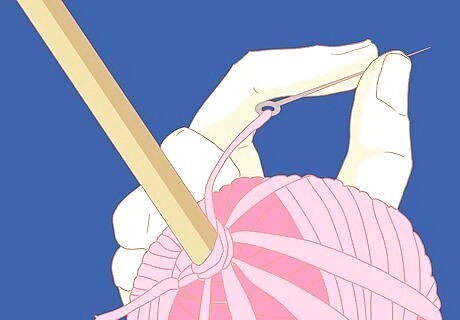
At the top of the mallet there should be a little nipple where the lines overlap. Start wrapping OVER the mallet slightly off-center. When coming over hook the yarn tightly around the nipple, NOT directly on top of it.
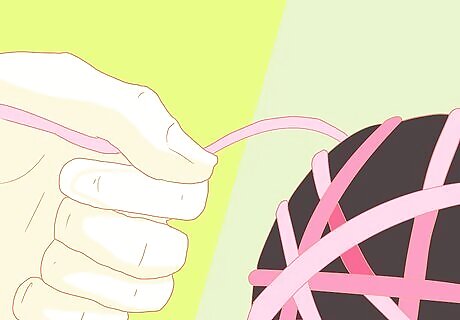
Keep wrapping the same way and keep count of how many times you wrapped it. (Remember not directly over the intersection of the first 4 wraps that made the "pizza looking pattern" or "overlapping X's pattern") You can wrap anywhere from 100-275 wraps. The hardness of the mallet depends on the type of yarn, the core, and the amount of wraps. Try it occasionally to see if its the sound you want. Be careful though because it might unravel.

When done with the number of desired wraps, there should be a little hole at the top. Leave about 3 inches of slack and cut the yarn. Thread the end of the yarn into the needle.

With the needle, stitch the top of the mallet. (To do this think of a donut. Imagine wrapping a donut with yarn. Through the middle, pull from the bottom, and do it again.) Using this technique might fill the hole if using a thick enough yarn.
Repeat this pattern tightly. Right when there is no more slack cut the yarn and any remaining slack should be tucked in the hole at the top and can be glued tight.
Using the same "donut" stitching technique, stitch a bottom ring with the 3 inches of slack left in the beginning. If the mallet ever loosens from the bottom, restitch it quickly. If the clove hitch shows and the slack gets too long, the mallet might unravel.

Repeat the steps before this again to make an identical second mallet. Wrap the yarn the same amount of times to get the closest sound possible.
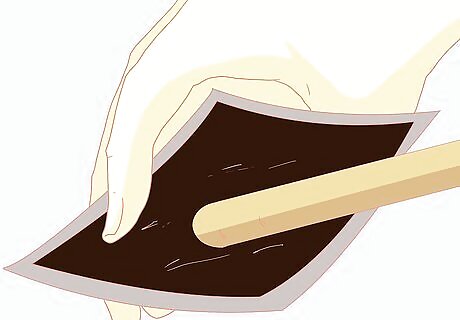
Sand down the dowels to the exact same length and smooth out the bottom if you might use them in a 4 mallet grip.


Comments
0 comment