

Choosing a Medium
Consider your goal. What types of painting and art are you hoping to create? Do you need a lot of time to work on a single project, or do you hope to fully finish pieces in a single sitting? Do you have a spacious work area that is well ventilated, or a small area that might cause fumes to build up? How much money do you hope to spend on supplies? These are all important things to consider before committing to a type of paint. Some people may use (say) acrylic paints, while others use oil paints, so try out different types of paint to find what works best for you.
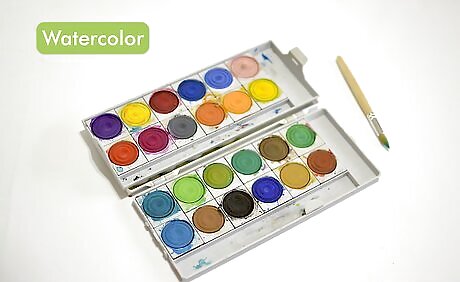
Try watercolor paint. Watercolors come in cases or small tubes of pigment. When used alone, they are thick and opaque, and do not cover much area. When used in combination with water, they will thin out and become transparent. Watercolors are used on specific paper made for use with watercolor; any old piece of paper will not necessarily work very well. These paints don’t allow thick layers of color, but give the beautiful effect of thin, translucent layers of color. Watercolor paint sets begin for as little as $20 and can range to prices far above $100. For a quality beginners set of paint, expect to pay between $50-$80 to start. Because watercolor can only be done on special paper that won’t wrinkle and curl when it comes into contact with water, there are limited options for things to use as a “blank canvas,” unlike acrylic and oil paints.
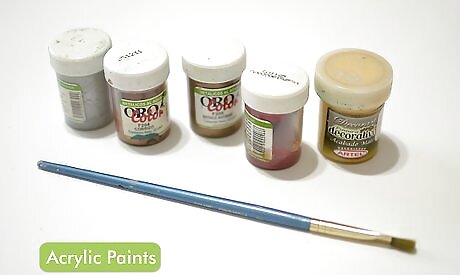
Think about using acrylic paints. Acrylic paints are another water-based paint option with a fast drying time and low fumes. These are a great choice for anyone interested in whipping up a completed painting in a single day. Thick layers of paint can be stacked up for a beautiful 3D effect, and because they are water soluble they can be wiped off surfaces and washed out of textiles. The downside is that because they dry so quickly, blending and wet-on-wet painting techniques can be difficult. The application style and overall appearance of acrylic paints is most similar to oil paints. Acrylic paints are typically less expensive than oil paints, and require many less additives. They are a bit more intuitive in terms of layering and technique than watercolor paints, though. Acrylic paints are much less toxic than oil paints, as they don’t give off fumes or require heavy ventilation. If you are working in a small space or have pets and children around, acrylic paint is a safer option than oil.
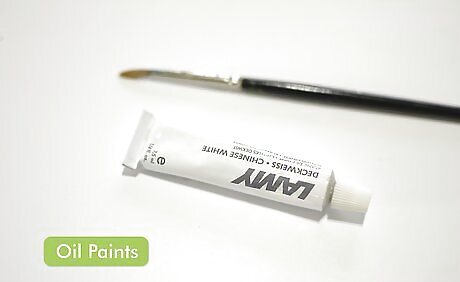
Consider using oil paints. Arguably the most advanced option of the three painting mediums, oil paints are slow-drying and thick, they offer dozens of specialized techniques. These take about three months to dry completely, making them the best option for someone who needs or wants a lot of time to work on a painting to completion. On the downside, they are slightly toxic and require a great deal of ventilation when being used. Oil paints are the most expensive option of the three paint mediums, and require several additional supplies including mineral spirits and gels. Oil paints have the richest color of the three paint mediums, and will dry true to the mixed color.
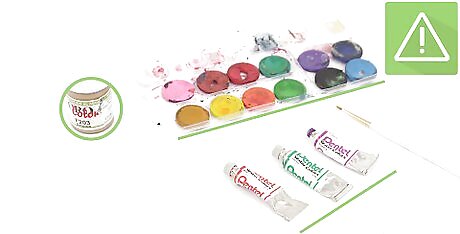
Get quality paints. When you’ve decided on which type of paint you want to use, you will have to select a brand to go along with it. As a beginning painter, it is tempting to want to purchase the cheapest available brand. However, you will save yourself time and money (in the long run) by purchasing quality supplies. There are higher levels of pigment in good quality paint, meaning that a single stroke is all that is required while 2-3 may be needed to get a solid coat of paint with a cheap paint. You’ll end up using a cheap tube of paint much faster (and with much more frustration) than a more expensive tube of paint. A craft store called Hobby Lobby has art supplies for budding painters. Things from large and small canvas to painting kits, this store is full of helpful materials.
Learning the Elements of Painting
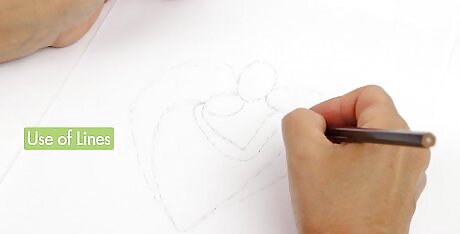
Understand the use of lines. The most basic type of line used in art is a contour line; this is the line drawn to outline an object. Some painters include contour lines around their subject, while others only use patches of color to show shapes. Determine whether or not or intend to use very obvious lines (such as contour lines) in your painting or not.

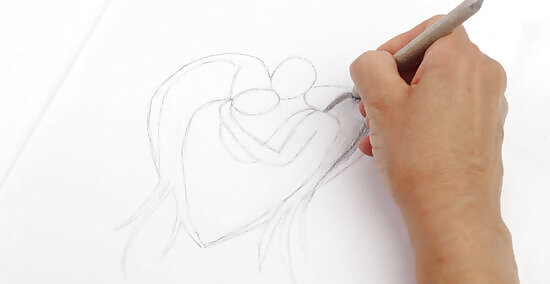
Learn how to build up shapes. Every object that can be painted is a culmination of several shapes put together. The biggest issue beginner painters have is trying to see one subject as a single shape, rather than a layering of many shapes. Instead of focusing on drawing the outline of a figure, consider it as multiple shapes that can be connected.
Understand value. Value is what color your figure is when converted to the gray scale; how light or dark a certain color is. Value is important when mixing paints, as colors can be deceptive when mixing unless thought of in terms of lightness and darkness. Realize that most paintings will only contain a value range in the bottom third (mostly light colors), the middle section (mid grays/medium tones), or in the top third (mostly dark colors) of a gray scale. Unless there is heavy contrast, the values in your painting should all be similar to each other.
Use your space effectively. Because you’re working on a flat surface, you need to create the illusion of distance through the use of space. To maintain a flat surface, keep objects the same size and spaced out. To create depth, overlap shapes and make things further away smaller while things close to the viewer should be larger.
Learn how to create texture. For things to look touchable in your painting, you need to create the illusion of texture. Texture is created by using different brush strokes and moving the paint in different ways on the canvas. Short, quick brush strokes will add fur-like texture while long, flowing brush strokes will make things look softer and longer. You can physically build up the paint on the canvas to create texture as well.
Create movement with your paint. Movement is like the continuation of texture, but on a larger scale. Movement is created when a texture pattern is repeated over and over on the entire canvas. Not all paintings require movement, but if you are trying to create a realistic painting, then movement is an important element to incorporate.
Look at your overall composition. The layout of your painting, the placement of objects and figures, is known as the composition. In order to create an interesting composition, figures must be placed in such a way as to cause the viewer’s eyes to circle the entire painting. Avoid putting a single figure in the center of your painting, as this composition is the most basic. Create interest by putting a single figure on an intersection of thirds, or by adding other interesting objects to the background.
Creating Your Painting
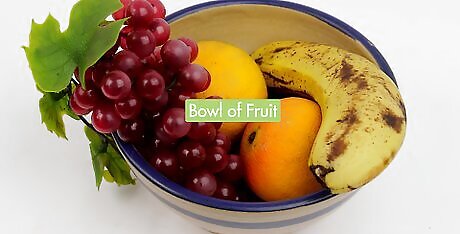
Choose a subject. The most important decision of your painting is deciding on a subject to focus on. For most beginner painters, it is easiest to choose an image (which is already flat) and painting a copy of that rather than choosing a 3-D object. To start, find something with basic lines and shapes, without too many colors, that would be easy to test your painting skills on. Common beginning painting subjects include: A bowl of fruit A vase of flowers A stack of books
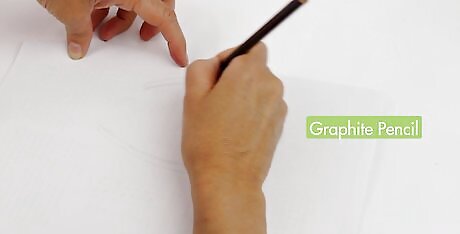
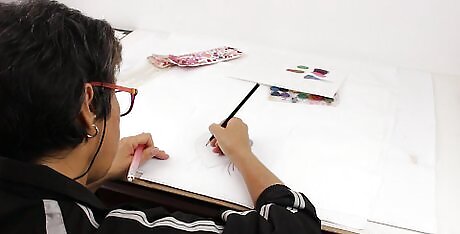
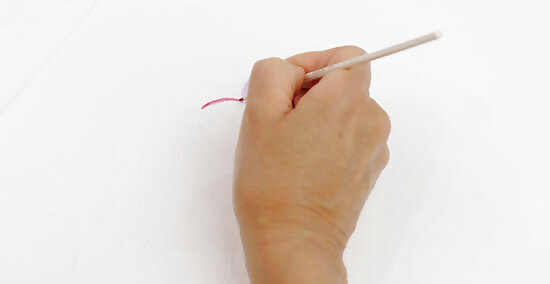
Create a sketch. Although it is not a requirement, many painters find it helpful to draw a rough outline of their figure on their canvas prior to painting it. Use a light graphite pencil to gently sketch the outline of shapes and figures on your canvas. You will be painting over this, but having a light outline will help you to keep your paint in the right areas.
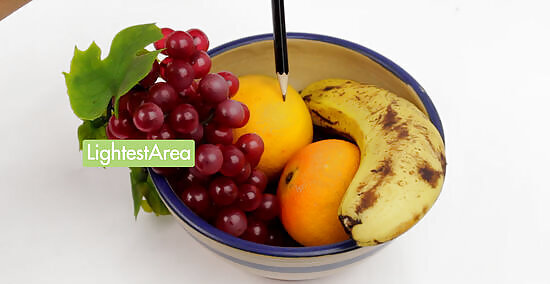
Find the light source. The colors your mix and the placement of paint on your canvas both rely on one major thing, its light source. Look at your subject, and determine where the lightest areas and the darkest parts are. Mix your paints with these in mind, creating several shades or tints of a single color to effectively blend colors together if necessary.
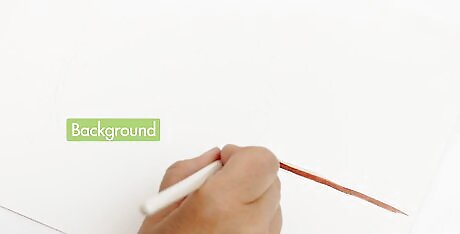
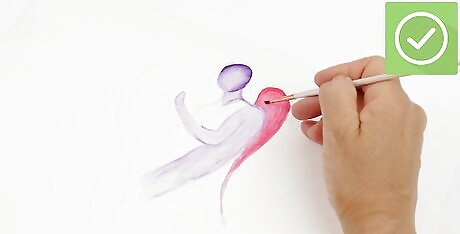
Start painting the background. When painting, it is best to work from the back to the front. This will help you to accurately layer objects and create the perception of distance. Paint with a single color at a time, going back and adding other layers of color as your work. Your background should be painted first, and you can add objects closest to the foreground later.
Add in your subject. When you’re happy with the background, you can add in objects and shapes. Work with layers of paint, similarly to the way you added the background in. Your subject is the center of attention for your painting, so it is important that you spend plenty of time paying attention to incorporating all the elements of art into it. Analyze it from all perspectives, and focus on recreating shapes rather than the entire figure. If you’re having a difficult time painting your subject accurately, flip your painting upside down. Painting it from a different angle will force your eye to look at the shapes that make up the figure accurately, rather than the symbol of the shapes your mind creates. Start with the lightest colors, and then work with darker colors. It is difficult to layer dark colors over light ones, so start with whites and pastels before moving onto hues and tones.
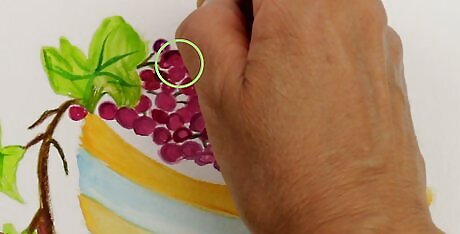
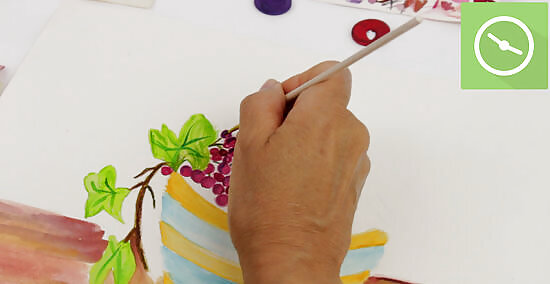
Add in details. As you begin to finish your painting, add in the details you want for your background and figures. Many times this includes adding texture with your brush, a wash or glaze, and small or intricate figures as an overlay. This is the time for you to really get minute and focused on finishing touches.
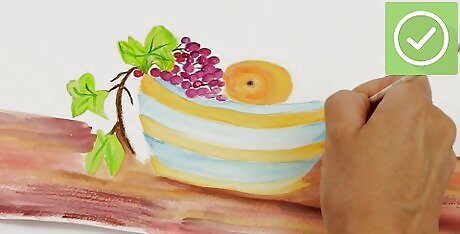
Clean up. With the completion of final details, your painting is done! Touch up any mistakes on your painting, sign the corner, and clean up your work materials. It is very important to thoroughly clean your paint brushes so that they stay in good condition and will work well for future projects. Save any paint that you have left in containers, and store away your art supplies.
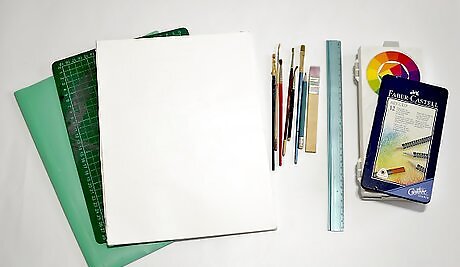
Getting the Remaining Supplies
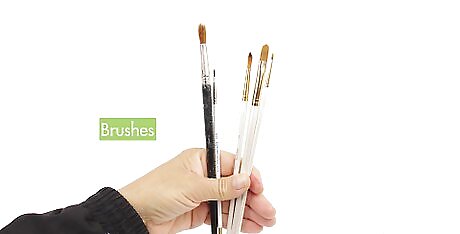
Choose your brushes. There are two primary things to pay attention to in choosing a brush: the shape of the bristles, and the material of the bristles. Bristles come in three shapes: round (with a pointed cylindrical tip), flat, and filbert (like a flat brush that comes to a point). The bristles can be made out of sable (mink), synthetic, synthetic mix, hog, or squirrel hair. For watercolor painting, the best brushes are sable or squirrel, with a round tip. The best paint brushes for acrylic painting are synthetic or synthetic mix with a flat tip. For oil painting, the best options to use are synthetic mix and hog with a filbert tip.
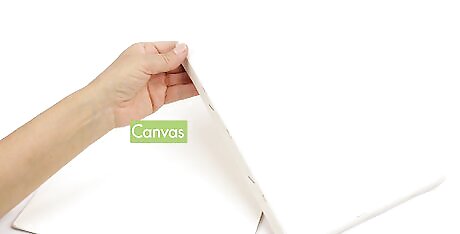
Get your canvas. Stretched canvas is the best option for acrylics and oils, as it is relatively cheap. However, thick drawing paper, canvas board, and watercolor paper are all good options as well. Oil and acrylic paints can be used on most smooth surfaces, including wood and plastic, but the surface must be primed first to allow the paint to grip. Watercolor paints can only be used on special paper or fabric. Don’t use regular printer paper or another thin paper for painting, as the paint will be too heavy and wet and will cause it to curl and warp. If you plan to paint on wood or plastic, you will have to prime it first so that the paint sticks.
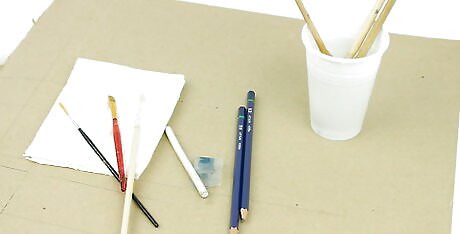
Get your other supplies. In addition to those primary supplies, you will need a pallet, jars full of water (two is good - one for washing your brush and getting the color out and the other for wetting your paints), and a rag, an old shirt or apron to wear. Other specialty supplies are required for oil paints, but are not needed for watercolor or acrylics. It is helpful to get gesso as well; it is a white primer that preps any surface (canvas and paper included) to create the best painting surface. Not necessary for most painting but often desired, an easel can be used to prop up your painting. Otherwise, any flat, stable surface will work for painting on.
Mixing Colors
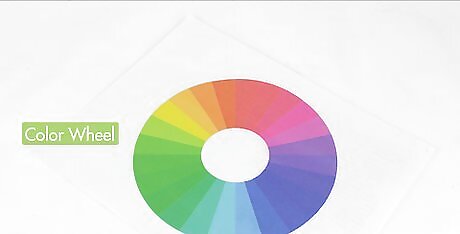
Familiarize yourself with the color wheel. The color wheel is a map of colors, showcasing the ways new colors can be created. There are three sets of colors present: primary, secondary, and tertiary. Primary colors are: red, blue, and yellow. These are colors that come straight from a tube; they cannot be made from mixing other colors. However, secondary colors (purple, green, and orange) can be made from the primary colors. Tertiary colors are in between primary and secondary on the color wheel (think teal or peach). Red + Yellow = Orange Yellow + Blue = Green Red + Blue = Purple
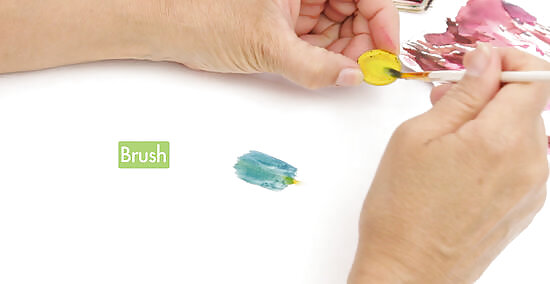
Mix your colors. If you would like a more varied choice of colors then you may choose to mix a range of colors to make your choicest one. Nothing is worse than creating a painting using colors only straight from the tube. Mix your colors together to create new variations; mix the two primary colors in equal amounts for a true color, or add a little more of one color than the other. For example, making purple with slightly more blue than red will result in a bluish indigo color, while mixing with more red may result in a deep maroon.
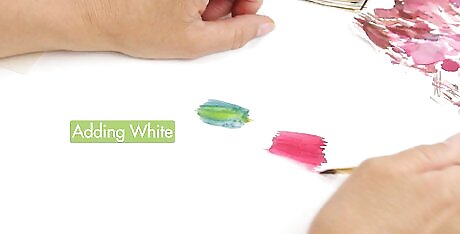
Create different tints. Adding a small amount of white to any color will make it lighter, turning it into a tint. Most from-the-bottle colors are very vibrant and bold, and can be made more pastel-like by adding white. It is harder to add white to a color, so try adding a bit of your color to white paint first. You will have to use less paint to make a tint in this fashion.
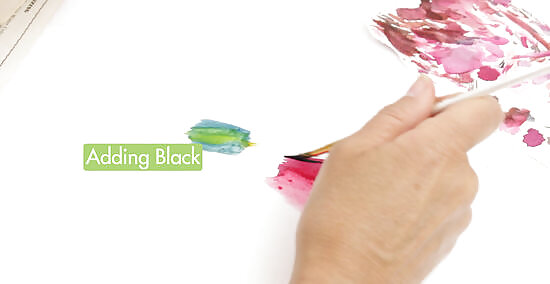
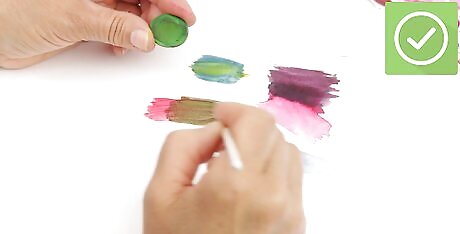
Mix some shades. The opposite of a tint, a shade is when you mix any color with black. This makes the color slightly darker, i.e turning red into burgundy or blue into navy. It is easiest to add a small amount of black to your color (rather than adding your color to black paint) to accomplish your shade. In this case, less is more - always start with the smallest amount of paint possible to avoid making a drastically different color right off the bat.
Create different tones. If a color is too bright for your liking, mix the color’s opposite into it to dull the vibrancy. Doing this is changing your hue (true color) into a tone; you’re toning the color down. A color’s opposite is the one directly across from it on the color wheel. For example, the opposite of red is green, yellow is violet, and blue is orange.


Comments
0 comment