
views
Using the Photos App
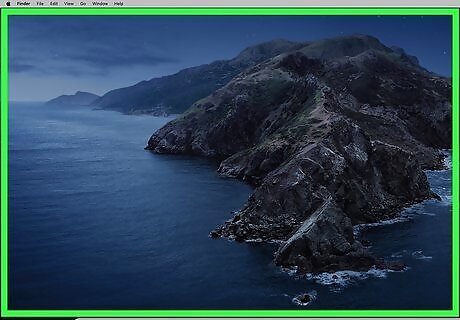
Click on an empty space on your desktop. Follow this method if you want your background to rotate through a specific selection of photos from your camera roll. You’ll start by creating a folder, so first click on an empty space on your desktop.
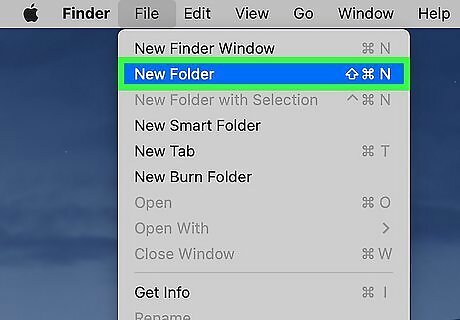
Click on File > New Folder. “File” is located on the left of the top menu bar. "New Folder" is in the File dropdown menu.
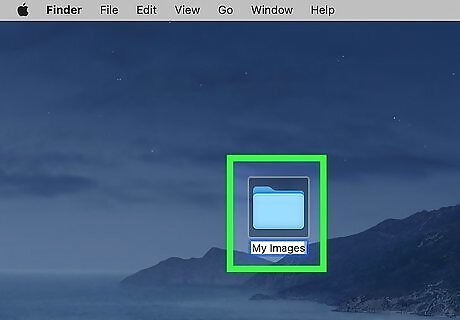
Rename your new folder. A folder labeled “untitled folder” will now appear somewhere on your desktop. If you want to rename it, click once on the folder, then click File > Rename in the top menu bar. Now type in a name and press Enter on your keyboard.

Open the Photos app. This is located in your dock and it looks like a white square with a circular rainbow inside.
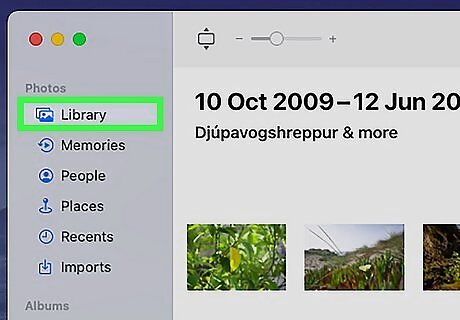
Click on Library. This is at the top of the left menu. It displays your entire photo library. If you want to narrow down the photos displayed, feel free to click on any of the other categories/albums in the left menu.
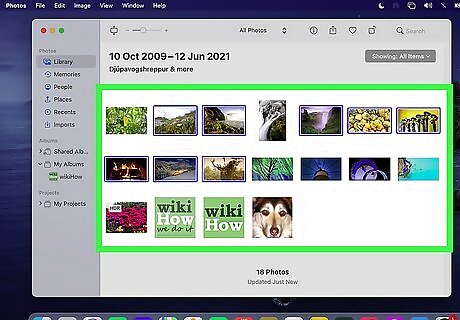
Select the photos you want in your desktop background. To select a consecutive group of photos, click on one photo, press and hold Command + Shift on your keyboard, and then click on another photo. This will automatically select all of the photos in between the two that you clicked. To select individual photos, click on one photo, press and hold Command on your keyboard, and then click the other photos you want.
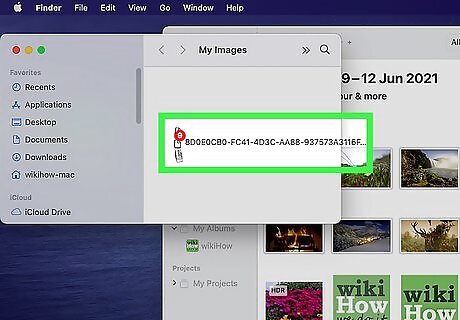
Drag the photos into your folder. Click and hold your cursor on one of the photos you selected. Now drag it to the folder on your desktop, and release. Your selected photos will now appear in that folder.
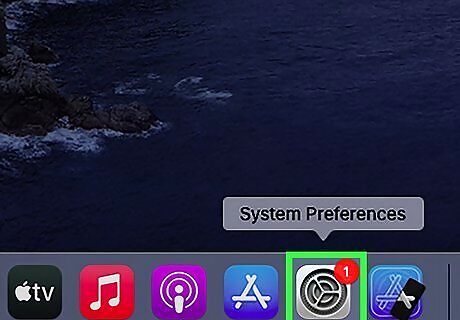
Open System Preferences. This is located in your dock, and it looks like a gray square with a gear inside. Click to open.
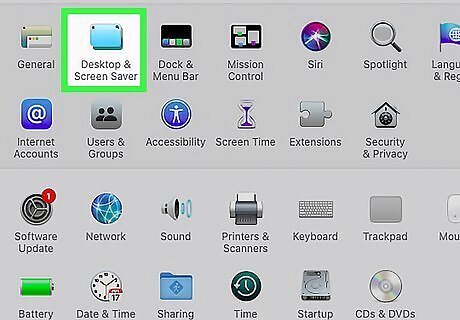
Click on Desktop & Screen Saver. This is located near the top left corner of System Preferences, and the icon looks like a light blue rectangle.
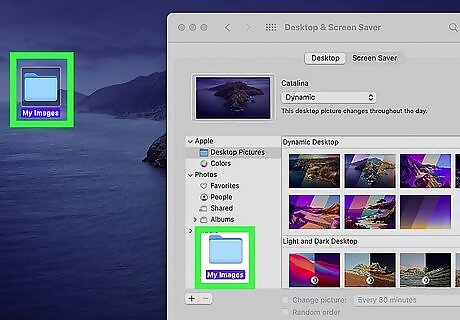
Drag the folder into System Preferences. Click, hold, and drag the folder from your desktop into the left menu on System Preferences. Your folder will appear as a subcategory under “Folders” in the left menu.
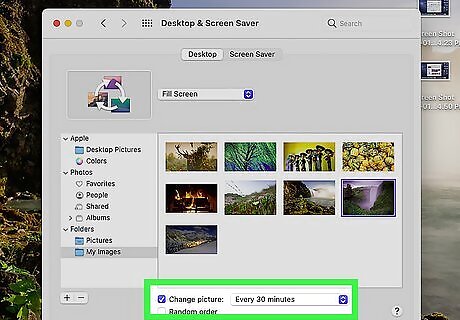
Click on Change picture. Click on the square button next to Change picture near the bottom of the window.
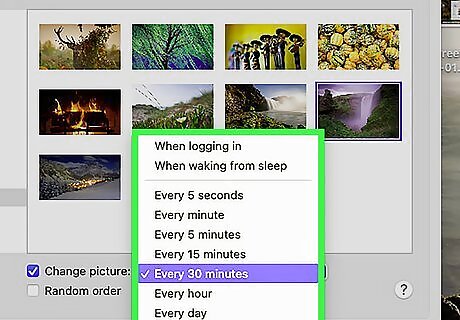
Click on the frequency dropdown menu. This is located to the right of “Change picture.” This indicates how frequently your desktop background will change, so click on one of the various options in the dropdown menu.
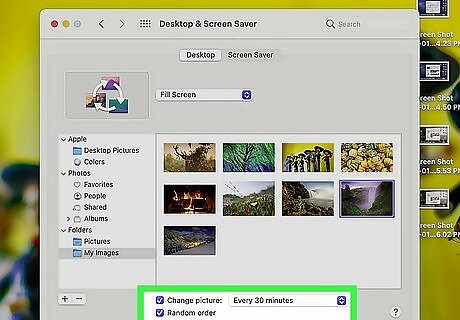
Click on Random order (optional). If you want the pictures to appear in a random order, click on the square button next to Random order near the bottom of the window.
Using System Preferences
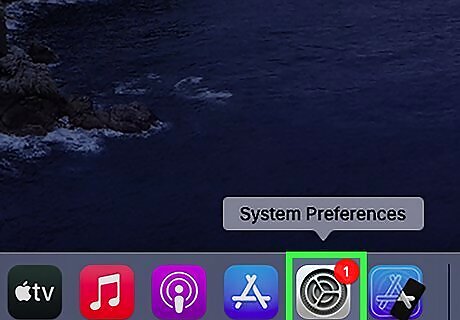
Open System Preferences. This is located in your dock and it looks like a gray square with a gear inside. Click to open.
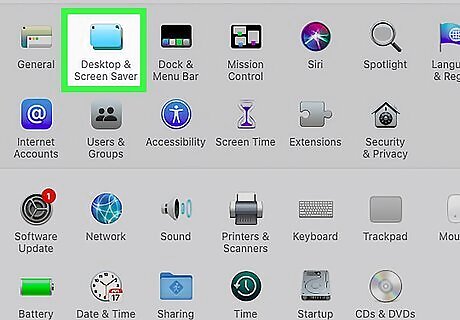
Click on Desktop & Screen Saver. This is located near the top left corner of System Preferences, and the icon looks like a light blue rectangle.
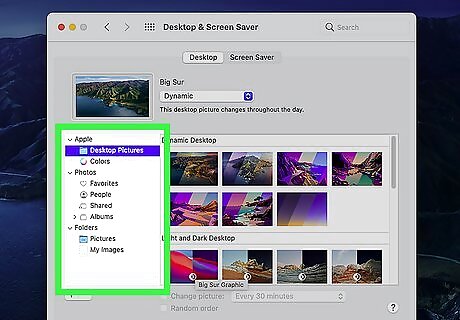
Select the location of the photos you want to use. Click Apple in the left menu if you want to use Apple’s desktop backgrounds. Click Photos. If you would rather use your own photos, click on this button in the left menu. Selecting Photos means your background will cycle through all of your photos on iCloud. If you want to narrow the selection down, click on any category/album underneath "Photos." You may not be able to see these other categories if you haven’t expanded the Photos menu. Do this by clicking on the arrow to the left of Photos. Some of these subcategories can also be expanded (for example, expand the “Albums” subcategory to click on a specific photo album).
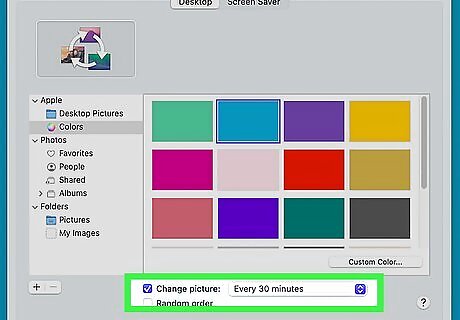
Click on Change picture. Once you’ve selected a category from the left menu, click on the square button next to Change picture near the bottom of the window.
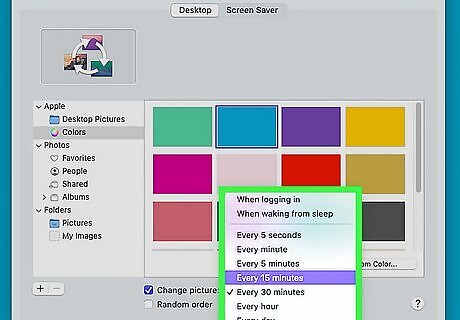
Click on the frequency dropdown menu. This is located to the right of “Change picture.” This indicates how frequently your desktop background will change, so click on one of the various options in the dropdown menu.
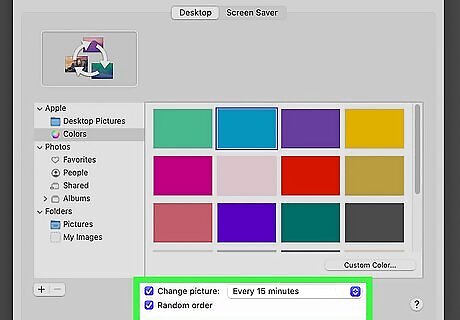
Click on Random order (optional). If you want the pictures to appear in a random order, click on the square button next to Random order near the bottom of the window.


Comments
0 comment