
Cutting the Fabric

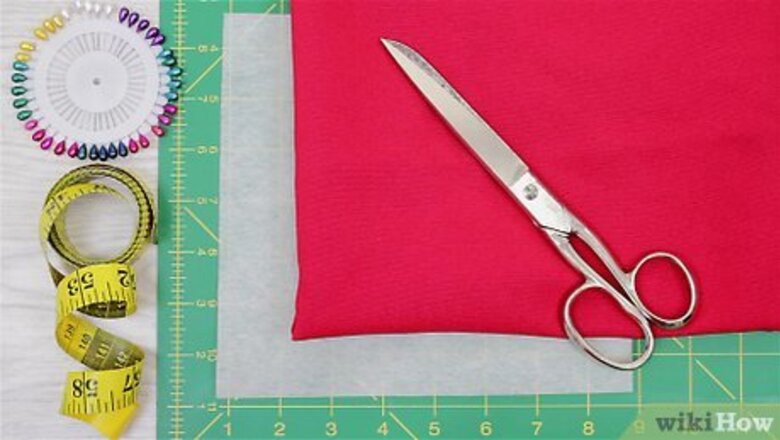
Gather your materials. Sewing a welt pocket requires some special materials. Before you get started, you will need: Fabric for the pocket. Use the same color of fabric as your sewing project if you want the pocket to blend in. If you want it to stand out, then you can use contrasting colors. Fusing Ruler Chalk or marker Scissors Sewing machine The item you want to have a welt pocket.

Cut out two large rectangles of the pocket fabric. You will need to cut out rectangles that are large enough to cover the width and length of your entire pocket. Make sure to cut the rectangles to the same size. Also, consider the size of your garment and how big you want the pockets to be. For example, if you want your pockets to be 4 inches (10 cm) wide and 9 inches (23 cm) deep, then you should probably cut rectangles that are 6 inches (15 cm) by 11 inches (28 cm). This will ensure that there is plenty of material to make the pockets.
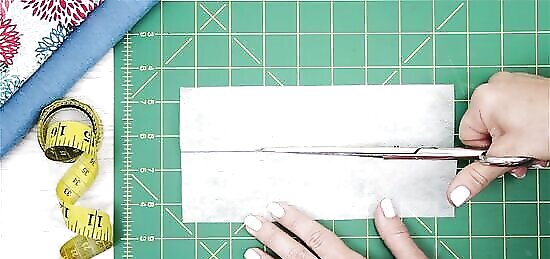
Cut the fusing into two strips. Next, you will need to cut strips out of your fusing material. These strips will need to be large enough to cover the opening of your pocket, so cut the strips to be slightly larger—1 inch (2.5 cm) wider—than the desired length of your pocket opening and only 2 inches (5 cm) wide. For example, if you are planning a pocket that is 4 inches (10 cm) wide, then cut two strips that are 5 inches (12.7 cm) by 2 inches (5 cm).
Creating the Pocket Opening
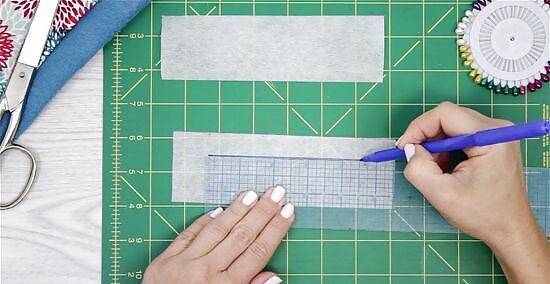
Draw two parallel lines on one piece of fusing. When you have all of your material and fusing cut out, you will need to draw two parallel lines on one piece of your fusing. The lines should be the desired width of your pocket opening. Use a ruler to make these lines. For example, if you want to have a 4 inch (10 cm) pocket opening, then draw two parallel 4 inch (10 cm) lines on the fusing. Space the lines so they are about ½ inch (1.3 cm) apart.
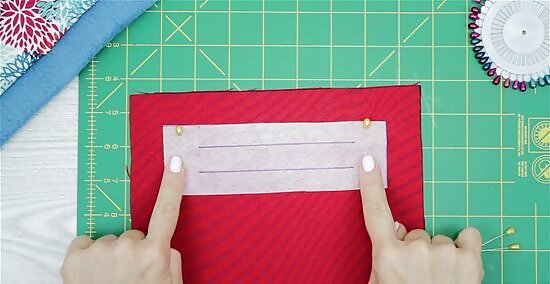
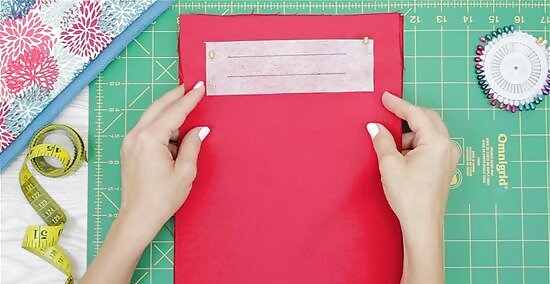
Pin one piece of the fusing to each piece of fabric. Pin the fusing strips onto the wrong sides of the fabric at the location where you want the pocket opening to be. Make sure that you pin the fusing to the same spot on both pieces of fabric so that they will line up when you stack them.
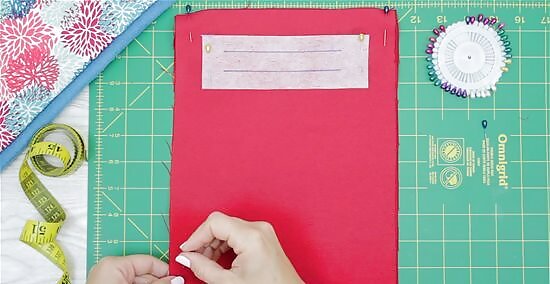
Stack the two pieces of fabric so that the fusing is facing out. Next, lay the fabric with the piece of fusing with no lines drawn on it so that the fusing is facing down. Then, lay the other piece of fabric with the lined fusing pinned to it so that the fusing is facing up. Remember to line up the fusing strips! They need to be as even as possible.
Pin the rectangles to the right side of your sewing project. Identify where on your sewing project you want the welt pocket to be. Then, pin the rectangles—lined fusing side up—onto your project. If you just want to make a welt pocket for practice first, then follow the process without pinning your rectangles to a sewing project. You could always sew the pocket into a project later on if you prefer.
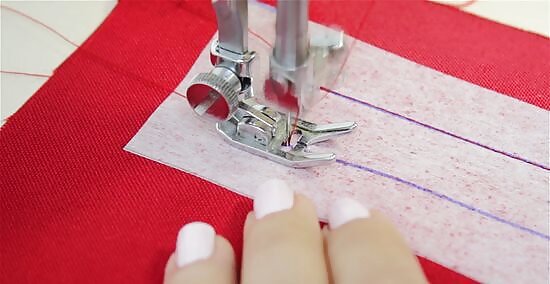
Sew across each of the two lines that you drew. When the fusing is all lined up, use a straight stitch to sew across each of the two parallel lines that you drew on the top piece of fusing. Sew through both pieces of fusing and all layers of fabric. Only sew across the lines for now. Do not go beyond the lines or sew in the areas between the lines.
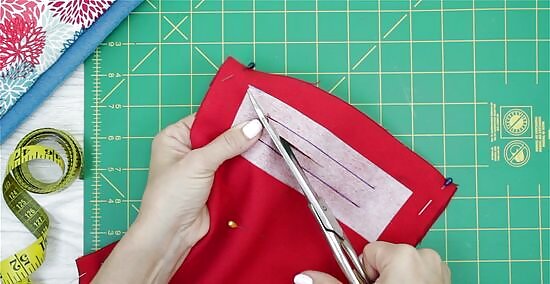
Cut a slit down the middle of the two lines. When you have finished sewing the lines, remove the fabric from the sewing machine and snip the excess threads. Then, you will need to cut down the middle of the two lines. However, do not start right where the lines start. Begin cutting about ½ inch (1.3 cm) into the lines and stop cutting about ½ inch (1.3 cm) from the end of the lines. Then, cut a diagonal line to the end of each of the lines on both sides. The diagonal lines at the ends will make it easier to fold the material under and create the pocket opening.
Finishing the Pocket
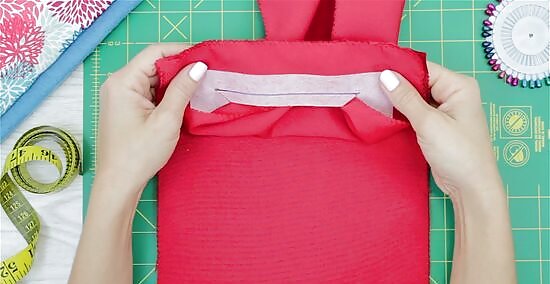
Pull the fabric on one side of the pocket through the pocket opening. To make your two pieces of fabric and fusing start to look like a pocket, you will need to pull the fabric on the front side (lined fusing side) of your pocket through the opening you just created. Pull all of the fabric all the way through the opening.
Tuck the pocket fabric under. Next, begin tucking the fabric around the opening to define the rectangular area that will be the pocket's opening. Make sure that the material is neatly folded and tucked under to form a long rectangular opening.

Fold down the short end of the fabric and iron. Next, you will be creating the top half of the covering for your welt pocket. To do this, fold down the top layer of fabric above the pocket opening on the front of the pocket so that the fabric is inverted and completely covering the opening. The fusing on the opposite side should be visible when you do this. Use an iron to press the fabric down and create a crease in the fabric.
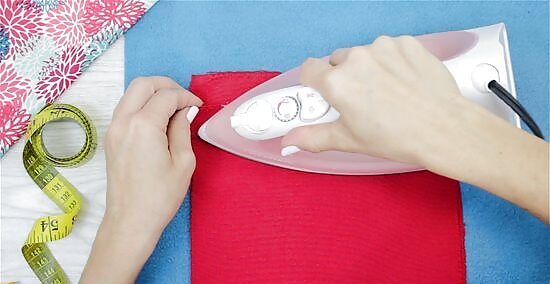
Fold again so that the opening is halfway covered. Next, fold the piece of fabric upwards so that it is only half covering the rectangular pocket opening and so the fusing is hidden. Then, iron over this area as well to form another crease. This will complete the top half of your welt.

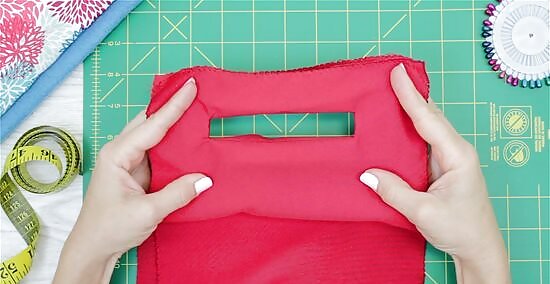
Repeat the same process with the bottom half of the fabric. You will need to do the same thing to create the bottom half of the welt pocket opening. Fold the fabric all the way up first, press the fabric, and then fold it down so that the fabric is only covering half of the opening. The edges of the top and bottom flaps should be even. If you prefer, you can also do a single welt pocket. This is when you only make a top or bottom flap. In this case, you would need to fold the top or bottom of the fabric enough so that it covers the entire opening.

Sew around the welt. When you are finished folding and pressing your welt, you will need to secure it by sewing around it. You may sew around the entire welt, or you may just tack down the sides. Either option is fine. Choose a matching or invisible thread to sew the welt in place and sew. Sewing around the entire welt will make the pocket more secure, but some people prefer the look of less stitching around the pocket and opt to just tack down the short sides of the welt.
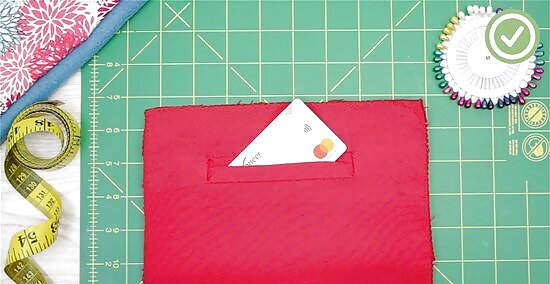
Create the pocket bag. The last thing you need to do is to create the pocket bag for your welt pocket. To do this, fold the fabric in the back of the pocket in half and then lift up the edges of the top part of the pocket. Sew around the sides and across the top of the pocket fabric to secure it. Your welt pocket is now ready to go!


Comments
0 comment