views
Using Live Trace
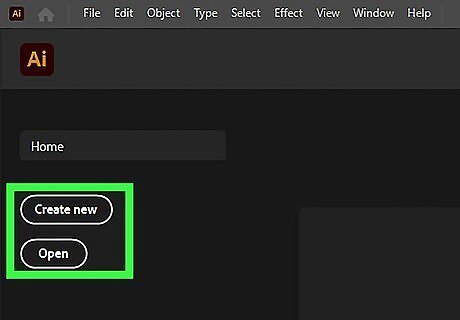
Open a new project in Adobe Illustrator. Adobe Illustrator has an icon that resembles a yellow square that says "Ai" in the middle. Click the Adobe Illustrator icon to open Adobe Illustrator. Then click Create New on the title page. Either select one of the intention tabs at the top (i.e. mobile, web, print, film & video) or enter the height and width for your artboard and select a color mode (i.e, RGB, or CMYK). Then click Create. Alternatively, you can open a new project at any time in Adobe Illustrator by clicking File in the menu bar at the top and then clicking New. Not all images are suitable for tracing in Adobe Illustrator. Photo-realistic images with lots of detail may take a long time to trace, use up a lot of computer processing power, and produce large files. The best images to trace tend to be simpler images with relatively few colors and details, such as logos, cartoon images, and illustrations the best images for tracing. You should also use a high-resolution image.
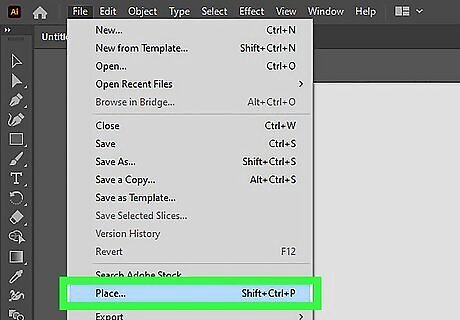
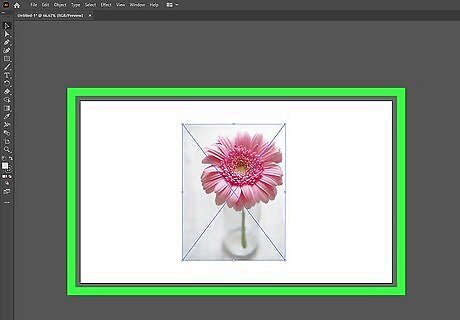
Place an image you want to trace. Use the following steps to place an image in Adobe Illustrator: Click File in the menu bar at the top. Click Place. Select an image you want to trace. Click Place. Click and drag the image to where you want it to go.
Select the image. To do so, press V on the keyboard or click the icon that resembles a black mouse cursor in the toolbar to select the selection tool. Then click the image to select it.
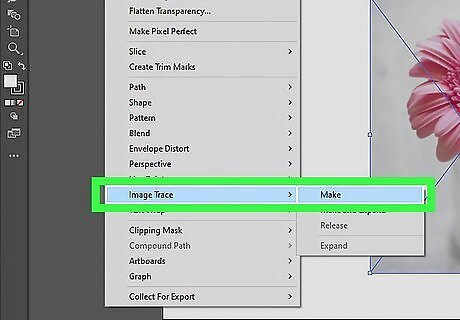
Open the tracing options menu. Use the following steps to open the tracing options menu: Click Object in the menu bar at the top. Click Live Trace. Click Tracing Options.
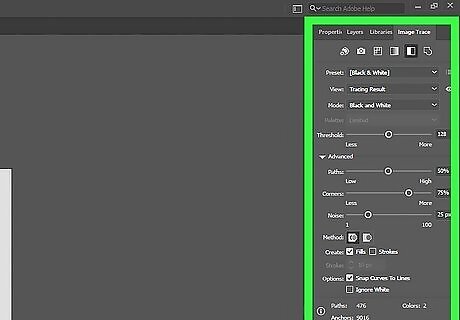
Adjust the Tracing options. The options in the Tracing Options menu are as follows: Preview: Click the checkbox next to Preview to see the results of the tracing options you select in real-time. Presets: Use the drop-down menu next to "Presets" to select a preset tracing option. This will automatically set all the other tracing options in the menu. Mode: This selects the color mode you want to use. Your options are "Black & White," "Greyscale," and "Color". "Black & White" uses only black and white colors. "Greyscale" uses black and white and a variety of shades of grey. "Color" allows you to use different colors. Threshold: Threshold is used only in black and white mode. It sets what shade colors are converted to black or white. Pallette: This allows you to select a specific color palette to use when converting images to color or greyscale. This option is not available for black and white mode. Max Colors: This sets the maximum number of colors or shades of grey that can be used in the image trace. Output to swatches: Click the checkbox next to "Output to swatches" if you want to save the colors used in the image trace as swatches that you can use later on. Blur: This blurs the original source images before tracing. This can help smooth jagged edges and reduce the number of blemishes. Use this slider bar to select how much blurring you want to use before tracing the image. Resample: This option re-samples the original image to a specified resolution before tracing the image. This can help speed up the tracing process but also result in degraded results. Fills: Click the checkbox next to "Fills" to create regions filled with color or shades of grey in the tracing results. Strokes: Click the checkbox next to "Strokes" to create strokes around the filled regions, which can be used to outline the filled regions. Max Stroke Weight: This specifies how large an area in the original images needs to be in order to be converted into a stroke. Areas larger than the specified stroke weight will be converted into fills instead. Min Stroke Length: This specifies the minimum length an area of the original image must be in order to be traced as a stroke. Path Fitting: This specifies how much distance is allowed between the pixels in the original image and the traced shape. A lower setting creates a tighter path around the pixel image. Minimum Area: This specifies the smallest number of pixels in the original image that can be traced. Corner Path: This specifies how sharp a corner must be in order to be traced as an anchor point in the trace results. Raster: Use the drop-down menu next to "Raster" to specify how the original image is displayed in the trace results. Vector: Use the drop-down menu next to "Vector" to specify how the traced image is displayed.
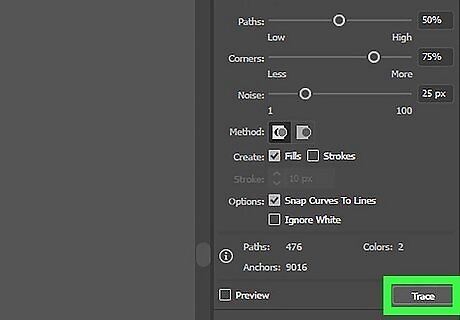
Click Trace. Once you are done adjusting the options in the Tracing Options menu, click Trace to apply the trace results.
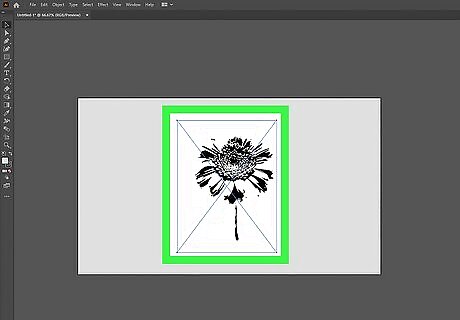
Ensure the image is still selected. You should see a blue bounding box around the image on your artboard. If you do not see a blue bounding box around the image, click the image with the selection tool to select it.
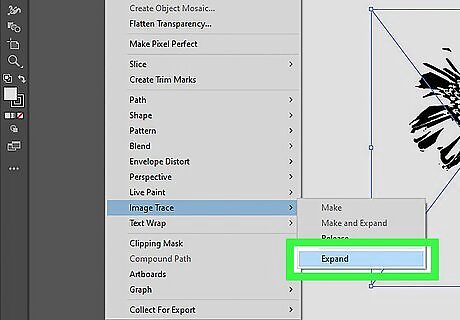
Expand the trace results. This applies the trace results to the traced images and allows you to edit vector points and colors in the traced image. Use the following steps to expand the trace results. Click Object in the menu bar at the top. Click Live Trace Click Expand.
Tracing an Image Manually

Open a new project in Adobe Illustrator. Adobe Illustrator has an icon that resembles a yellow square that says "Ai" in the middle. Click the Adobe Illustrator icon to open Adobe Illustrator. Then click Create New on the title page. Either select one of the intention tabs at the top (i.e. mobile, web, print, film & video) or enter the height and width for your artboard and select a color mode (i.e, RGB, or CMYK). Then click Create. Alternatively, you can open a new project at any time in Adobe Illustrator by clicking File in the menu bar at the top and then clicking New. Not all images are suitable for tracing. Photo-realistic images with lots of detail will be incredibly difficult to trace and produce large files that take up a lot of space. The best images to trace are simple images with relatively few colors. Cartoon images, artwork, drawings, logos, and illustrations are ideal for tracing in Illustrator.

Place an image you want to trace. Use the following steps to place an image in Adobe Illustrator: Click File in the menu bar at the top. Click Place. Select an image you want to trace. Click Place. Click and drag the image to where you want it to go.
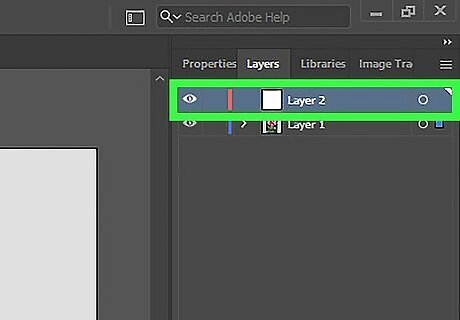
Create a new layer. To do so, open the Layers panel and click the icon that resembles a sheet of paper at the bottom of the Layers panel to create a new layer. The Layers panel is the icon that resembles two squares stacked on top of each other. If you do not see the Layers panel, click Window in the menu bar at the top. Then click Layers. You can add as many layers as you need. As you work, you may want to create different layers for different parts of the drawing. If an object in a layer is blocking your view, you can hide the layer by clicking the eyeball icon next to the layer in the Layers panel. Alternatively, you can hold Ctrl (or Command on Mac) and click the eyeball icon next to a layer to just show the outlines without the color.
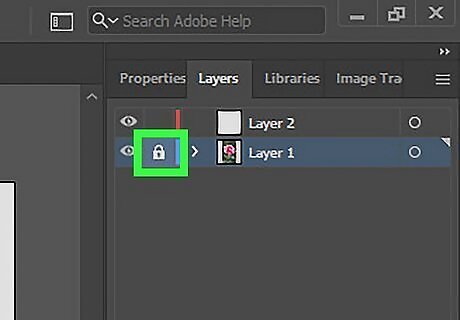
Lock the layer with your original image. To do so, click the blank square next to the eyeball icon to the left of the layer with your original image in the Layers panel. This locks the layer in place and prevents you from accidentally selecting the image and shifting it around.
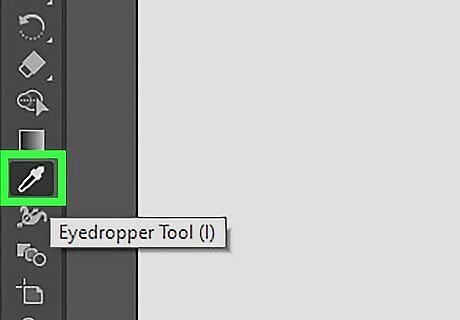
Use the eyedropper tool to select a color. The easiest way to select a color when tracing an image is to use the eyedropper tool. Click the icon that resembles an eyedropper in the toolbar, or press "i" on the keyboard to select the eyedropper tool. Then click the area in the image you want to trace to select the color. In Adobe Illustrator, you have two colors; the fill color, and the stroke color. The fill color is the color of the area of a shape. You can select the fill color by clicking the filled colored square at the bottom of the toolbar. The stroke is the color of the outline around a shape. You can select a stroke color by clicking the square with a colored border at the bottom of the toolbar. If you want to turn off the Fill or Stroke color, click the fill or stroke color box, and then click the white swatch with a red line through it.
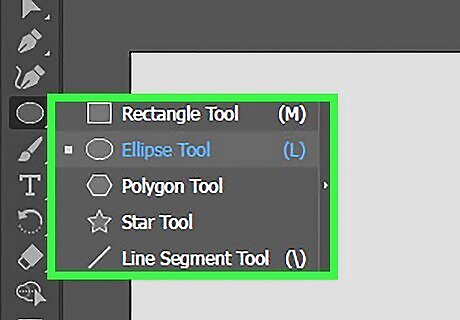
Use the shape tools to create simple shapes. You can use the shape tools to create simple shapes, such as circles and rectangles. To select a shape tool click and hold the rectangle tool in the toolbar which resembles a rectangle. Then click the shape tool you want to use. Click and drag over the shape you want to trace. Hold Shift while you click and drag to create a perfect square or circle using the rectangle or ellipse tool. Some shapes have menus that allow you to adjust the shape attributes, such as the number of sides in a polygon. To open a shape tool menu, select the shape tool and then click once on your artboard. You can also use the pathfinder to combine shapes, or cut shapes out of existing shapes. To locate the Pathfinder, click Window in the menu bar at the top and then click Pathfinder. Click two or more overlapping shapes, and then click the option you want to use in the Pathfinder panel.
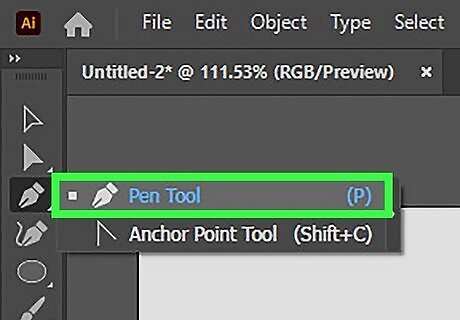
Use the Pen tool to trace more complex shapes. Click the icon that resembles a fountain pen tip in the toolbar or press P on your keyboard to select the pen tool. Then use the following steps to trace an image with the Pen tool: Click where you want to start a line. Click where you want the line to end to create a straight line. Click and drag to create a curved line. Click another point to create another line that continues the same curve. Click the anchor point to stop drawing or change the direction of a line or curve. Click the starting anchor point to complete the shape.
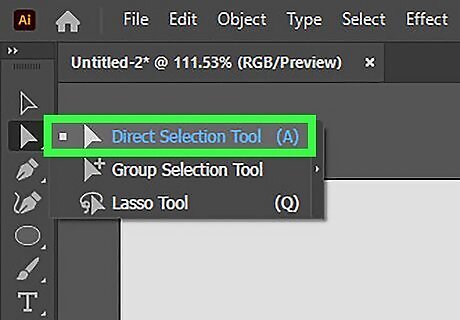
Use the subselection tool to adjust shapes. If you need to make adjustments to a shape, you can do so using the subselection tool. Click the icon that resembles a white mouse cursor in the toolbar to select the subselection tool. Then use the following steps to make adjustments to your shape. Click an anchor point on a line to select it. Click and drag the handles (bezier curves) to adjust the curve of a line. Click and drag an anchor point to move it.
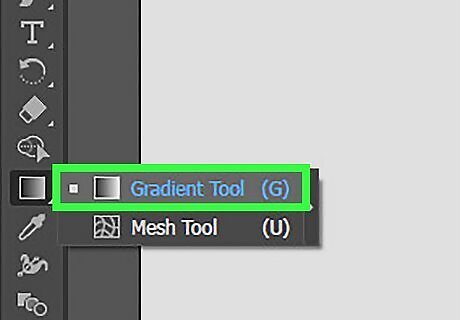
Use the gradient tool to add a color blend. The gradient tool allows you to add a color blend to shapes. You can use gradients to add a metallic sheen to an object, or you can use a gradient blend on a round object to make it look 3D. Use the following steps to add a gradient to a shape Select the object you want to add a gradient to. Click Window followed by Gradient to open the Gradient menu. Use the drop-down menu to select a linear or radial gradient. Double-click one of the color stops below the color strip (click below the color strip to add more stops). Select a color for the stop from the swatches. Repeat for additional stops. Click and drag the gradient blend in the sample window to the shape. Press G on the keyboard to select the gradient tool. Click and drag over the shape to adjust the direction of the gradient blend.
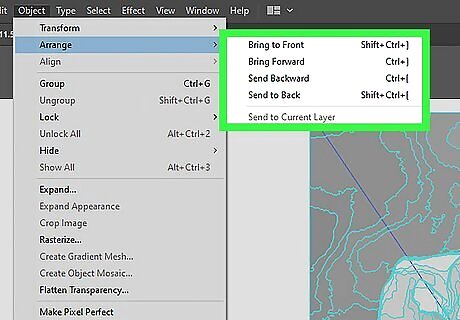
Move objects back and forward. You can have many different objects in a layer overlapping. Sometimes you need to move an object into the foreground or push it back into the background. Use the following steps to move an object back or forward: Select an object or shape you want to move. Click Object Click Arrange. Click Bring Foward to move the object forward by one increment. Click Bring to Front to move the object all the way to the front of the layer. Click Send Backward to move the object backward by one increment. Click Send to Back to move the object all the way to the back of the layer.







Comments
0 comment