
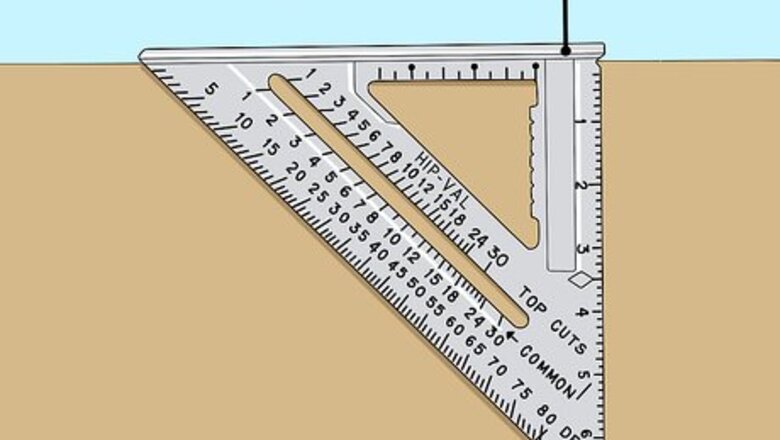
Protracting with a Speed Square
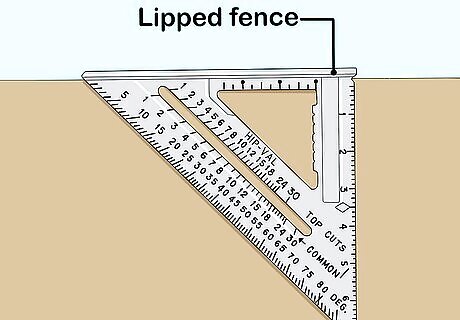
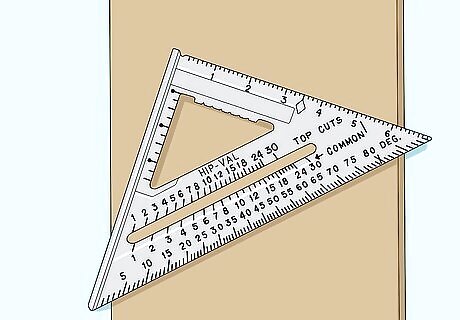
Press the fenced lip of the speed square flush with the wood. Keeping the speed square flush with the piece of wood you are using will keep the protracted angles accurate during later stages.Position the base of the speed square on the wood so that you can make the mark in the correct location. You will only need to keep one point of the speed square flush when pivoting it, but it is important to begin flush with the wood.
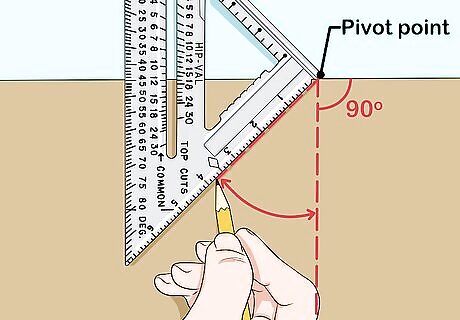
Use the pivot point to set the speed square to the appropriate angle. Holding the pivot point on the speed square, which is located at one end of the lipped fence, rotate the speed square until your desired angle matches with the end of the wood. Be as accurate as possible with your measurement, taking care to line the speed square exactly at the desired angle. The speed square will have ruler-like numbers on the hypotenuse side, which represent different angles ranging from 0 to 90.
Trace the base of the speed square. Once your angle has been aligned, trace the base, not the hypotenuse, to create your angled mark. Trace slowly and accurately, taking care to create a thick, visible line with your pencil. Once the mark has been made, erase the graphite if you feel like you've made a mistake and try again.
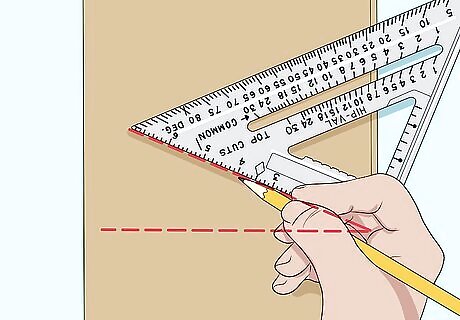
Reposition the speed square and draw a straight line. In order to gain an accurate representation of your angle and check your mark, position the base of the speed square with the end of the mark. Trace the base of the speed square to draw a straight line, allowing you to visibly identify the angled mark.
Marking Lines with a Speed Square
Identify where the line should be drawn. Depending on your project, decide where you need clear, concise lines to be drawn. Because the use of a speed square will vary depending on the project, create a plan specific to your needs and decide exactly where lines must be drawn. Use the square to locate and mark studs, position floor joists, lay out stair stringers, determine roof pitches, any other project that is dependent on straight lines. Creating a plan and knowing where you need the lines to be will help you plan ahead and make less mistakes.
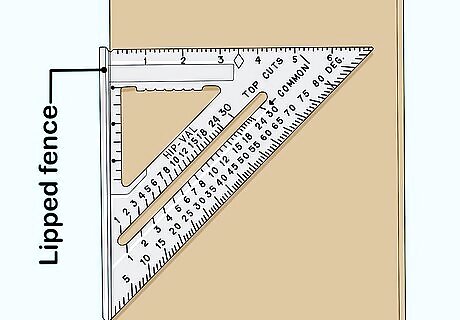
Position the lipped fence of the speed square against the edge of the wood. Identify the lipped fence, or fence of the speed square, and place it flush with the edge of the wood. When drawing lines, keep the lipped fence firmly pressed against the wood for best results. Use either side of the speed square, as both sides will have a lipped fence. The lipped fence allows you to brace the speed square flush with the wood, creating a straight or angled line that is proportionate to the wood's edge.
Draw a straight line. Use a pencil to draw a square, or perfectly straight line down your piece of wood. Place the graphite of the pencil against the base of the speed square and slowly trace the line. Make as many straight marks as your project calls for and redo the lines if you make a mistake. Straight lines are necessary for projects that call for shortening pieces of wood, especially when accuracy is a must. Using a pencil to draw the line will allow you to erase the mark if you make a mistake or change a plan.
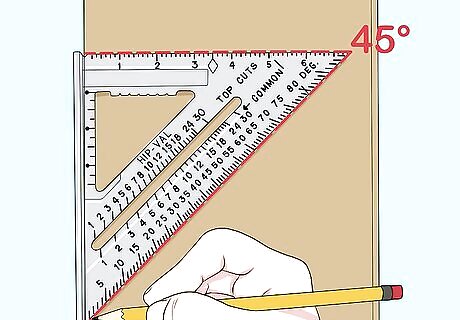
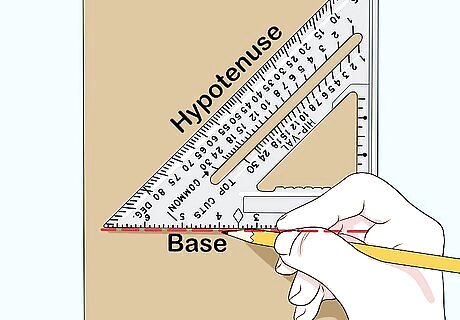
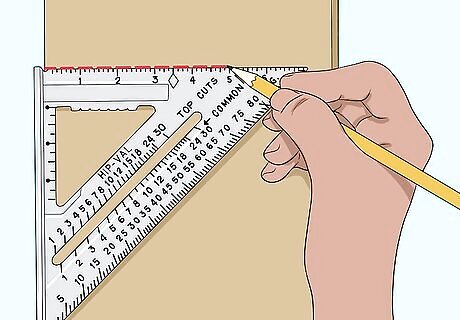
Draw a 45° line. Keep the lipped fence of the speed square flush with the wood and use a pencil to trace a line down the hypotenuse, or longest part, of the speed square. Trace the hypotenuse to create perfect 45° angles, especially during projects that call for perfectly angled pieces of wood. 45° lines are necessary for many projects, especially when it comes to roof rafters and other sloped pieces of wood. Check your speed square for numbers correlating to the angles of the pitch of your roof if it's not at a 45° angle. The hypotenuse is the longest line of the speed square, connecting the base of and the lipped fence.
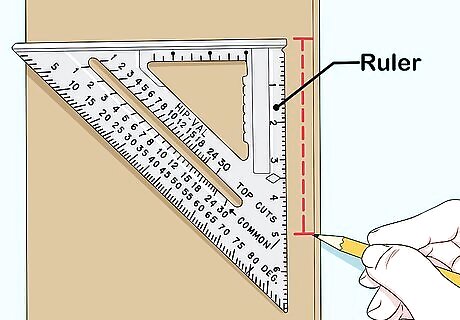
Use the ruler to measure distances between marks. With the ruler on each face of the speed square, measure distances between markings for accuracy. Take measurements for straight lines, as well as for 45° marks. The ruler on the speed square will allow you to make accurate, perfectly measured marks on pieces of wood.
Using a Speed Square as a Saw Guide
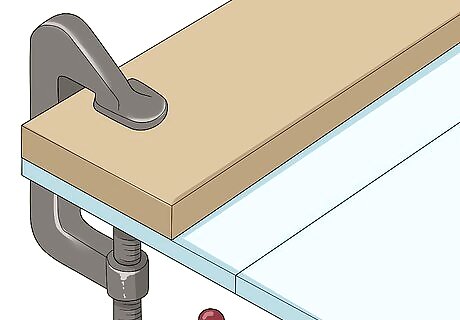
Clamp the piece of wood to a table. For safety purposes, it is important to secure the wood to the table. Use medium sized C-clamps that allow you to screw and secure the wood to the table. Tighten the clamps until the wood does not move when pressed on or pushed. Do not clamp the wood too tight, as this could damage or split the wood. Stop securing the piece of wood as soon as it is secure and unmovable.
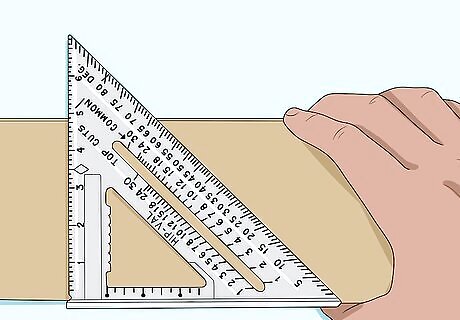
Place the speed square flush with the wood. Using the lipped fence of the square, brace it firmly against the wood to ensure it doesn't move while cutting. Consider clamping the speed square to the wood if you are nervous about it moving during your cut.
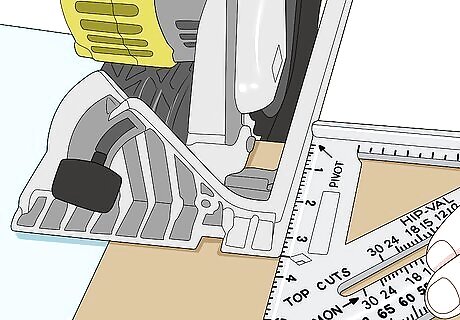
Run a circular saw along the speed square. Slowly pass the saw along the wood, keeping it flush with the speed square while making the cut. The speed square will allow you to cut steadily and accurately because the it is thicker than a framing square or combination square. Take care when operating a saw, wearing goggles and avoiding distraction. It is a good idea to take a few practice cuts before cutting the wood you need.


Comments
0 comment