
Setting Up Blinkist
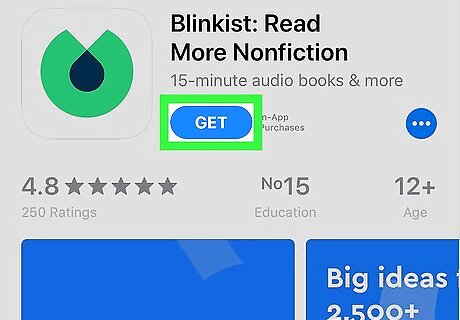
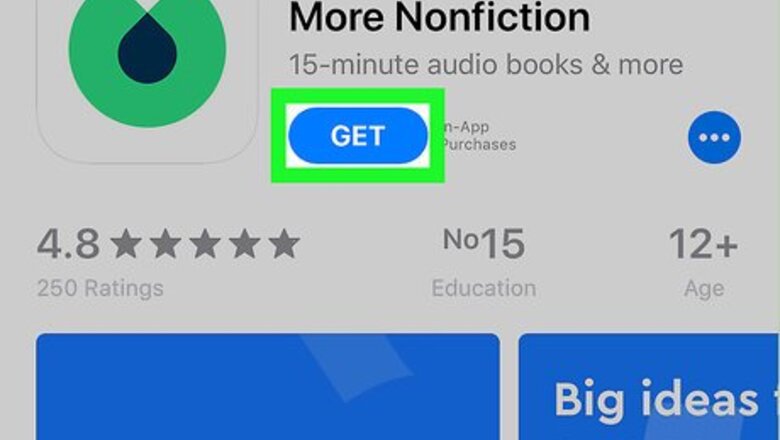
Install Blinkist from the App Store. If you haven’t yet installed the app, here’s how to get it: Open the App Store iPhone App Store Icon. You’ll usually find it on the home screen. Tap Search at the bottom-right corner of the screen. Type Blinkist into the search bar and tap Search. Tap Blinkist. It's the icon of a green circle with a chunk missing and a black teardrop inside. Tap GET. Follow the on-screen instructions to download the app. You may have to provide a passcode or use Touch ID before the download begins. Once the download is complete, the ″GET″ button will change to ″OPEN.″

Open Blinkist. It’s the green circle with a chunk missing and a black teardrop inside. You’ll usually find it on the home screen. If you’re still in the App Store, tap OPEN to launch the app.
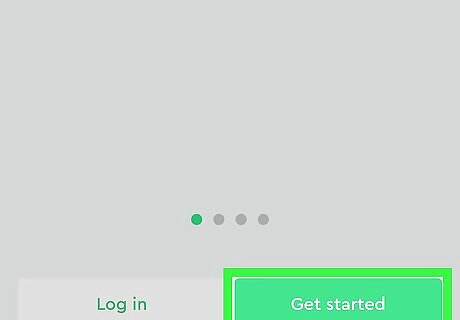
Tap Get started. It’s the blue icon at the bottom-right corner of the screen.
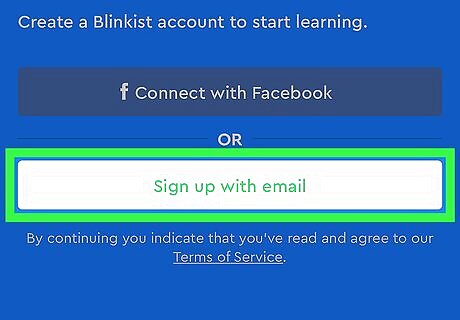
Tap Sign up with email. Select this option if you want to create a new account with a username (your email address) and password. If you want to connect your Blinkist account to your Facebook login, select Connect with Facebook instead, and then follow the on-screen instructions to link Facebook to Blinkist.
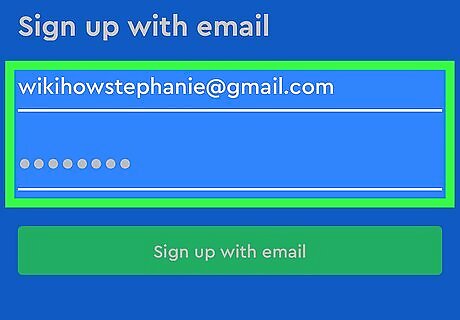
Enter your email address and password. The password you type is what you’ll use to access Blinkist.
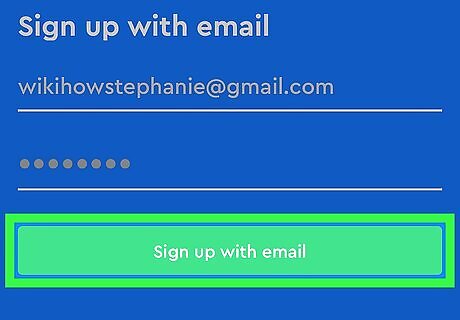
Tap Sign up with email. Once your account is created, you’ll be greeted with a screen that advertises a subscription plan.

Tap View all plans. It’s at the bottom of the screen.
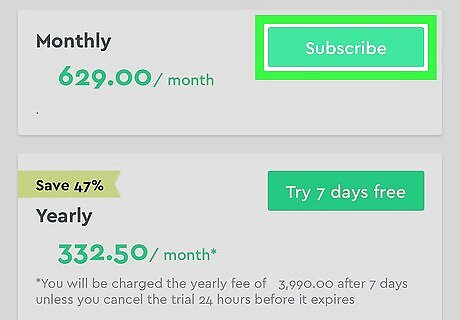
Select your plan. To try Blinkist for free without making a commitment, tap Try 7 days free. This option gives you 7 consecutive days of free access, but you’ll be automatically billed for a year’s subscription (currently $79.99 in the US) at the end of the 7th day. You’ll need to cancel the trial before it’s over to avoid being billed. To sign up for a subscription that bills your account monthly, tap Subscribe next to the amount. If you don’t want a subscription, tap the X at the top-left corner of the screen. You can still use Free Daily, a feature that lets you listen to or read one summary per day (selected by Blinkist).
Reading or Listening to Books

Open Blinkist. It’s the green circle with a chunk missing and a black teardrop inside. You’ll usually find it on the home screen. If you don’t have a subscription, you’ll only be able to read or listen to the Free Daily book of the day.

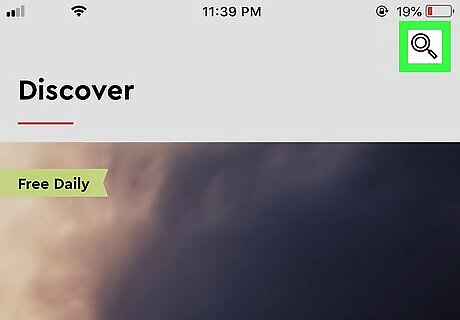
Search for a book. There are a few different ways to browse on the Discover screen (which you can access from anywhere by tapping the house icon at the bottom-left corner of the screen): Search: Tap the magnifying glass at the top-right corner of the screen to open the Search screen, type a title, author, or keyword, then tap the Search key on the keyboard. Categories: Scroll down to the ″Categories″ section and tap More to view a list of topics. Tap a topic to view relevant books. Curated lists: Scroll down on the Discover screen and tap More next to ″Curated Lists.″ Scroll through the lists, then tap a category to view its titles. For you: The more you use Blinkist, the better it learns your interests. Scroll down to the ″For you″ area to see your current recommendations. Trending and New: Scroll down to the bottom of the discover screen to view these two categories. Swipe left across the titles to see what’s available.
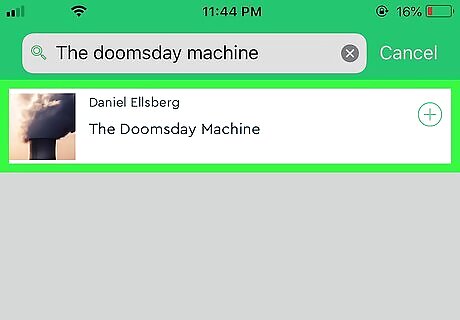
Tap a title to learn more about it.
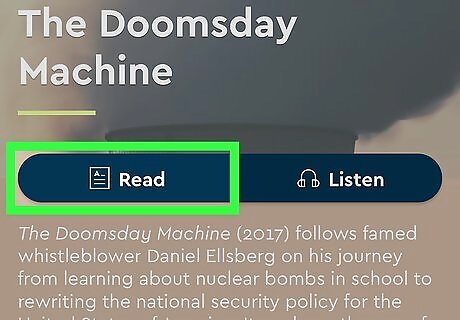
Tap Read to read the Blinkist version of the book. This opens a summary of the book that you can read right on the screen. To change the size of the text, tap the Aa icon at the top of the screen, then drag the slider left (smaller) or right (larger). To jump to a section (called a ″Blink″), tap the list icon (the second from the left at the top of the screen), then tap the Blink you want to read. To share the title in another app, tap the sharing icon (the square with an arrow) at the top of the screen, then select an app.
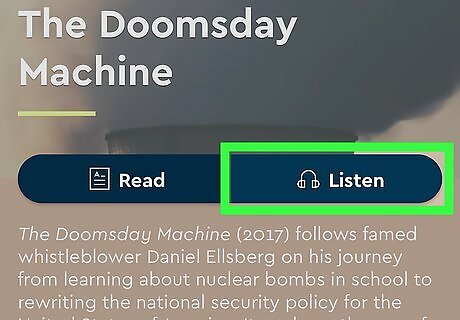
Tap Listen to listen to the book. The audio version of the title will begin to play. If you selected the Read option earlier but want to switch to listening mode, tap the headphones icon at the top-right corner of the screen. To share the title in another app, tap the sharing icon (the square with an arrow) at the top of the screen, then select an app.
Adding Books to the Library

Open Blinkist. It’s the green circle with a chunk missing and a black teardrop inside. You’ll usually find it on the home screen.
Tap the search icon. It’s the magnifying glass at the top-right corner of the screen.
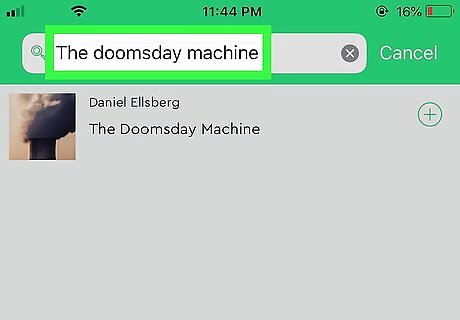
Search for a book. Type a title, author, or keyword, and then tap the Search key. A list of results will appear.
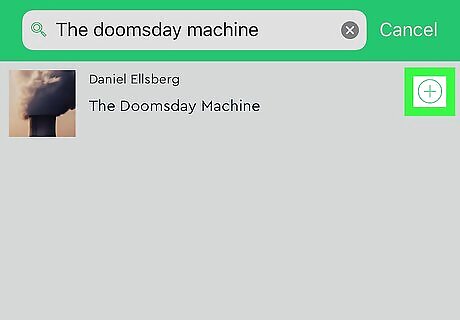
Tap + on the book you want to add. The ″+″ will turn into a check mark, which means the book is now in your library.
Using the Library
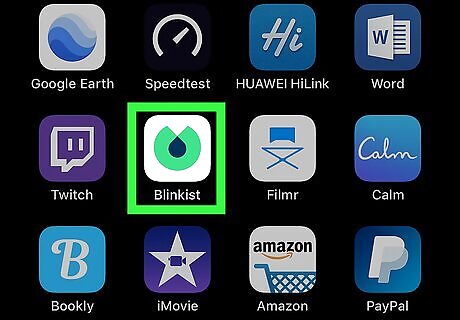
Open Blinkist. It’s the green circle with a chunk missing and a black teardrop inside. You’ll usually find it on the home screen.
Tap the library icon. It’s the open book icon at the bottom of the screen (the second icon from the left).
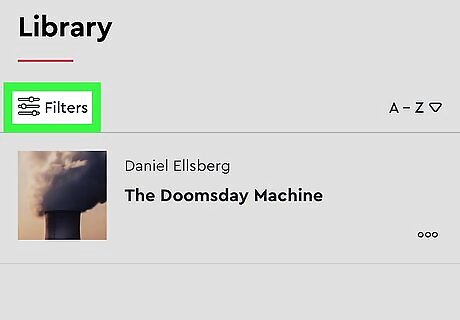
Filter or rearrange your list. All titles you’ve added to the library appear here in alphabetical order. Use these tips to manage your library: Organize your books in a different order by tapping the drop-down menu at the top-right corner of the list and selecting a different order. To display titles that meet certain criteria (e.g., books you haven’t yet started, books you’ve finished), tap Filters at the top-left corner of the list and select an option.
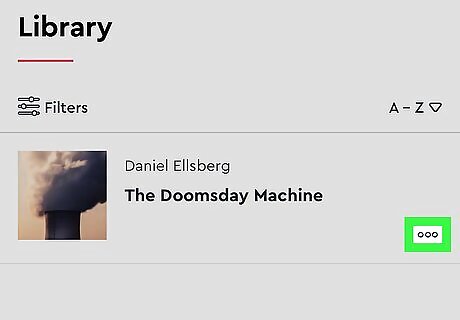
Delete a book from the library. To remove a book you no longer need quick access to, tap ⋯ on the title and select Delete from library.
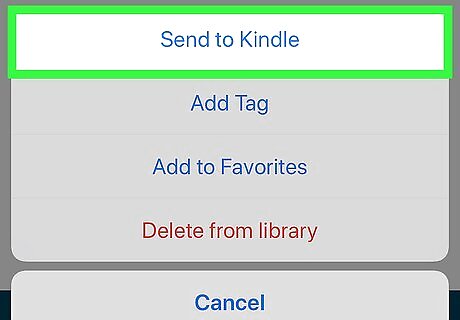
Send a book to your Kindle (subscription required). If you have an Amazon Kindle, you can easily send a Blinkist title to the device for easy reading on the go. Tap ⋯, select Send to Kindle, and then follow the on-screen instructions to proceed.


Comments
0 comment