
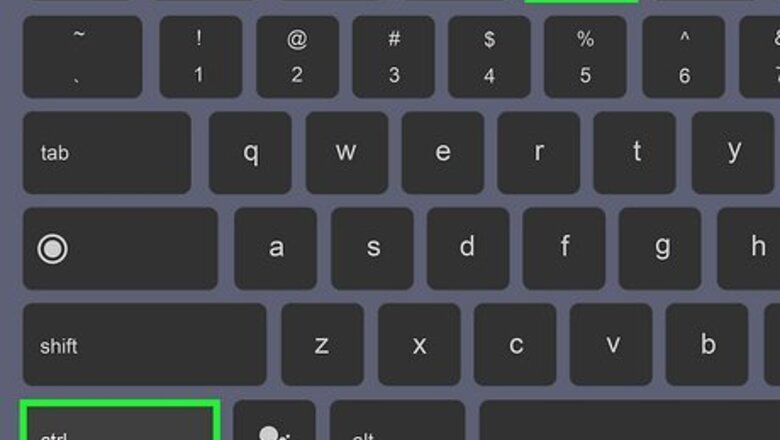
- To open the Screenshot toolbar, press Shift + Ctrl + Show Windows at the same time.
- Use the Screenshot toolbar to take a full, partial, or one-window screenshot.
- You can click the video camera on the Screenshot toolbar to record your screen as a video.
Screenshot with Keyboard Shortcuts
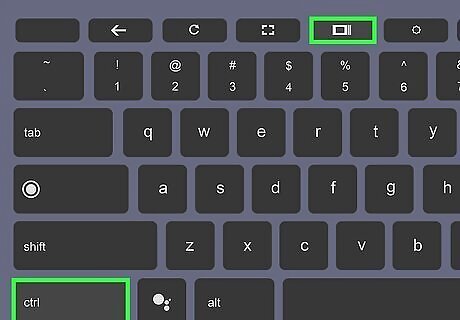
Press Ctrl + Chromebook Show Window to take a full screen screenshot. This keyboard shortcut instantly takes a full screen screenshot and saves it to your Downloads folder. The Show Windows key is the keyboard key that has a rectangle with two vertical lines on the right side. If you're using an external keyboard, use Ctrl + F5 instead.

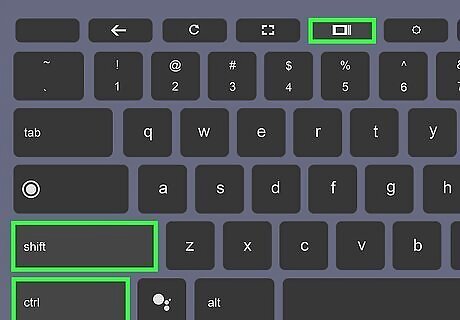
Press Ctrl + Alt + Chromebook Show Window to take a partial screen screenshot. When you press these keys at the same time, your cursor will turn to a crosshair. Click and drag the cursor over the part of the screen you want to capture, then click Capture to take a screenshot.

Press Ctrl + Chromebook Show Window to screenshot a single window. You can then click the window you want to capture to take a screenshot instantly.
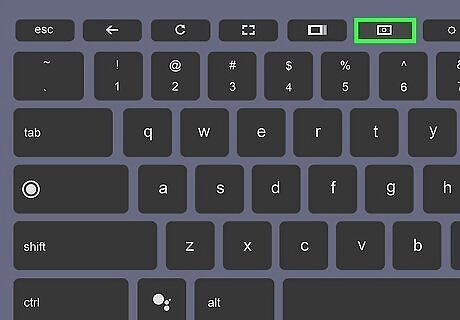
Press Ctrl + Shift + Chromebook Show Window to open the Screenshot toolbar. This handy shortcut allows you to access all of your Chromebook's screenshot and screen recording options at once. To learn how to use the Screenshot toolbar, see Using the Screenshot Toolbar. If your Chromebook has a Screenshot key on the keyboard Chromebook Screenshot, pressing it will also open the Screenshot toolbar. If your Chromebook is in tablet mode, you can press Power and Volume Down at the same time to open the Screenshot toolbar. The Screenshot toolbar is similar to the Snipping Tool on Windows and the Mac Screenshot app.
Using the Screenshot Toolbar

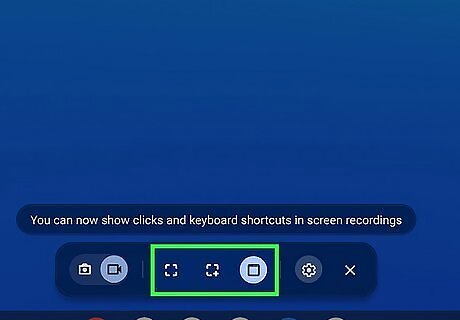
Open the Screenshot toolbar. You can use your Chromebook's Screenshot toolbar to take any type of screenshot. Use any of these four options to open it: Press the Screenshot key Chromebook Screenshot on the top row of your keyboard. This key is not available on all Chromebooks. Press Shift + Ctrl + the Show windows key Chromebook Show Window (the rectangle with two vertical lines beside it). If you're using an external keyboard, press Shift + Ctrl + F5. Click the clock at the bottom-right, then click Screenshot on the Quick Settings menu.

Select a screenshot option. By default, the standard screenshot feature (the camera icon) is selected on the toolbar. To take a full screen screenshot, click the icon of a square made of brackets Chromebook Fullscreen. This saves a full-screen capture to your Downloads folder. To capture part of the screen, click the square made of brackets with a plus sign (+) Chromebook Partial Screenshot at its bottom-right corner. To take a screenshot of a single window, click the window icon Chromebook Window Screen.

Take a partial screen or window screenshot. If you selected to capture only part of the screen or a single window, you'll have one more step: Partial screen: Click and drag the cursor over the area of the screen you want to capture. If needed, you can change the size of your selection by dragging its corners or by pressing Tab and then using the arrow keys. When you're ready to take a screenshot of the selected area, click Capture. The screenshot is now saved to your Downloads folder. Single window: Click a window to instantly take a screenshot and save it to your Downloads folder.
Recording the Screen
Open the Screenshot toolbar. In addition to taking still screenshots, you can use your Chromebook's Screenshot toolbar to create screen recordings. Use any of these four options to open the toolbar: Press the Screenshot key Chromebook Screenshot on the top row of your keyboard, if available. Press Shift + Ctrl + Show windows key Chromebook Show Window. Press Shift + Ctrl + F5 (external keyboards). Click the clock at the bottom-right, and then click Screenshot on the Quick Settings menu.

Click the Screen Recording icon. Opening the Screenshot toolbar defaults to a still screenshot (the standard camera icon in the toolbar). To switch to screen recording mode, click the video camera beside it.
Select a screen recording option. Like taking a screenshot, you can choose an area of your Chromebook's screen to record: To record the full screen, click the icon of a square made of brackets Chromebook Fullscreen. To record part of the screen, click the square made of brackets with a plus sign (+) at its bottom-right corner Chromebook Partial Screenshot. To record a single window, click the window icon Chromebook Window Screen.
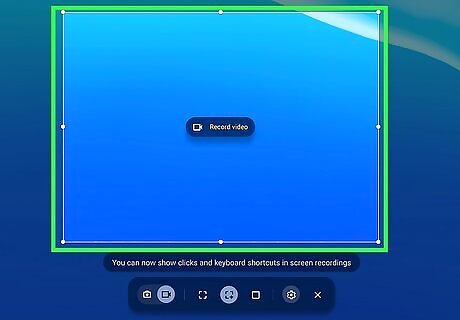
Choose a window or part of the screen to record. If you chose the full screen option, you can skip this step. Otherwise: To record part of the screen, click and drag your cursor around the area you want to record. You can make the selection larger or smaller by pressing Tab and then using the arrow keys on your keyboard, or by dragging its corners. To record a single window, such as when you're narrating gameplay for a YouTube or TikTok video, click the window you want to record.

Narrate or show your face as you record (optional). If you want to hear your voice in the screen recording, such as if you're doing a voiceover, and/or simultaneously record your face using your front (selfie) camera, it's easy: Click the gear icon on the Screenshot toolbar. Select Microphone under "Audio input." Select Front camera to see your face in a circle at the bottom-right corner of the screen.

Click anywhere in your recording area to start the recording. For example, if you're recording a single window, click the window to begin the recording. After a quick countdown, the recording will begin.
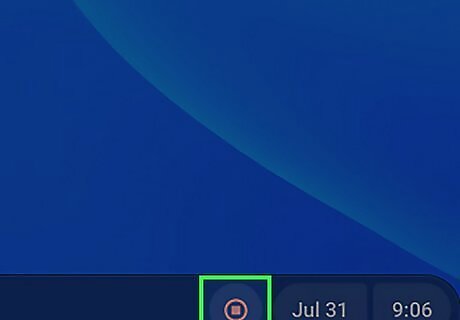
Click the red Stop button when you're finished. This stops recording your Chromebook's screen and saves the finished video to your Downloads folder.
Finding and Editing Screenshots
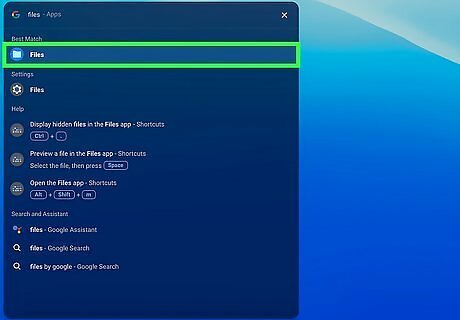
Open the Files app on your Chromebook. You'll find it in your Apps list.
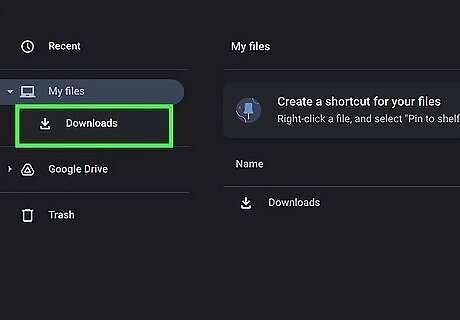
Click the Downloads folder. All screenshots and screen recordings are saved to the Downloads folder by default. If you want to save your screenshots and screen recordings to a different folder, open the Screenshot toolbar, click the gear icon, and choose Select folder. You can then select any other folder on your Chromebook.

Double-click the screenshot. This opens it in your Chromebook's standard image editor. Screenshot file names begin with the word "Screenshot," followed by the date the file was created.

Use the icons on the toolbar to edit your screenshot. Editing your screenshot is just like editing any other photo on your Chromebook: Use the Crop and Rotate tool (the crop symbol surrounded by curved arrows) to crop out any parts of the screenshot you don't want to keep or change its orientation. Use the Rescale tool (the square made of dots) to change the image's dimensions. You can adjust the screenshot's brightness and contrast using the icon with several sliders.

Click Save to save your changes. Now that you've saved your screenshot, you can share it with others or print it as needed.


Comments
0 comment