
- Outline the shape of your doll onto 2 pieces of felt, then cut out the pieces.
- Use embroidery floss to sew a button for the right eye, stitch an X shape for the left eye, and stitch a horizontal line for the mouth.
- Cut out a small heart using red felt and stitch it onto the doll’s chest where a real heart would be.
- Partially sew the two pieces of felt together and fill the doll with stuffing before closing it up.
Making a Felt Voodoo Doll
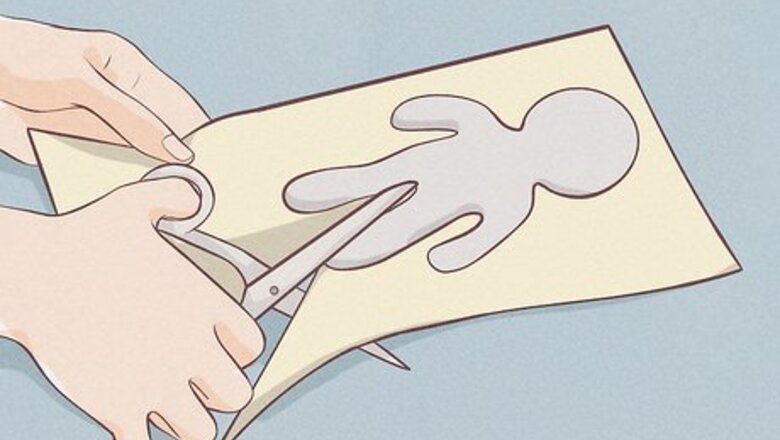
Create your template on a sheet of paper and cut it out. Find a simple, person-shaped template online or draw one yourself. The template doesn't need to be realistic or proportionate to a real person and can be as big or small as you desire. As a reference, most voodoo dolls are small enough to fit in your hand. If you don't know how to draw, use a gingerbread man cookie cutter as a stencil, but make the head bigger and more round.
Secure the template to two sheets of felt with sewing pins. Keep the pins inside the template so they don’t get in the way when you’re cutting. If your template is small enough, use a single sheet of felt. If your stencil is larger, fold the felt in half so that you have two layers, then pin the template. Use any color of felt you want, from natural skin tones to green, red, or even blue.
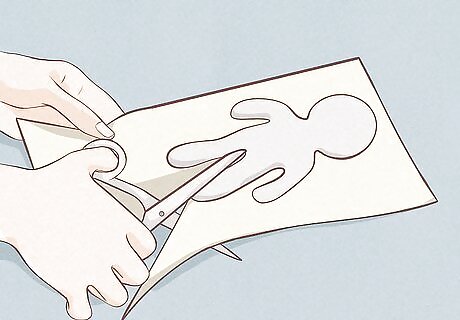
Cut the felt, using the template as a guide, then remove the pins. Because of the way you will be sewing this voodoo doll, there’s no need to add any extra fabric to account for the seams. Once you have the felt cut out, remove the pins and set the template aside.
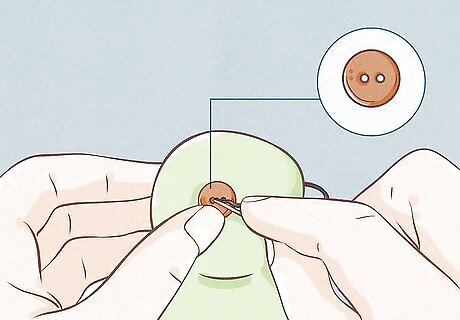
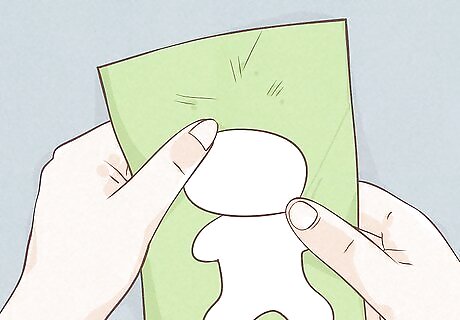
Sew a button onto one of the felt pieces for the right eye. Choose one of the felt pieces to be the front and set the other one aside. Thread a needle with black embroidery floss, then use it to sew a button onto the right side of the head. Finish sewing on the back of the felt, but don't cut the floss yet. For a fancier voodoo doll, cut a circle out of black felt that's slightly bigger than the button and place it under the button before you sew it on.
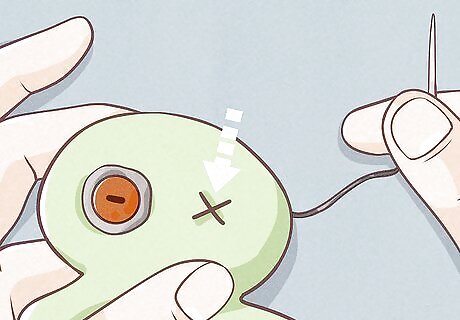
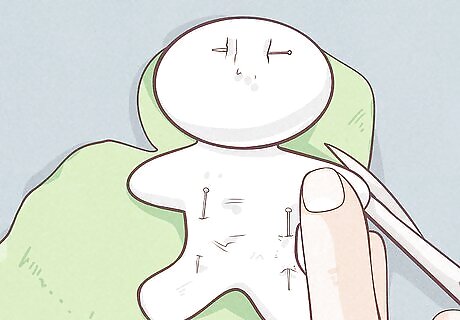
Stitch an X for the left eye. Keeping your needle threaded with the same embroidery floss, stitch an X shape onto the left side of the head to make the second eye. It can be the same size as the first eye, or slightly larger or smaller. Finish the X on the back of the felt and don’t cut the floss yet. You can also sew another button instead, which can be identical or different from the first button you used.
Stitch a horizontal line for the base of the mouth. The mouth should extend from eye to eye, and sit at the bottom of the head. Bring the needle up through the back of the felt, so that it comes out below the left eye. Pull it over towards the right eye, and push it back down through the felt. Don't cut the floss yet. Keep the thread loose so that the felt doesn’t wrinkle.
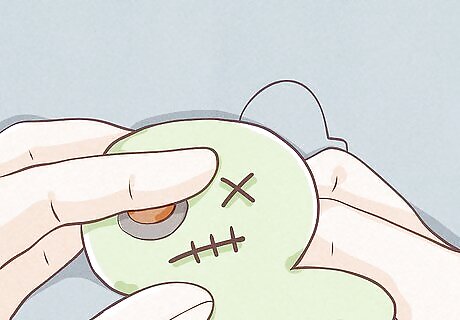
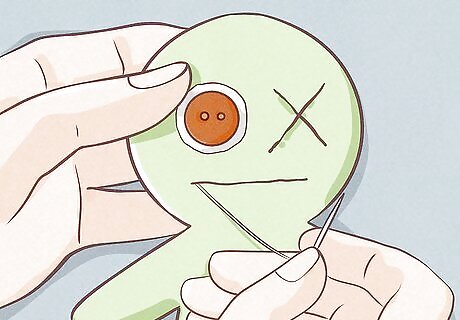
Add 4 to 5 vertical lines to make the mouth look sewn shut. Work your way from the right side of the mouth to the left. Each line should cross straight through the horizontal line. Start and finish just inside the horizontal line and space them as evenly as possible. After this is done, knot and cut your floss.
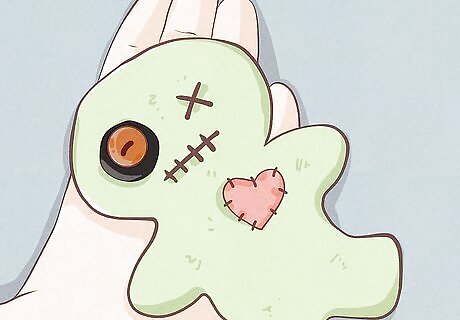
Sew a red felt heart onto the left side of the torso. Cut a small heart made out of red felt first. Position it onto the left side of the doll’s torso where a real heart would be. Thread your needle with more black embroidery floss and knot it. Starting from the back, stitch the heart onto the felt. Finish on the back of the felt, then knot and snip the floss off. Use a straight stitch for a cleaner look. Do this by passing the needle up and down through the heart as close to the edge as you can. Use perpendicular stitches for a rustic look. Pass the needle up through the heart, then down through the felt next to it, up through the heart, then down through the felt…and so on and so forth until you’ve secured the entire heart to the doll.
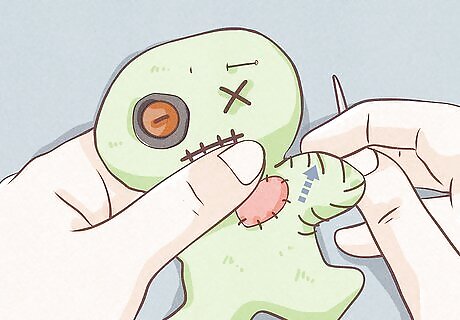
Sew the two felt pieces together. Thread the needle with more black embroidery floss and knot it. Place your two pieces of felt together so that the details you sewed on are on the outside. Push the needle up through the left armpit and wrap it around the edge towards the back of the doll. Then bring the needle up through the felt again, a little above the first stitch. Work your way around the doll, finishing at the left hip. Leave a gap in the side to add stuffing and don't cut the floss just yet. To give your doll a more refined and fancy look, sew a blanket stitch instead. You won't be turning this project inside-out, so make sure that the piece with all of the designs is on the outside.
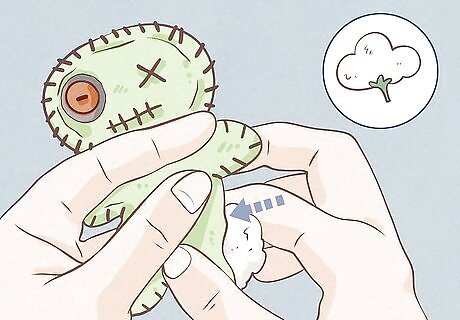
Stuff the doll. Use a small amount of polyester stuffing or cotton balls for the inside of your doll. If you use cotton balls, pull them apart first to make them fluffier. Use the end of a pen or pencil to help push the stuffing to fill out the arms and legs of the doll. For a more authentic voodoo doll, use Spanish moss.
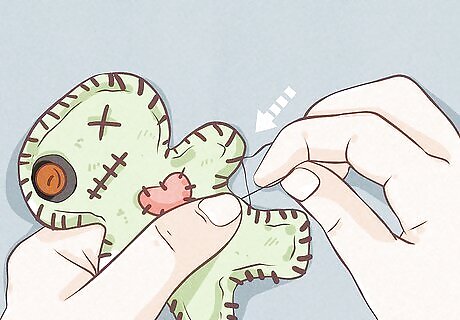
Finish sewing the doll. Once you have the doll stuffed to your liking, finish sewing it shut using the same technique as before. When you reach the left armpit again, knot the floss, then snip the rest off. Your doll is now complete!
Making a String Voodoo Doll
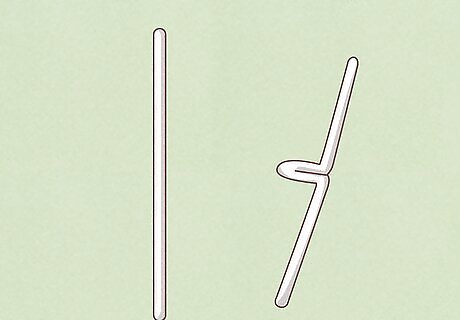
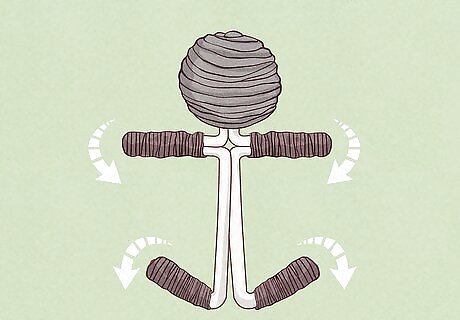
Fold a pipe cleaner in half, then spread it open to make the neck. Fold a 12-inch (30.48 cm) pipe cleaner in half. Measure down 1 inch (2.54 cm) from the fold, then spread the two halves apart and bend them at 90-degree angels from the 1-inch (2.54-centimeter) neck. If you don’t have a pipe cleaner, a length of wire will also work.
Bend each half to make 1½-inch (3.81 cm) long arms. Measure 1½ inches (3.81 cm) along the left "arm." Bend it downwards and in on itself, then bend the rest down so that it forms another 90-degree angle with the arm. Repeat this step for the other arm. You’ll be left with something that resembles a cross shape. When you are done, you should have a 1-inch (2.54 cm) vertical neck, and two 1½-inch (3.81 cm) horizontal arms. The rest of the pipe cleaner should be pointing downwards, vertically.

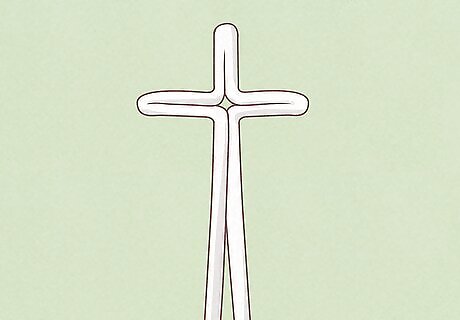
Create the legs 2 inches (5.08 cm) down from the arms. Measure 2 inches (5.08 cm) from the arms. Bend the pipe cleaner apart to make an upside-down V. Fold the excess pipe cleaner back to the V to make a set of 1½-inch (3.81 cm) legs. Your stick figure should have: 1 inch (2.54 cm) vertical neck 1½-inch (3.81 cm) horizontal arms 2-inch (5.08 cm) vertical torso 1½-inch (3.81 cm) diagonal legs
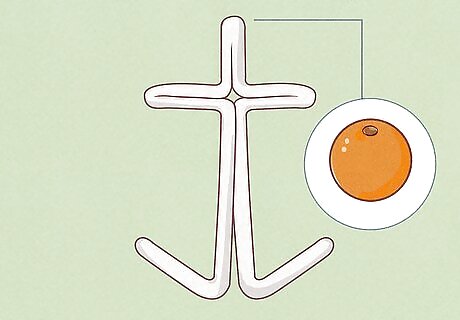
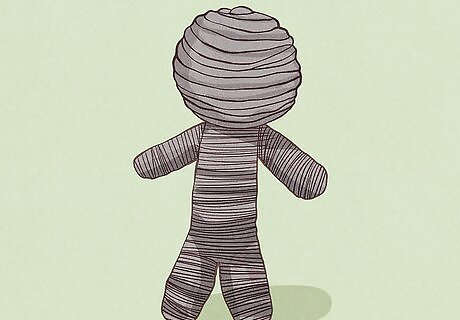
Stick a small wooden bead onto the neck to make the head. Choose a wooden bead that’s 1-inch (2.54 cm) in diameter to use as the doll’s head. Place a drop of glue into the bead’s hole, then slide it all the way onto the neck. You can also use a 1-inch (2.54 cm) foam ball instead. First drill a small hole using something sharp (like a pencil), fill it with glue, then poke it onto the neck. It’s okay to use a slightly larger bead. Just keep in mind that it will become larger once you start wrapping it with string.
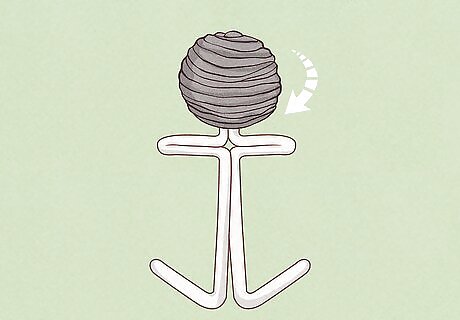
Wrap yarn around the wood bead until it’s completely covered. Glue the end of the yarn] to the bead at any point. Continue to wind the yarn vertically, horizontally, and diagonally until the bead is completely covered. When you can no longer see the bead, secure the end of the yarn with another drop of glue. Make sure to switch up the direction you’re wrapping the yarn often so that it has an even thickness throughout. If the head looks too small, keep wrapping it. The more you wrap it, the larger it will become. Use any color yarn you want, but keep in mind that you will be wrapping the doll again with embroidery floss to give it color later on.
Wrap the yarn around the legs and torso. Begin wrapping down the left leg, then back up to the hips. Continue wrapping down the right leg and back up again, then work your way towards the arms. When you finish wrapping the arms, go back over the torso again a few times to make it a bit thicker. For a neater finish, wrap the yarn around the looped parts of the hands and feet first, then wrap the rest of the arm and leg. If you used bare wire instead of a pipe cleaner for the skeleton, you may have to wrap your doll a few more times to make sure it doesn’t end up too thin.
Add color and clothes with embroidery floss. You have the option to leave your doll as is, or wrap it all over again with colored embroidery floss. This will give your doll more thickness, shape, and color. Wrap it using the same method as for the yarn. Consider using different colors for the head and body. Make it even fancier by using different colors to wrap a shirt and pants. For a hint of design, cross the embroidery floss over the left shoulder down to the right armpit, then over the right shoulder and down to the left armpit. Do this a few times to make an X shape.
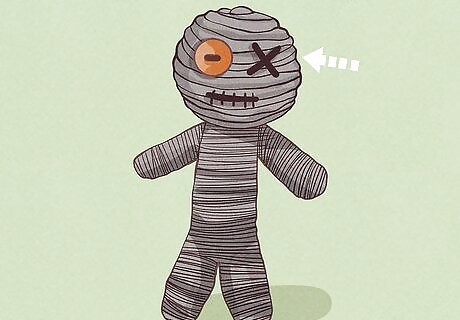
Add details with beads, buttons or more floss. Use beads or buttons for the eyes and black embroidery floss for the mouth. Use craft felt to add more details, such as beards or belts. If you want to give your doll hair, cut a few strands of embroidery floss, tie them in the middle, then glue them to the top of the doll's head.


Comments
0 comment