views
Creating a Battery Bank
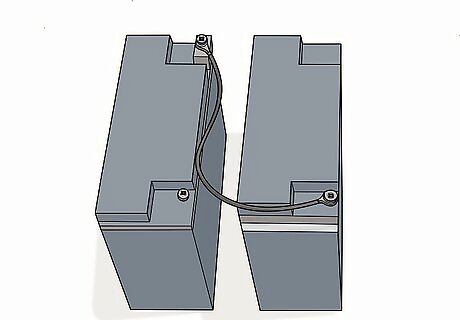
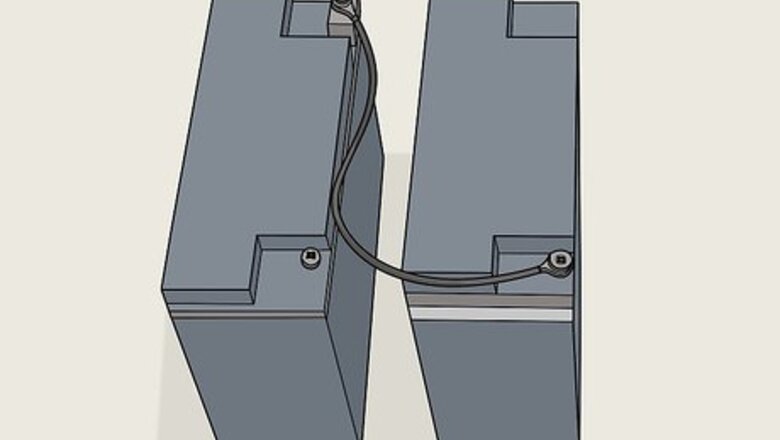
Choose a series connection to add voltage and make a battery bank. A series connection combines the voltage of the 2 connected batteries to create a bank of batteries that you can draw power from. A battery bank still keeps the same amperage rating, or amp hours, so if 2 batteries have 6 volts and 10 amps each and are joined together in a series, they will then produce 12 volts, but will still have the same 10 amp capacity. Make sure the batteries you plan to connect have the same voltage and amps or you could shorten the battery life and have difficulty charging them.
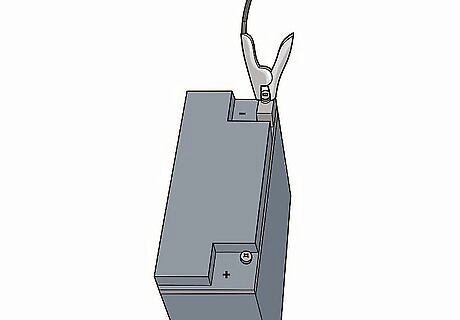
Attach a jumper cable to the negative terminal of one battery. Take a jumper cable and connect one of the clamps to the negative terminal of one of the batteries. The terminals are the metal contacts that are used to connect a battery and allow the stored electricity to flow from the battery. The negative terminals have a negative (-) symbol and are usually covered by a black plastic covering. You may need to lift or remove the black plastic covering to attach the cable to the terminal.
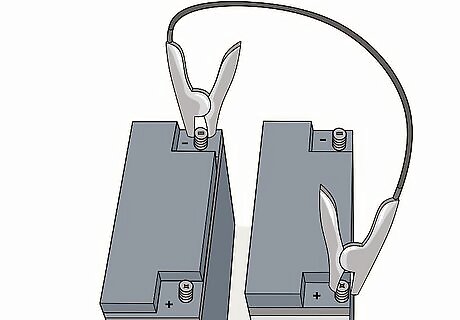
Clamp the cable to the positive terminal of the other battery. Take the clamp at the other end of the cable connected to the negative terminal of the first battery and connect it to the positive terminal of the second battery. The positive terminal will have the plus (+) sign next to it and is usually covered with a red plastic covering. Don’t scrape the clamps against the terminal or it could create sparks be a fire hazard. You should have the clamps of one jumper cable connected to the negative terminal of one battery and the positive terminal of another.
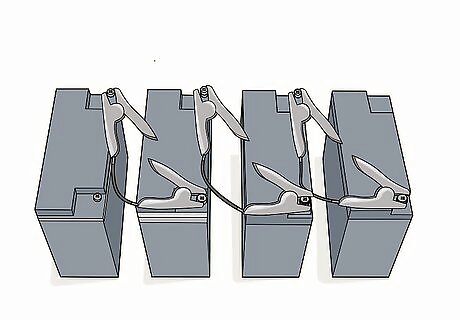
Use jumper cables to connect the battery series to your application. Use another set of jumper cables to clamp down on the open positive terminal of the battery and the positive terminal of your application. Then clamp the cable on the open negative terminal of the battery and the negative terminal on your application. This will connect your application to the series so the batteries can power it. Be sure to use another pair of jumper cables to connect the series to your application!Warning: Never cross or connect the open positive and the open negative terminals on the batteries to each other or they could short circuit or potentially explode!
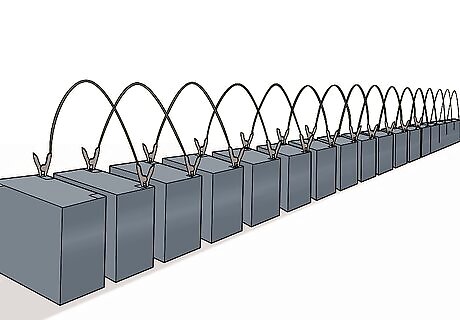
Make a series of more than two batteries by connecting the terminals. Take jumper cables and clamp around the positive terminal of one battery and the negative of the battery next to it. Repeat the connection process until all of the batteries you want to connect in a series are connected by jumper cables. There is no limit to how many batteries you can connect in a series, but be careful not to get lost in a jumble of cables. Use batteries that have the same volts and amps, don’t mix and match battery sizes and power outputs or it could short circuit some of the batteries.
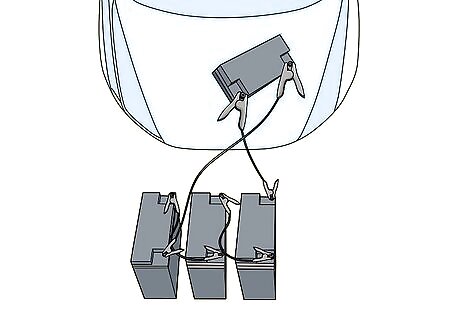
Connect a series of more than 2 batteries to your application. Use jumper cables to connect the open negative terminal of the first battery in the series to the negative terminal of your application. Then connect the jumper cables to the open positive terminal of the last battery in the series to the positive terminal of your application. This will increase the total amount of volts your application will receive.
Using a Parallel Connection
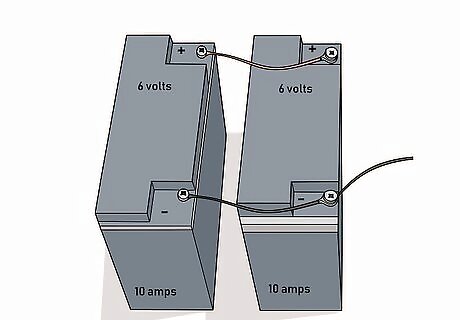
Use a parallel connection to increase your power rating. A parallel connection is similar to a series connection in the sense that it connects two batteries together. But a parallel connection increases the amperage rating while keeping the voltage produced by the batteries the same. For example, if 2 batteries are 6 volts and 10 amps each, a parallel connection will increase the amps to 20 but keep the volts at 6. It’s important to make sure that the batteries you plan to connect have the same volts and amps or it could shorten the battery life and you may not be able to recharge them.
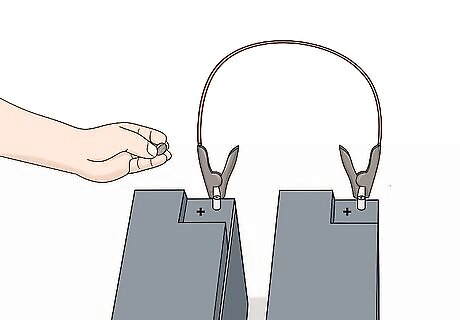
Connect a jumper cable to the positive terminals of each battery. Use a single, heavy-duty jumper cable and clamp it to the positive battery terminal of one battery and the positive battery terminal of the other battery, making sure they are securely attached. Positive terminals have a plus (+) sign next to it and are covered with a red plastic covering. Attach the clamps firmly, but don’t scrap or knock them against the terminal or it could cause sparks. Because the amps will increase, you need to use a heavier-duty jumper cable to keep the cables from burning out from the electricity.
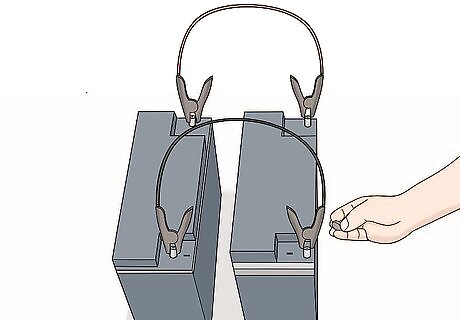
Attach a separate jumper cable to the negative terminals of each battery. Use a separate single heavy-duty jumper cable to connect both batteries by attaching the cable to the negative terminals. The negative terminal will be marked with a negative (-) symbol and will be covered by a black plastic covering. Do not use the negative cable of a pair of jumper cables. Rather, use a separate jumper cable to connect the negative terminals. The arrangement should be: positive to positive, negative to negative.
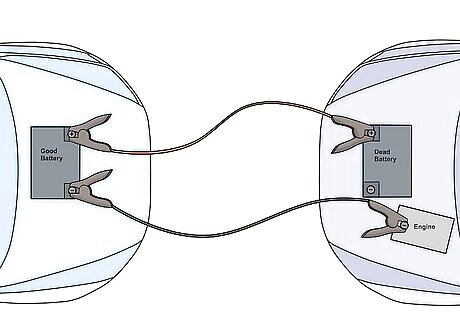
Connect the battery bank to your application. Set your battery directly next to the item you want to power. Use a separate pair of jumper cables and clamp the positive cable around the positive terminal on the battery and the positive terminal of your application. Then clamp the negative cable to the negative terminal on the battery and the negative terminal of your application. Warning: Be careful not to cross the cables and connect the positive terminal of your battery to the negative terminal of your application, or vice versa. It could short circuit the battery or potentially explode.
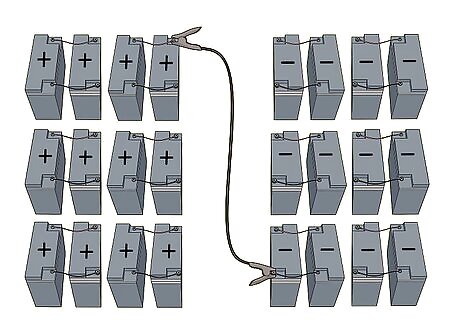
Make a series by connecting multiple parallel connections. If you have two sets of batteries connected in parallel, you can connect them to form a series. Use a jumper cable to connect a positive terminal on one parallel bank to a negative terminal on another parallel bank. There isn’t a limit on how many parallel connections you can connect in a series.
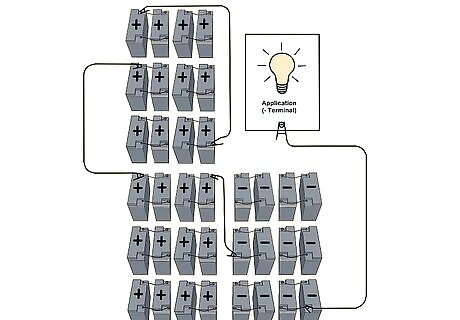
Connect the parallel connection series to your application. Use a separate pair of jumper cables and clamp around the positive terminal on the parallel series at one end and the positive terminal of your application. Then clamp the other cable to the negative terminal on the battery furthest away from the positive you connected and the negative terminal of your application. Make sure they are securely attached to the terminals.



Comments
0 comment