
Mastering a Single Stroke Roll
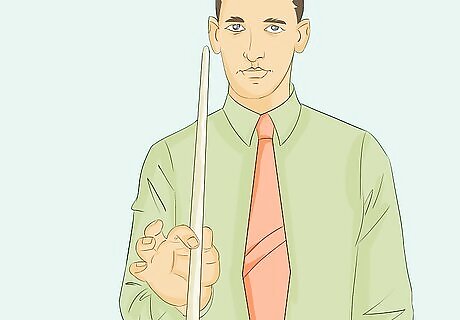
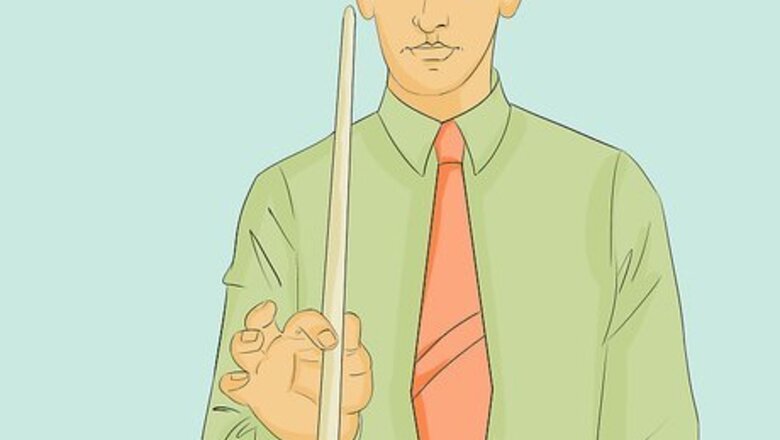
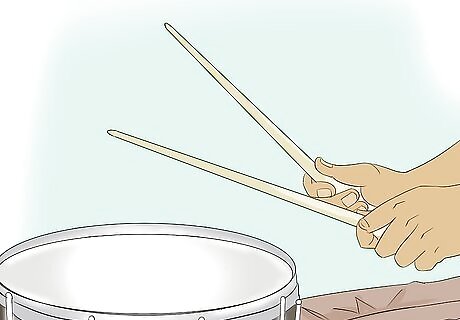
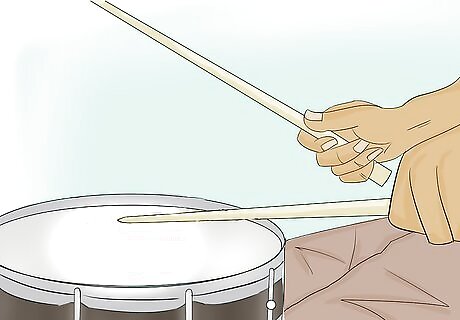
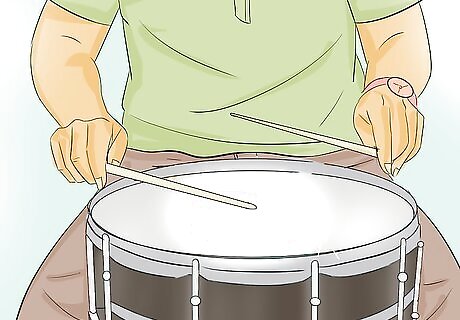
Find the balancing point to figure out where to grip your drumstick. Hold one of your drumsticks lightly in between your thumb and pointer finger. Start by holding the middle of the drumstick and see which way the drumstick tips. Then, move your hold up or down the drumstick until it stays even and balanced on both sides. Repeat this with your other drumstick in your other hand until you find your grip on both sticks. The balancing point, also known as the Fulcrum point, is the point on your drumsticks where you can hold and get the most bounce back from your stick when it hits the drum.
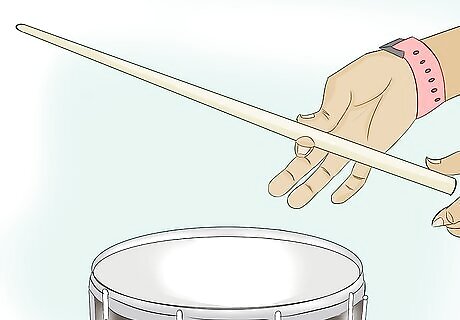
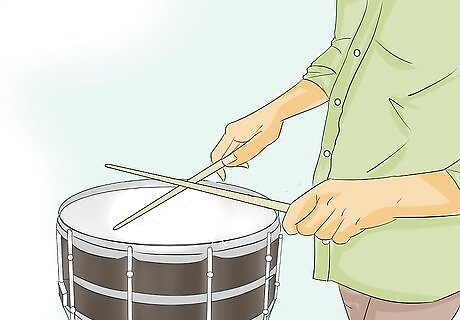
Test the bounce back for your grip placement. Hold one of the drumsticks at the balancing point. Loosen your grip as much as you can while still maintaining control over the drumstick. Then, hold your hand a few inches above the edge of the drum and let the end of the drumstick drop into the middle of the drum. Count the number of times the drumstick bounces before settling onto the drum. If the balancing point and grip tightness are right, the drumstick should bounce about 6 times. If the drumstick doesn’t bounce at all, you are likely holding it much too tightly. Relax your hand and loosen your grip, and then try the bounce test again.#*If the drumstick doesn’t bounce at all, you are likely holding it much too tightly. Relax your hand and loosen your grip, and then try the bounce test again.
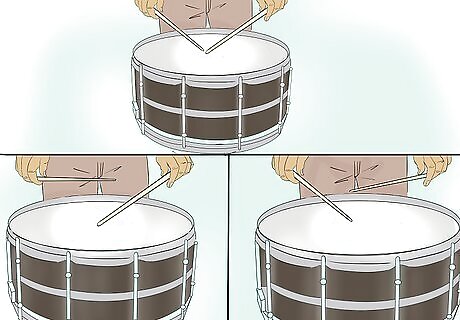
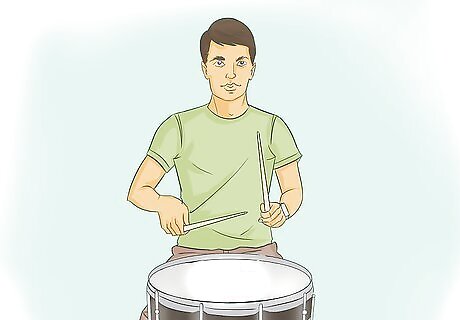
Alternate single drumstick bounces slowly. Hold onto both drumsticks using the grip style and placement that works best for you. Then, alternate dropping each drumstick onto the drum. Let your first drumstick bounce once and then, just as it finishes the bounce, drop the other drumstick on the drum. Typically, a single stroke roll pattern begins with the right drumstick bounce, then the left, then back to the right, and so on. However, you can start a single stroke roll with whatever hand you prefer. Practice this until the bounces and sounds are uniform on both sides and you are able to hold your pace. If you are new to playing the drums, it may take you a while to get into this rhythm. Finding your basic drum roll rhythm is primarily based on your own feeling and intuition, so don’t be discouraged if it takes you several tries.
Speed up the drumstick bounces as you feel more comfortable. As you find your rhythm and get more comfortable alternating drumstick bounces, try to speed up the rate at which you alternate your drumstick bounces. Do this little by little, speeding up only as much as you can while still maintaining control and consistency. Once you get to the speed where the sound is sustained, you’ve mastered the single stroke drum roll.
Learning a Double Stroke Roll
Grip the drumsticks at the balancing point. To find the balancing point, hold the middle of the drumsticks lightly in between your thumb and pointer finger. If the drumstick tips, move your hold up or down until it stays even and balanced on both sides. The balancing point is the point on your drumsticks where you can grip to get the most bounce back it hits the drum.
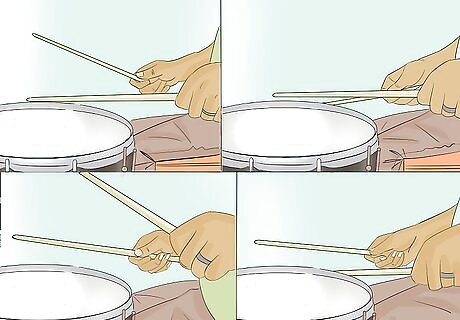
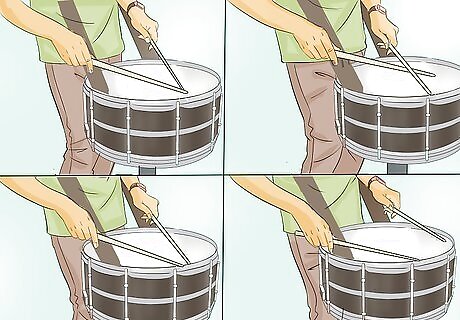
Tap out the double stroke roll sequence slowly. To start to do a double stoke drum roll, it can be helpful to begin by getting comfortable with the double roll sequence. To do this, first tap the drumstick in your right hand on the center of the drum twice. Then, immediately after the second tap, tap the left drumstick on the drum twice as well. After the left drumstick taps the drum twice, repeat this double tap on the right side, then back to the left, and so on. The basic sequence of the double stroke drum roll is RIGHT-RIGHT, LEFT-LEFT, RIGHT-RIGHT, LEFT-LEFT. Practice this double roll sequence until you are comfortable and able to maintain a steady pace.
Let the drumsticks start to bounce to do a double stroke “diddle.” Once you’re comfortable with the double stroke sequence, you can start to do the drum roll by replacing the second purposeful drumstick taps with bounces. To do this, begin by striking the drum with your right drumstick and allowing it to bounce once after the initial strike. As soon as the drumstick bounces and hits the drum for the second time, strike the drum with your left drumstick and let it bounce once after the initial strike as well. Repeat this right strike-right bounce, left strike-left bounce sequence slowly until you’re able to get a feel for the rhythm and get comfortable with this sequence. The “diddle” is the bounce that occurs after you initially strike the drum with the drumstick. It can take some time to get a feel for the double stroke “diddle,” so be prepared to practice this for awhile before you start to get comfortable.
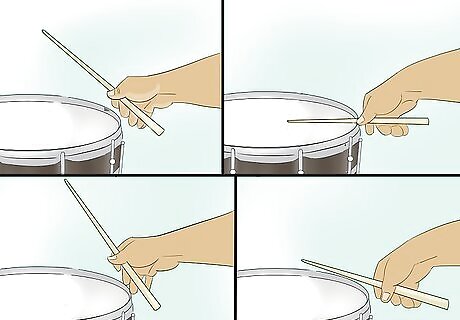
Apply a bit more pressure onto each drumstick as you initially strike. Once you are comfortable doing a double stroke “diddle” in the double roll alternating sequence, start to add a bit more pressure to the initial strike of each drumstick. This added pressure will make the bounces smaller and faster. While you want to apply pressure, make sure that you don’t press the stick down at a sharp angle onto the drum. Instead, apply pressure while keeping the drumstick at only a slight angle, allowing the drumstick to still maintain a natural bounce.
Add more pressure on the drumstick until the sound is sustained. As you get comfortable at a given speed, continue to add a bit more pressure to speed up the double stroke “diddle” until you’re able to sustain a seamless rhythm. Once you’ve achieved an even, continuous sound and a consistent stroke that you can easily start and stop, you’ve successfully learned a double stroke drum roll.
Doing a Buzz Roll
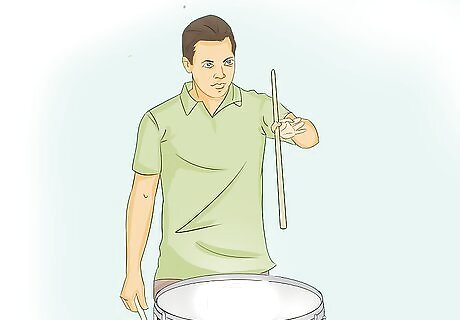
Hold your drumsticks loosely at the balancing point. Find the balancing point by holding the middle of the drumsticks lightly in between your thumb and pointer finger. If the drumstick tips, move your hold up or down until it stays even and balanced on both sides. You will need to have the maximum amount of possible bounce back in order to create the “buzz” of the buzz drum roll, so finding the balancing point is a crucial first step.
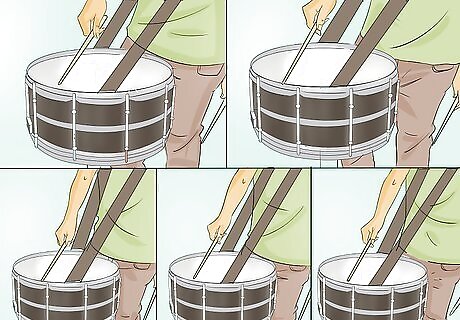
Strike the drum and let it bounce until it naturally comes to a stop. As the drumstick bounces get smaller and quicker as it nears a stop, it will create a noticeable ‘buzz’ sound. Practice this with both your right and left drumsticks until you can successfully create the buzz with both hands.
Practice alternating a right “buzz” drop bounce with a left. Start to build a successive sequence of buzzes by letting your right drumstick bounce and then, just as it finishes the last bounce and creates the “buzz,” drop the other drumstick on the drum. Practice alternating until the bounces and sounds are uniform on both sides and you are able to hold your pace.
Add pressure as you strike to speed up the drumstick bounces. Once you are comfortable alternating drumstick bounces between your right and left drumsticks, you can start to speed up the bounces to create a faster, more sustained “buzz” sound by adding just a bit of pressure to your initial strike, and maintaining that pressure as the drumstick bounces. To do this, press down a bit on the drumstick while keeping the drumstick at only a slight angle. Make sure that you don’t press the drumstick down at a sharp angle onto the drum, as this will decrease the amount of bounce rather than speed it up. To help you understand how applying pressure will work to create a faster “buzz,” imagine that your drumstick is a ping pong ball. If you drop the ball onto the drum, it bounces several times, getting lower with each bounce. Now, imagine that you drop the ball and immediately hold a paddle over it. The ball will bounce faster because the paddle prevents it from reaching its full height, and the bounces will be consistent. Applying just a bit of pressure on your drumstick works as the paddle does, creating a faster, sustained “buzz” sound.
Speed up your strokes while applying more pressure. As you get used to applying pressure to create a faster “buzz,” start to gradually speed up your strokes on the drum. Practice at each speed until you notice the natural flow and rhythm that’s produced from seamlessly overlapping each buzz stroke. When you execute a successful buzz roll, the drum will sound like it is making a single buzz note, versus a series of separate strokes. Part of a successful buzz roll lies in how well you can overlap each successive buzz. Therefore, you’ll need to practice to gradually build up your speed until the beginning of each new buzz comes at the tail of the previous one.


Comments
0 comment