views
Making a Basic Dutch Braid
Start with neatly brushed, dry or damp hair. You can do a Dutch braid on dry or damp hair, but it needs to be brushed and free of any knots or tangles. If you have any flyaways, lightly mist them with water or tame them with a smoothing product like a serum or pomade. Braiding on wet hair is a great way make your hair curly without using heat. You will have to let your hair dry completely before taking the braid out, however.
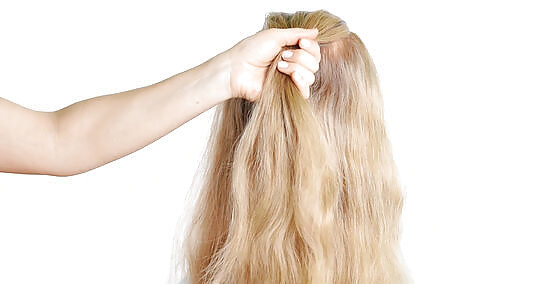
Brush your hair straight back, then gather a section from the hairline. Comb your hair straight back so that you don’t have any side or center parts. Slide your thumbs through your hair to gather a section from your front hairline. This section should span the width of your forehead. With this method, you’ll create one large braid down the center of your head. Alternatively, you can gather your hair into a half-up, half-down pony tail that is at about eyebrow or eye level.
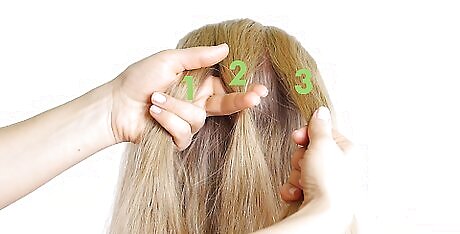
Split the section into 3 equal strands. Hold the right strand in your right hand, and the other 2 in your left hand. Let the middle strand drape over your middle finger, and hold the left strand against your palm with your pinkie. This will keep them separate. You will be starting your braid from the right side. If starting from the left is more comfortable for you, simply reverse everything.
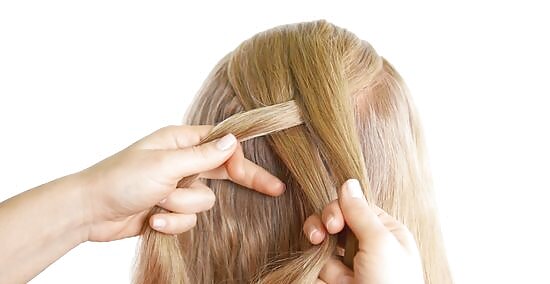
Begin a standard braid to anchor the Dutch braid. Cross the right strand under the middle strand, then cross the left strand under the new middle strand. It is very important that you cross these 2 strands under instead of over, like in a standard braid. If you don’t do this, the Dutch braid won’t turn out right.
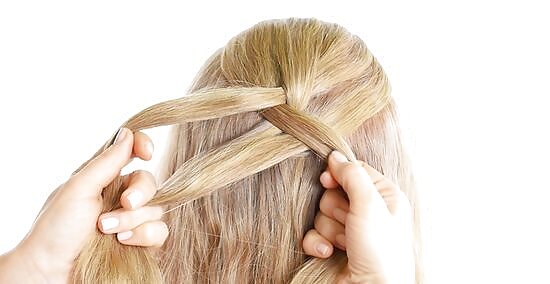
Add a thin section of hair to the right strand before crossing it under the middle one. Gather a thin strand of hair from the right side of your hairline and add it to the right strand. Treating the 2 strands as one, cross them under the middle strand. Use your fingers to smooth down any stray hairs and ensure that the braid is tight. The thin strand should be a little smaller than the right strand you are adding it to. Some people find it easier to cross the right strand first, then add the hair to it. Make sure that the added hair is going under the middle strand.
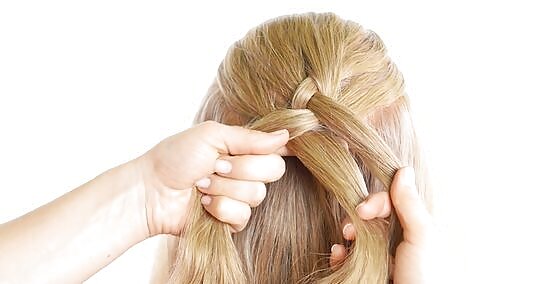
Repeat the process on the left side. Gather a thin strand of hair from the left side of your hairline. Add it to the left strand, then cross it under the middle strand. Smooth down any stray hairs and make sure that the braid is tight. Again, you can cross the strand first, then add hair to it. Make sure that it’s going under the middle strand.
Continue to Dutch braid until you reach the nape of your neck. Add thin strands of hair to the right and left strands before crossing them under the middle one. Keep the thin strands consistent in size, and make sure that you braid as tightly as is comfortable for you. You can always loosen the braid up later. When you reach the nape of your neck, stop. EXPERT TIP A Dutch braid is also known as "renversee," which means "reverse," because it's the opposite of a French braid. Ndeye Anta Niang Ndeye Anta Niang Professional Hair Stylist & Master Braider Ndeye Anta Niang is a Hair Stylist, Master Braider, and Founder of AntaBraids, a traveling braiding service based in New York City. Ndeye has over 20 years of experience in African hair including braiding box braids, Senegalese twists, crochet braids, faux dread locs, goddess locs, kinky twists, and lakhass braids. Ndeye was the first female of her tribe in Africa to move to America and is now sharing her knowledge of African braids passed on from generation to generation. Ndeye Anta Niang Ndeye Anta NiangProfessional Hair Stylist & Master Braider
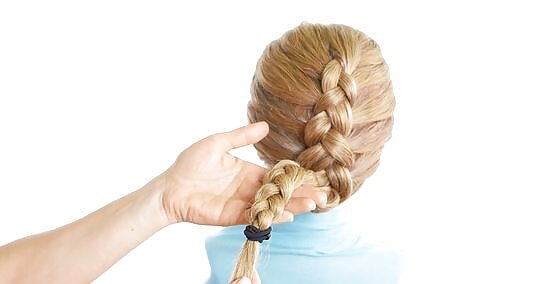
Finish off with a standard braid. Gather the remaining hair into the right, middle, and left strands, making sure to distribute it evenly. Finish off with a regular braid by crossing the right and left strands under the middle one. Keep your stitches tight and smooth. You can tie the braid off when you have about 2 inches (5.1 cm) left, or continue braiding down to the very end. When the braid becomes too long to braid down your back, bring it over one of your shoulders.

Loosen the outer strands of the braid to make it fuller, if desired. Starting from the end of your braid, gently tug on the outer strands to loosen them up. For a more carefree look, muss up the fine hairs at your hairline as well. Don't get carried away, however; your braid will loosen on its own throughout the day. For a romantic twist, coil the braid into a bun at the nape of your neck and secure it with bobby pins.
Making a Double Dutch Braid
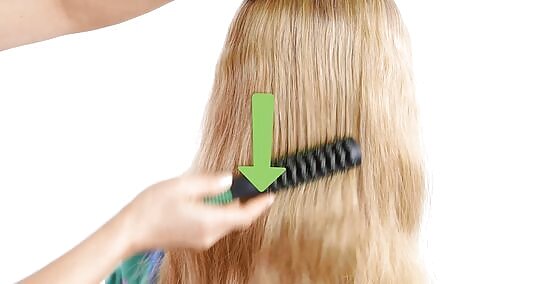
Start with neatly-brushed hair. Your hair can be wet or dry, but it needs to be brushed and free of tangles or knots. Braiding your hair wet will make your hair curly if you let the braid dry, then take it out.
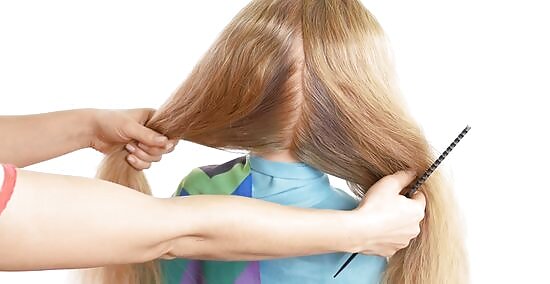
Part your hair down the center for a symmetrical look. Use the handle of a rat-tail comb to part your hair down the center, from forehead to nape. Brush the left side of your hair over your left shoulder, and the right side over your right shoulder.
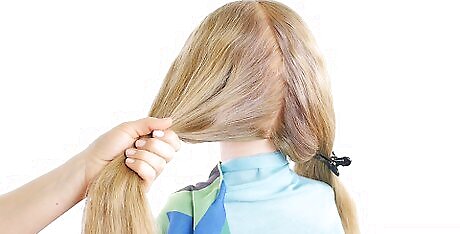
Make a side part for a cool, off-center style. Starting at your hairline, part your hair to the left or right side. As you trace the part back towards the crown, gradually bring it to the center. The part should be right down the center from the crown of your head down to the nape.
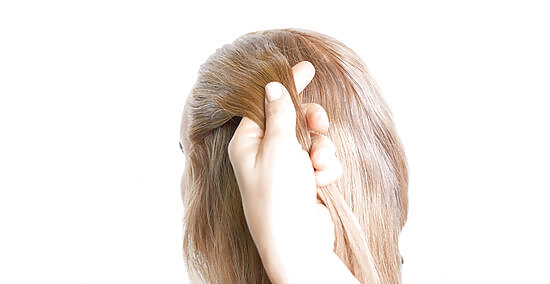
Gather a thin section of hair from the left side. Clip or tie the right side of your hair out of the way. Next, gather a 2-inch (5-cm) wide section of hair from the left side of your hair, right at the hairline. You can start from the right side, if you prefer, but you'll need to do everything in reverse order.
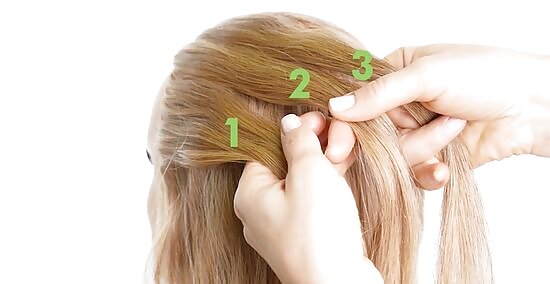
Split the section into 3 equal strands. Hold the left strand in your left hand, and the other 2 strands in your right. Keep the middle strand draped over your middle finger, and hold the right strand against your palm with your pinkie.
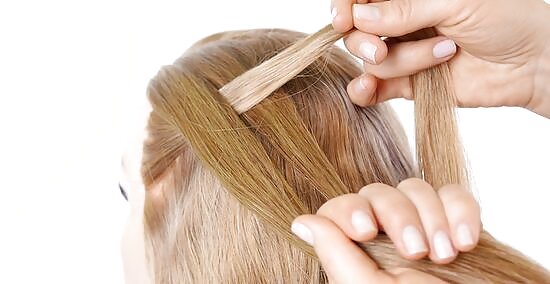
Begin a standard braid. Cross the left strand under the middle strand, then cross the right strand under the new middle strand. Gently tug on the strands to tighten them. Make sure that you are crossing under the middle strand and not over, otherwise the Dutch braid won't work. If you are starting on the right side of your head, cross the right strand under the middle one first instead.
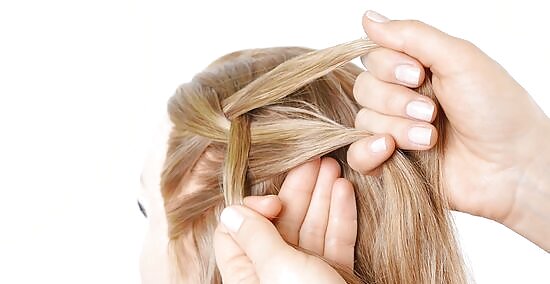
Add some hair to the left strand, then cross it under. Gather a thin section of hair from the left side of your hairline, and add it to the left strand. Treating the two strands as one, cross them under the middle strand. Use your fingers to smooth down any stray strands of hair, if needed. The thin section should be a little smaller than the one you are adding it to. You can cross the left strand under the middle one, then add the thin section of hair to it. Some people find it easier that way.
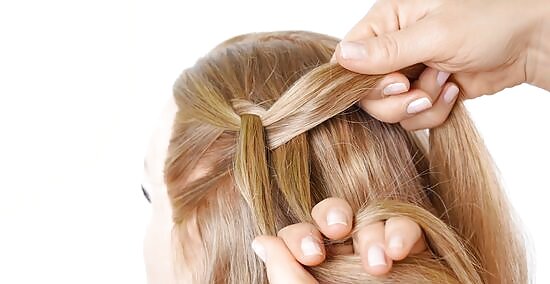
Repeat the process for the right strand. Gather a thin section of hair, this time from the part. Add it to the right section to make it thicker, then cross it under the middle strand.
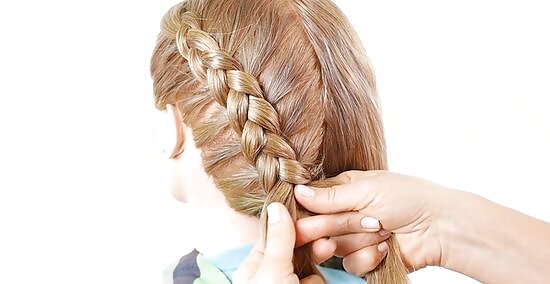
Continue to Dutch braid until you reach your nape. Keep adding thin strands of hair to the left and right strands before crossing them under the middle one. Keep the strands even in size and tension. Try to center the braid between your part and hairline.
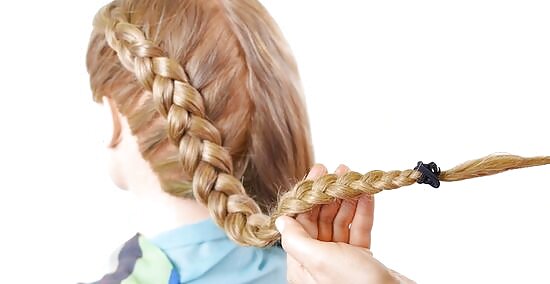
Finish off with a regular braid. Gather whatever hair you have left over on the left side, and distribute it evenly between the left, right, and middle strands. Continue crossing the left and right strands under the middle one until you get to the end of your hair. Tie the braid off with a small hair tie. If you have very short hair, you may not have enough hair left to braid. Simply tie it off as a mini pigtail.
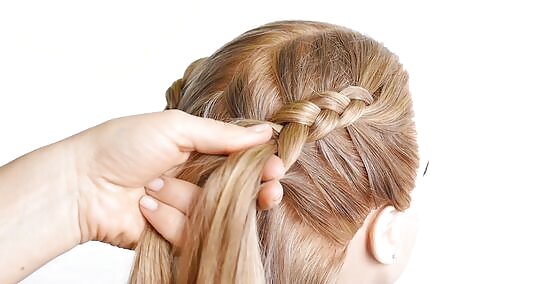
Repeat the process on the other side of your head. Gather a thin section of hair from your hairline and split it into 3 smaller ones. Begin braiding with the right strand this time. Start with a regular braid for 2 cross unders, then continue with a Dutch braid until you reach your nape. Finish off with a regular braid, then tie it off.
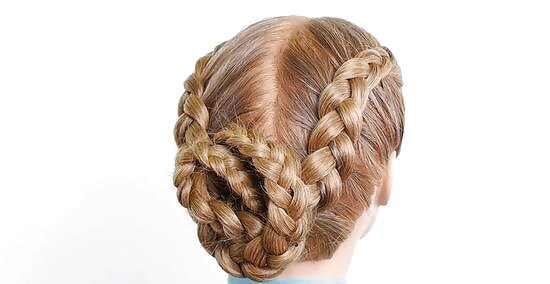
Wrap or twist the braids into a bun or crown, if desired. You don't have to do this at all, but it's a great way to update your style and get your hair off of your back. Alternatively, you can tie the 2 braids into a ponytail instead. Here are some ideas to get you started: Mini buns: twist each braid into a bun, tucking the tails underneath and out of sight. Secure the buns with bobby pins. Braided crown: wrap the left regular braid around the back of your head and pin it to inside edge of the right Dutch braid. Repeat for the right braid and left Dutch braid. Relaxed ponytail: gather the 2 braids together and secure them with a hair tie. Remove the 2 smaller hair ties, and undo the braids. Wrap a thin strand of hair around the ponytail to hide the elastic, then secure it with a bobby pin.






Comments
0 comment