
- For beginners, play on a soft reed with a strength 2 or 2.5 so it's easier to make sound. As you improve, increase the strength of your reed.
- Grip the mouthpiece with your curved lower lip and top teeth. Seal your lips all around the mouthpiece in a firm “ooo” shape so no air escapes.
- Blow an even, fast, narrow air stream to produce a pure sound. Imagine you’re blowing out a birthday candle or cooling off a hot coffee.
Purchasing or Renting Supplies
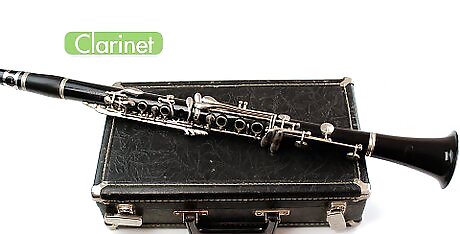
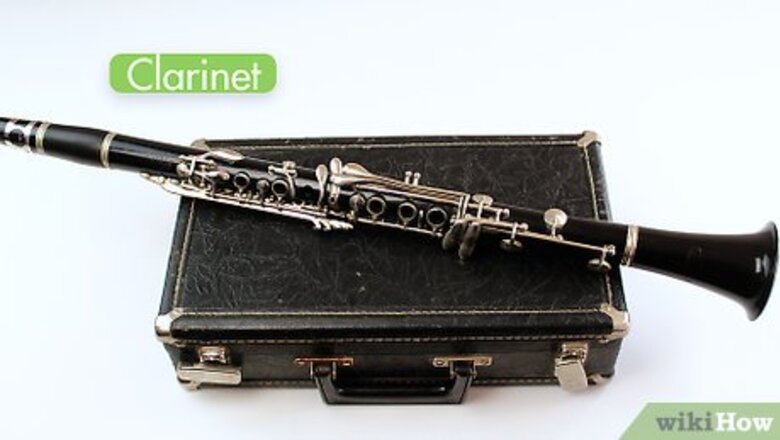
Buy or rent a beginner-model plastic or hard rubber B-flat clarinet. If you're just starting out in a school band, rent a clarinet from your school or from a music shop in your town that loans band and orchestra instruments. Choose a plastic student instrument from a reputable clarinet brand like Buffet, Yamaha, or Selmer (the Buffet Premium, Yamaha YCL-255, and Selmer CL301 are all great models). Many shops let you rent-to-own so you can purchase your clarinet after several years. If you’re purchasing outright, consider a used instrument for a lower price. Stick to a plastic first instrument since wood clarinets are more difficult to play and maintain (plus, they’re more expensive). If you have an old clarinet you want to use, take it into a music shop to get it fixed up. The pads (circular patches underneath the keys that seal the instrument’s holes) will likely need to be replaced. It's much easier to learn on a properly maintained instrument that's new instead of one that's been sitting in the attic in disrepair.
Begin with soft reeds (strength 2 or 2.5) and gather other accessories. The reed is a thin, wooden slat that fits onto the mouthpiece of the clarinet and vibrates to produce sound. When you’re first starting, begin with a low-strength reed (2 or 2.5) from a reputable brand like Rico Royal or Vandoren. You can use higher strength reeds (a 3, 3.5, or 4) once producing a sound becomes “too easy.” Other supplies you’ll need include: A B-flat clarinet case that closes securely A tube of cork grease to lubricate the clarinet’s joints for easy assembly A microfiber swab or cleaning cloth with a weighted cord A mouthpiece cap A ligature to fasten your reed to the mouthpiece A mouthpiece patch or cushion for your top teeth to grip
Assembling the Clarinet
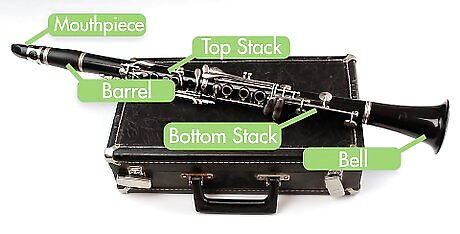
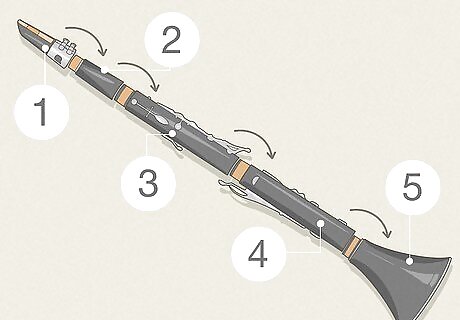
Name and identify the pieces of the clarinet. Most clarinets come in carrying cases with fitted slots for each component of the instrument. When it's time to take it out and put it together, inspect the case to make sure you've got all the parts ready to go in good working order. The case should include (from the bottommost piece to the top): The bell: a keyless, holeless piece that flares out like a megaphone. The lower joint: one half of the main body of the clarinet. It has 3 holes and many keys on the front and a thumb rest protruding from the back. The bottom end has a cork. The upper joint: the other half of the clarinet’s main body. It has cork on both ends as well as 3 holes and several keys on the front and one hole and one key on the back. The barrel: a short piece that’s slightly more flared at one end than the other. It has no holes, keys, or corks and resembles a barrel. The mouthpiece: an angular plastic or hard rubber piece with a cork at one end and a large rectangular hole in the side for the reed. It should come with a metal or leather ligature.
Assemble the clarinet from top to bottom. First, gently push and twist the bell onto the lower joint’s corked end. Then, push and twist the corked bottom end of the upper joint into the top of the lower joint. Look for the overlapping bridge keys on both joints to align the pieces correctly (press down on the silver ring around the middle finger hole on the top joint to raise the upper bridge key; it will lay on top of the lower bridge key). Then, place the wider end of the barrel on top of the upper joint. Lastly, place the mouthpiece on top of the barrel. Twist it so that the rectangular opening in the back is aligned with the register key (a long, slender key on the back of the upper joint).
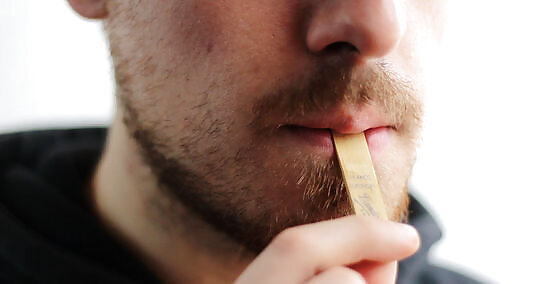
Wet the reed before you play or as you’re assembling the instrument. Before a performance or practice session, place your reed in a small jar of fresh water or dampen it with your saliva by holding it in your mouth for about a minute. A wet reed produces a smooth, clear sound; if you play on a dry reed, the sound will be airy and likely to squeak. If your reed is dripping wet, gently wipe it on a clean cloth so it’s damp but not soaked. Start with a softer reed (strength 2 or 2.5). As your mouth muscles get stronger and your endurance increases, you will start needing harder reeds. Bump up reeds when your clarinet tone starts sounding thin, tinny, or spread. You may struggle to play at all if your mouth muscles are too strong and they pinch the reed into the mouthpiece. Your teacher will also tell you if you need a softer or harder reed.
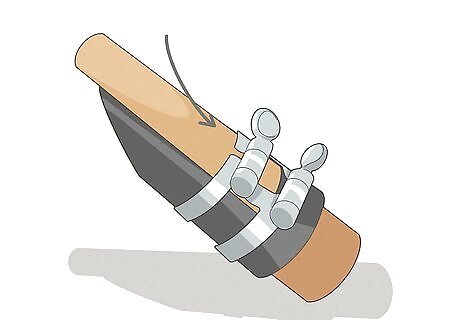
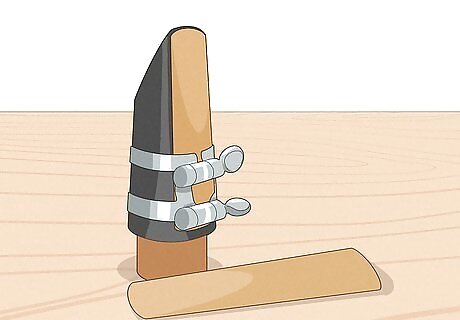
Fasten your damp reed to the mouthpiece with the ligature. Slide your ligature over the mouthpiece; on most models, the tightening screws should be facing you. Then, slide the reed between the mouthpiece and ligature. The thick end of the reed should be on bottom, and the flat side of the reed should be flush with the flat side of the mouthpiece, covering the rectangular opening. Align the tip of the reed so it’s just barely lower than the tip of the mouthpiece. Placing it too high or too low will make it difficult to produce a sound. Finish by tightening the knobs or screws on the ligature until the reed is firmly in place. Over-tightening can strain the mouthpiece, so be gentle. The tips of the mouthpiece and reed are very fragile. Cover them with your mouthpiece cap when not in use. Some instructors may tell you to assemble the mouthpiece, reed, and ligature first and then place them on the clarinet together. However, this increases the chance of accidentally chipping the reed or twisting the ligature off the mouthpiece.
Holding the Clarinet

Support the clarinet with your right thumb underneath the thumb rest. Your right hand and fingers will cover the keys and holes on the lower joint, and your left hands will cover the upper joint. To start, let the thumb rest on the back of the lower joint sit on top of your right thumb between the nail and first joint. Keep your other fingers gently curved and resting near the holes and keys on the front of the instrument. Keep your left hand “floating” over the upper joint; your thumb should hover over the register key and thumb hole in the back and your other fingers should curve around to the front. Until you begin fingering notes, the left hand does not hold on to anything. Once you’re playing, the thumb rest and mouthpiece are the “anchors” you support the instrument with. When your fingers are not in use, keep them very close to the holes to make it easier for them to get to the keys when they are needed. If you keep your fingers too far away, it will make it difficult to play fast things.
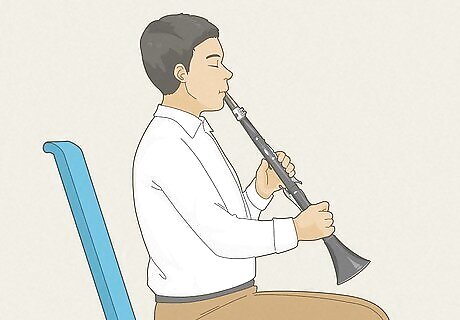
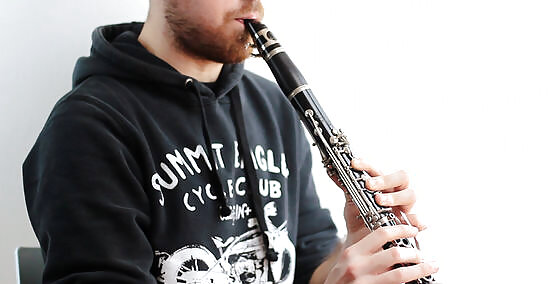
Sit up tall and hold the clarinet at a 45-degree angle from yourself. Keep your head high and looking forward, then bring the mouthpiece up to your lips. Hold the instrument at about a 45-degree angle so the bell is just past your knees (if you’re still getting used to the feel of the instrument, rest the bell between or on top of your knees for more support). Maintain tall posture from the waist up; keep your shoulders low and relaxed, your neck and throat straight, and your head looking straight forward. Always bring the clarinet up to your mouth instead of slouching down to reach the instrument. If it’s too difficult or unwieldy to hold the instrument, consider a neck strap to help support the weight. Most attach to the thumb rest.
Forming a Clarinet Embouchure
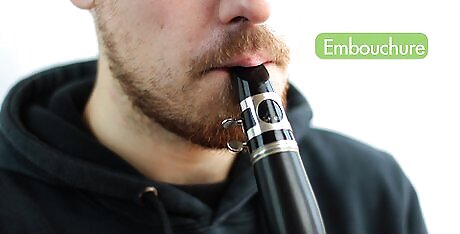
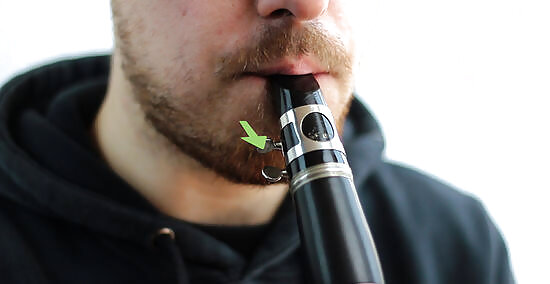
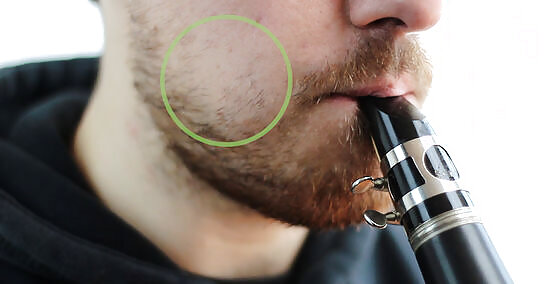
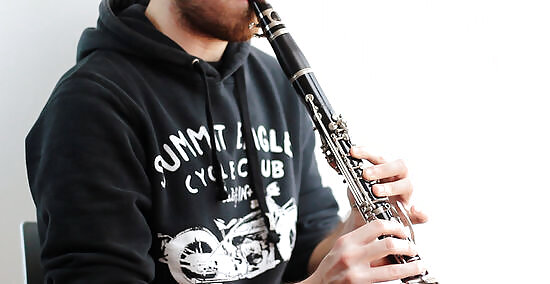
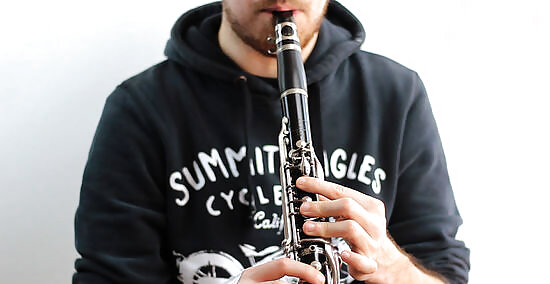
Secure the mouthpiece between your curved bottom lip and top teeth. First, curve your bottom lip over your bottom teeth about as far as the line between your lip and skin. Rest the reed on top of your lip so there’s about 0.5 in (1.3 cm) of the mouthpiece inside your mouth. Then, rest your top teeth on top of the mouthpiece so they’re making clear contact. It helps to have a mouthpiece patch on top of the mouthpiece so your top teeth have something to grip. Keep your bottom lip firm so that your chin flattens out and points down toward the ground. If you just push the horn into your mouth and blow, it'll be hard to make a note. Your embouchure (the shape of your lips around the mouthpiece) helps you produce a stable tone.
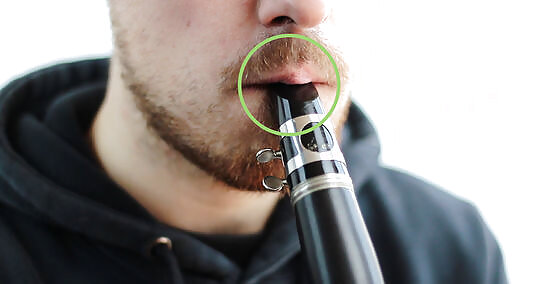
Seal your top lip and the corners of your mouth around the mouthpiece. With the mouthpiece in your mouth, say “whee” and bring your top lip down to meet the mouthpiece. Then, make an “ooo” shape in your lips (while keeping your top lip slightly firm) to bring the corners of your mouth down and around the mouthpiece, almost like you're slightly frowning. If your lips aren't sealed, air will escape and no sound will come out of the instrument. Keep your tongue in a natural, relaxed, slightly arched position with the tip pointing toward the reed (but not touching it). This may be hard to get used to at first; a clarinet teacher or band instructor can help you consistently get a good, supportive embouchure.
Making a Sound on the Clarinet
Keep your embouchure firm and blow a narrow, fast air stream. Take a deep breath with your diaphragm and keep your core gently engaged while you exhale. Blow “cold” air (like you’re blowing out a birthday candle) to keep your air stream fast, focused, and supportive. Experiment with different strengths of breath to get a sense of how much it takes to get a good-sounding tone from the clarinet. A little resistance is good and forces you to use faster, more supportive air. If the instrument is fighting you too much, double check that the reed is damp and aligned correctly on the mouthpiece. Don’t worry about pressing any keys or holes yet. The note you’re making now is called “open G” because it doesn’t require you to press anything (this is the G on the second line of the treble clef). For now, don’t let your tongue touch the reed. Just keep it in its natural, slightly arched shape.
Keep your cheeks firm and your tongue raised to control the sound. It’s tempting to puff out your cheeks when you play, but you'll get a more even and consistent tone if you avoid this. Keep the back of your tongue in a relaxed arch shape (like when you say the syllable “eee”) to funnel the air up and forward; if the tongue flattens into an “aah” shape, the air will go sideways and puff your cheeks out, which distorts the sound. Practice playing in the mirror to check your cheeks, posture, and embouchure while you play. Once you can produce a steady sound, try tonguing. While blowing, touch the top of the tip of your tongue just underneath the tip of the reed to articulate (separate) the sound. If you squeak, don't be discouraged. Keep experimenting with different amounts of air to put through the horn. Squeaks might be caused by your air stream being too wide and unfocused, your tongue dropping too low and flattening out, having too much or too little mouthpiece inside your mouth, or holding the instrument at too wide or narrow of an angle.
Playing Notes on the Clarinet
Cover the holes one finger at a time going downward to play a scale. Place your left thumb down over the hole in the back of the upper joint to make the note F. Continue covering holes in your left hand to go lower—add your index finger over the top hole on the front to make E, add your middle finger to the middle hole for D, and cover the third hole with your ring finger to play middle C. Then, add your right hand fingers. Cover the top hole on the lower joint with your pointer finger to play B-flat, add your middle finger to the middle hole to make A, and your ring finger over the third hole to play low G (an octave below open G). Note how adding fingers changes the strength that you need to use to blow through the horn. Generally, the more holes that are covered, the more resistant the note is. Cover the holes completely to get a full, in-tune sound. Keep your fingers long and slightly curved so the thick pad of your finger is covering the hole (not the very tip of your fingers).
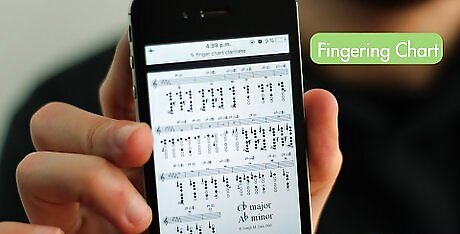
Look at a clarinet fingering chart to learn how to play every note. Look online or check your local music store for beginner clarinet method books. Method books contain fingering charts, playing advice, and short tunes that teach you specific skills (like incorporating new notes or playing more expressively). Some commonly used ones are Band Expressions, Standard of Excellence, and the Rubank Elementary Method. Learn to read sheet music to advance more quickly. B-flat clarinet music is written in treble clef and sounds one whole-step lower than concert pitch (C) instruments.
Improving Your Clarinet Playing Over Time
Practice scales and arpeggios. If you practice scales and arpeggios, your technique for solos and other repertoire will be much smoother. Finger patterns are essential for playing clarinet well, and you can learn those quickly by practicing these runs. If you’re taking clarinet lessons or enrolled in a band program, your instructor will definitely provide you with a scale book or assignments (and help you learn them). In music, a scale is a sequence of 8 notes that spans one octave (for example, going from low G to open G one note at a time). An arpeggio is an exercise that takes the first, third, and fifth notes of a scale to make a chord.
Practice songs or pieces that you know and enjoy. As with any instrument, if you're just playing for fun, start off with things you know. There are plenty of popular pieces for the clarinet that are not too challenging. This is especially so if you like swing and jazz, which is more intuitive. The classical repertoire can be more demanding, but there are beginner-friendly pieces if you look hard enough. Some jazz tunes to explore include the vocal lines from songs like “My Way” by Frank Sinatra or “Hit the Road, Jack” by Ray Charles. Some simple classical tunes include arrangements of tunes like Beethoven’s “Ode to Joy,” “Clair de Lune” by Claude Debussy, or folk songs like “Amazing Grace.”

Consider taking private lessons. It's very hard to learn to play the clarinet just from reading a book or watching a video tutorial. It's best to start out with a teacher (instead of on your own) so that you won't miss anything or learn anything wrong. Often, school music teachers will offer lessons for cheap. Bad habits can develop without you even knowing, which can make it hard to get past a certain skill level. If you want to play the clarinet the right way, begin lessons as early as possible. Private lessons are typically weekly and begin at 30 minutes for beginners. The rate you pay depends on the teacher’s experience and the demand in your area.

Join your school band or orchestra. School groups are great ways to improve your own technique on the clarinet, learn how to play in a large ensemble, and enjoy music that you wouldn’t be able to play just by yourself. Plus, you’ll have a whole clarinet section to share tips and tricks with. Prepare for the long haul! You aren't going to become a good player overnight. Start with the basics then move on to more advanced things. Playing an instrument is a life-long learning project.


Comments
0 comment