
Selecting the Right Wood
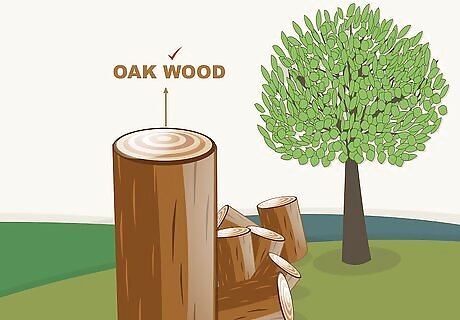
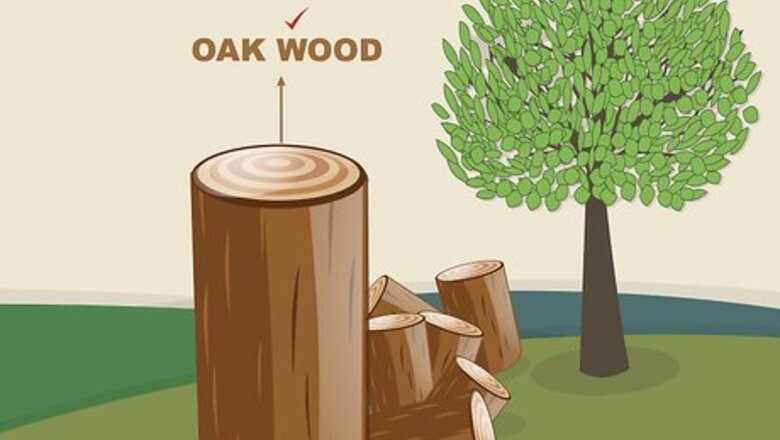
Select a wood like oak or maple to create an attractive appearance. Oak is the most popular quarter-sawn timber. The ray flecks that oak reveals when it is quarter-sawn are spectacular. Maple is another wood that displays an attractive appearance when it is quarter-sawn. Choose one of these types of wood appropriate for the quarter-sawn product you’re trying to create. The “ray flecks” that are visible in quarter-sawn wood are the tree’s medullary rays, a type of structure that grows in the wood perpendicular to the growth rings. These structures help transport water and nutrients throughout the tree during life. Quarter-sawn oak is particularly effective for cabinet and furniture making. Oak is also valued for its exceptional stability and resistance to warping. Due to its hardness and fine grain, quarter-sawn maple is ideal for making instruments, decorative boxes, and other fine woodworking projects. The finished wood has a beautiful rippled appearance.
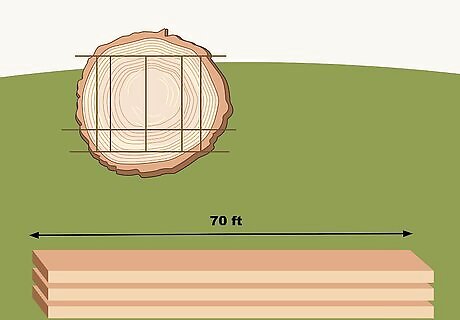
Determine what size of log you need for your project. Estimate the size and length of the boards you’ll need using the International 1/4 Log Rule. You can find the International Log Rule online at this website: http://www.woodworkersjournal.com/how-much-lumber-is-in-a-log/. The rule provides specifications for how many boards you can produce from a log of a particular size. For example, a 12 ft (3.7 m) long log with a 12 in (30 cm) minimum diameter can yield 70 ft (21 m) of boards.
Choose a log with long, thick medullary rays. Medullary rays are the shiny ribbons that extend vertically through the tree perpendicular to the growth rings. Select logs to quarter-saw that have prominent medullary rays arranged in a spoke-like pattern originating at the log's center.Did you know? Quarter-sawn wood often sells for a higher price than plain-sawn wood, partially because of the attractive look created by the exposed rays. The longer and thicker the rays are, the more chance you have of hitting them when you saw. These rays give quarter-sawn wood its beautiful and distinctive appearance.
Preparing Fresh-Cut Logs for Quarter-Sawing

Put on personal safety equipment. Wear safety goggles and gloves at a minimum. Put on an apron to keep wood dust from getting on your clothes. Heavy work boots are also recommended both to keep sawdust from getting in your shoes, as well as to protect your feet in case a cut branch or log falls on them. Also, obtain and wear heavy-duty earmuffs to protect your ears from the loud sounds of machine-assisted wood cutting.
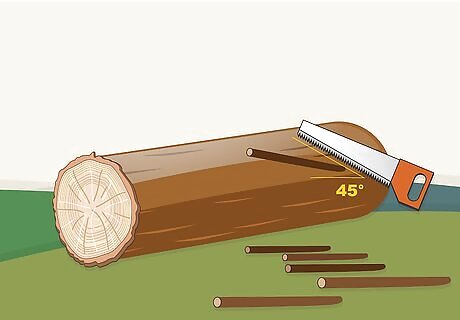
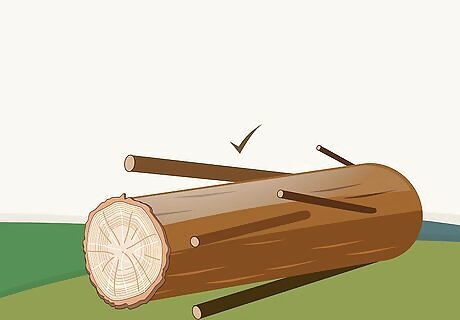
Cut any limbs or branches off the log. If the log still has any branches attached, you will need to remove them with a hacksaw or pruning saw. Hold the saw blade at a 45° angle, with the teeth touching the branch, then move the saw back and forth while applying downward pressure. Discard each branch you remove until the log has been completely cut. If you’re using a chainsaw, cut the limb on the side of the log opposite where you are standing for extra safety.
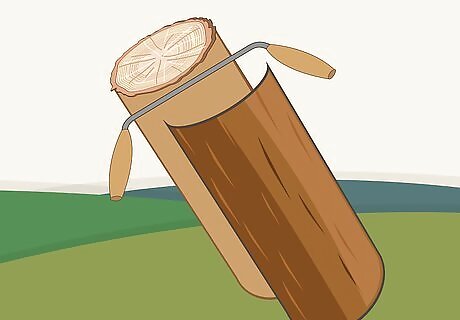
Remove the bark from the log with a drawknife. Place the log into a vise with the cut end facing upward, then hold a drawknife over the open face, with the teeth positioned over where the bark and sapwood meet. Move the drawknife back and forth while pressing downward until a piece of the bark comes loose. Repeat until you have shaved all of the bark from the log. You can also hand-peel the bark from the log. Make sure you are wearing safety gloves. Grip a piece of loose bark from one end of the open face of the log, then pull it up and off the log. Repeat this process using other loose pieces of bark until it’s all been pulled off. If some of the bark is hard to peel off, slide a knife blade or 5-in-1 painter’s tool between the bark and the sapwood to loosen it. It’s easiest to hand-peel bark from logs that have been dead for a year or 2, since this will give the wood and bark plenty of time to dry out.
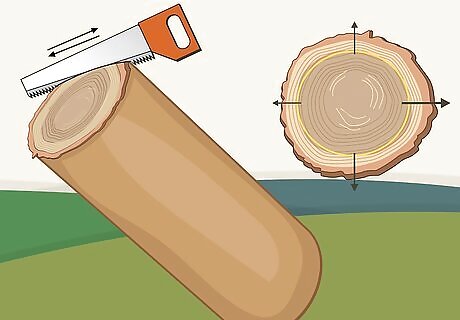
Eliminate the sapwood with a handsaw. Sapwood is the outer, lighter-colored wood where water and sap flows, and it is susceptible to fungus. Place the handsaw teeth on the open face of the log where the sapwood meets the inner layer—the heartwood. Saw the sapwood off by moving the saw back and forth and exerting downward pressure on the teeth.Tip: While sapwood is more prone to decay than heartwood, it can still be useful in certain kinds of woodworking projects. For example, white maple sapwood is much more desirable than the hardwood and is ideal for making flooring, instruments, and athletic equipment (such as baseball bats). If you want to use sapwood, treat it with wood-preserving chemicals to extend its lifespan. Sapwood is also harder to seal than the heartwood, because it has a lot more moisture in it.
Cutting Boards from Logs
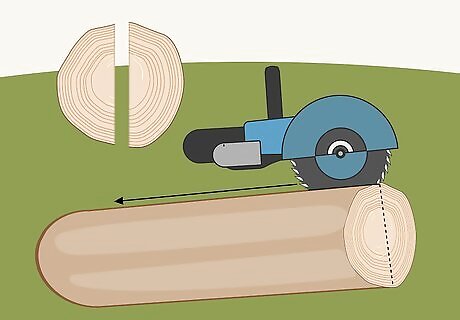
Line the log up on the portable saw carriage and cut it in half lengthwise. Position the log horizontally in the carriage so that the blade can cut through its center. Slide the log down the carriage until one end is flush with the blade. Cut the log in half lengthwise, then turn the saw off. To maximize the amount of lumber you get from the log, you can now cut several wide boards from the bottom of one of the halves you just cut.
Cut the log into quarters. Once you’ve cut the log in half, line one of the halves up along the blade. You will need to stand it up on its edge. Turn the saw back on and cut the half into 2 equal parts. Turn the saw off and remove these parts. If you haven’t cut boards from the other half already, place the remaining half log back in the saw carriage, turn the saw on, and cut this log into 2 equal parts. Always double-check that the saw is turned off when removing cut logs from the carriage to minimize your risk of injury.
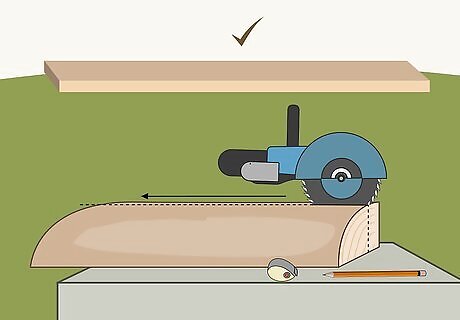
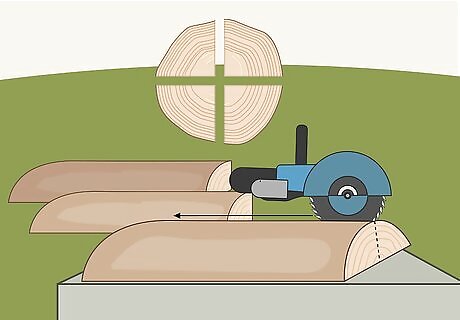
Saw a board of the desired thickness from one of the quarters. Place a quartered section on the saw carriage. Orient the saw blade near the open face so that you can cut a board off of it of a predetermined thickness. Turn the saw on and saw off a board. Tip: Draw guidelines on the cross-section of the log showing where you would like to make the cuts. This will make it easier for you to cut your boards evenly to the desired thickness. For example, if you want boards that are 1 in (2.5 cm) thick, align the blade 1 in (2.5 cm) away from one side of the log.
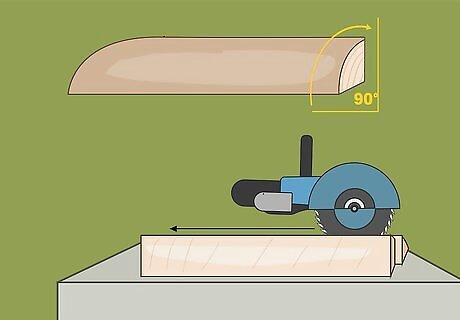
Turn the quarter log 90° and saw off another board. Slide the quarter back under the blade so that the blade is positioned to cut a board of the same thickness as the first, and then saw off another board. Repeat this last step until you have cut the log into as many boards as possible. Remember to turn the log 90° before sawing off each board. Use your quarter-sawn boards to build beautiful wood products! For example, you might build a cabinet or table, use long boards for flooring, or create small objects like boxes or cutting boards.
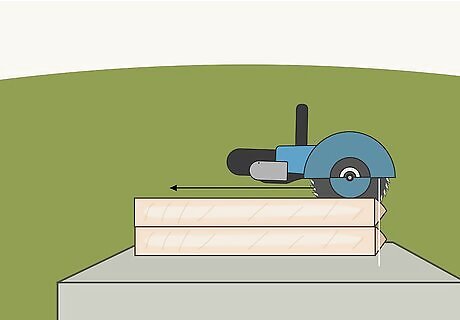
Cut 2 quarters simultaneously to save time. Place 2 quarters next to each other. Then slide each quarter under the blade and cut the 2 quarters at the same time. Remove the 2 resulting boards. Pull the 2 quarters apart and rotate each quarter 90°. Place the quarters back under the blade, then cut another 2 boards. Repeat this process until you have cut all of the boards you can from the quarters.
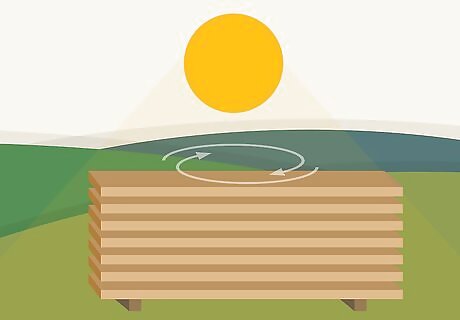
Air-dry your cut boards before you use them. Freshly sawn wood typically has quite a bit of moisture in it, so your boards will need to be dried before you can use them. Find a storage spot outdoors where you can stack your boards away from trees (which can drop leaf litter and twigs) or soggy soil. To create the best air flow, elevate your boards on cinder blocks and line them up side by side. If you have a lot of boards, stack them in layers separated by thin wooden slats, then weigh the whole stack down with more cinder blocks. Look for a spot where prevailing winds will blow through the side of the stack of lumber. Use a moisture meter to check the moisture content of the wood periodically. The goal is to achieve a moisture level of around 15-20%. Depending on the weather conditions and the original moisture content of the boards, it may take several months for the lumber to dry.


Comments
0 comment