views
- The easiest way to set a song as your ringtone is to buy one from the Tones section of the iTunes Store on your phone.
- You can also create a custom ringtone in iTunes, Music, or GarageBand on your computer.
- However you create your ringtone, you can set it using Settings or the Contacts app on your iPhone.
Buying Ringtones from the iTunes Store
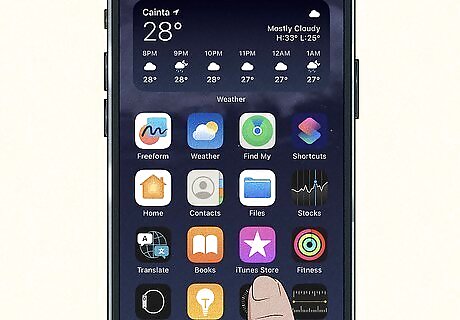
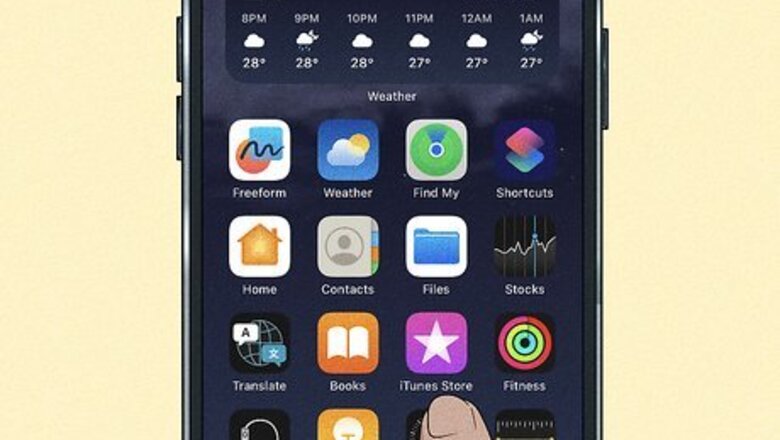
Launch the iTunes Store on your iPhone. To quickly and easily buy a ringtone made from a popular song, you can use the Tones section of the iTunes Store right on your iPhone. The iTunes Store is a built-in app on iPhones. The icon looks like a white star on a bright pink background. If you don’t see the iTunes Store app on your Home Screen, scroll through all your Home Screen pages until you reach the App Library. Search for itunes store in the search field at the top of the screen or scroll down and look for it in the Entertainment group. If can’t find the ringtone you want in the iTunes Store, try one of the methods below. You might need to make one in iTunes, Apple Music, or Garage Band.
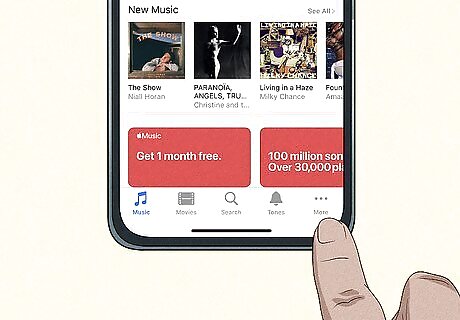
Tap the More tab. This tab is located at the bottom right corner of the screen.
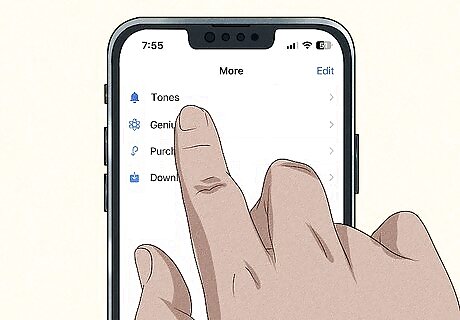
Select Tones. It’s at the top of the More menu.
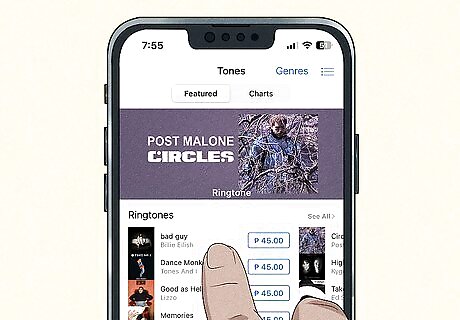
Browse or search for the ringtone you want. You can either browse through the categories on the main Tones screen, or tap Search at the bottom of the screen and type in the name of the song or artist you want. If you use the Search feature, it will search for anything in the iTunes Store that matches your search term. Scroll down to the Ringtones category in the search results to find ringtones, if there are any.
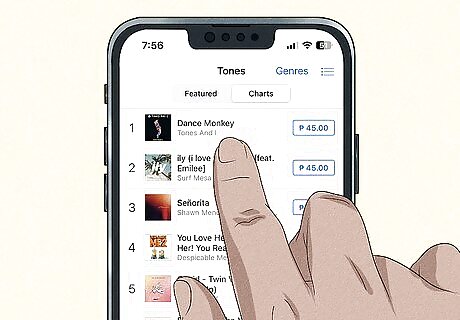
Tap a ringtone to hear a preview or see more info. Once you’ve found a ringtone you’re interested in, tap on the thumbnail to hear a preview. You can also tap the name of the ringtone to bring up more information.
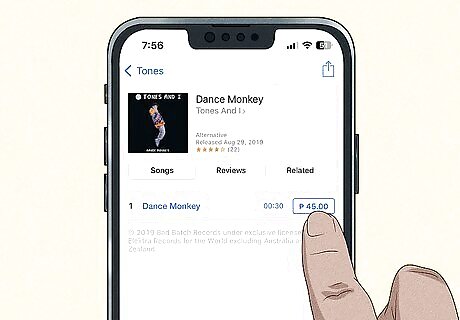
Tap the price of the tone to buy it. You’ll see the price of the ringtone in a blue box to the right of the thumbnail and the name of the tone. Tap on it to purchase the tone. A menu will pop up giving you several options. You can: Set as Default Ringtone Set as Default Text Tone Assign to a Contact Tap Done to buy the tone and install it on your iPhone without setting it.
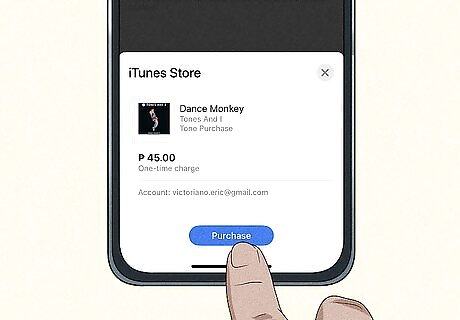
Confirm your purchase. Once you tap one of the purchase options, you’ll be prompted to confirm. Depending on your iPhone settings, you may need to do something like double-click the side button, verify with Face ID or Touch ID, or enter your Apple ID password. If you don’t choose one of the options in the menu to set your ringtone right away, you’ll need to set it after you’ve made your purchase. You can also re-download ringtones you’ve purchased in the past with the same Apple ID. To do so, open iPhone Settings App Icon Settings and select either Sounds & Haptics or Sounds. Tap any sound listed in the Sounds and Haptic Patterns group. Tap Download All Purchased Tones. It’s near the top of the menu, under Store. You can also tap the Tone Store link to open the Tones section of the iTunes Store.
Creating a Ringtone in Music or iTunes
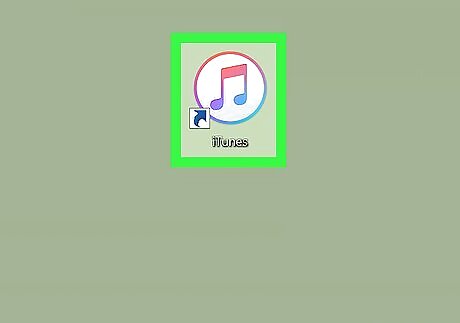
Open Apple Music or iTunes on your computer. Can’t find the song you’re looking for in the iTunes store? You can easily make your own on your computer. If you're using Windows or a version of macOS released prior to Catalina, click iTunes in your app list. If you're using a more recent version of macOS, open the app called Music.
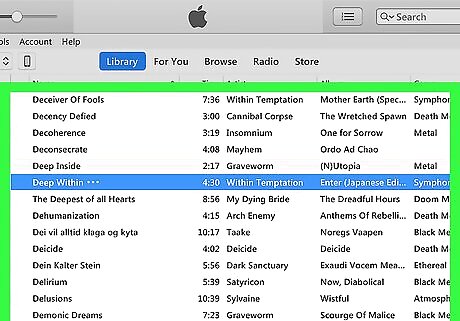
Make sure that your song is in iTunes or Apple Music. You'll need to have the actual music file you want to trim already in iTunes or Apple Music on your computer—it can't just be a streaming song from your Apple Music subscription or something stored in the cloud. If you have the song as an MP3 (or another format) on your computer, just drag it into iTunes or Apple Music to add it now. Some songs you’ve previously purchased might be stored in the cloud. If you see a cloud icon with a down arrow beside it next to the song, click it to download the song onto your computer. You can download songs you don’t own from Apple Music, but you won’t be able to turn them into ringtones. You’ll get a notice saying that it’s a protected file that can’t be converted. If you’re using Apple Music, you can purchase songs by going into the iTunes Store. If you don’t see the store listed in the sidebar menu in Music: Click Music in the menu bar at the top of the screen, then click Preferences or Settings. Open the General tab and check the box next to iTunes Store next to the Show header. Click OK to confirm your choice and close the Settings/Preferences window. You can then click the link in the sidebar to browse the iTunes store. You can also click on the ••• button next to any song or album in Apple Music and select View in iTunes Store to purchase and download it.
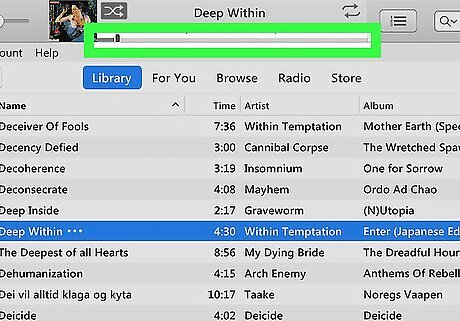
Find the section of the song that you want to use. Double-click the song in iTunes or Music to play it, listen for the beginning of the section that you want to use as the ringtone and note the start time, and listen for up to 40 seconds before noting the end time. You can see the timestamp for the song at the top of the iTunes window when a song is playing. Ringtones cannot be longer than 40 seconds. Depending on your operating system, you may not be able to make ringtones that are longer than 30 seconds.
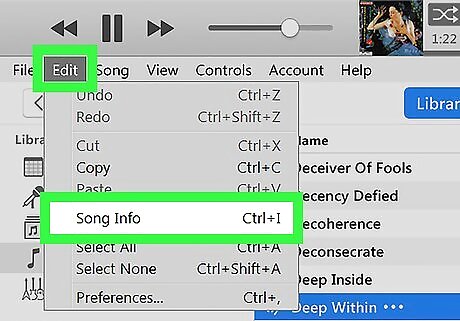
Open the song's information. To do so in iTunes, right-click the song and select Song Info (Windows) or click on the ••• button and select Get Info (Mac). If you’re using the Apple Music app on your Mac, click the ••• button and select Get Info from the menu that pops up..
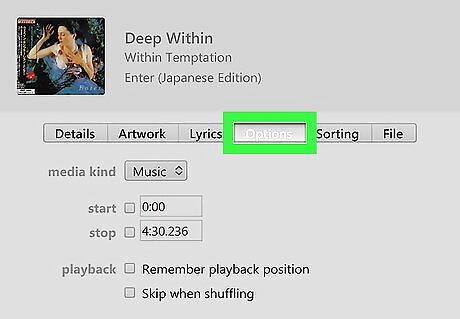
Click the Options tab. It's at the top of the information menu window.
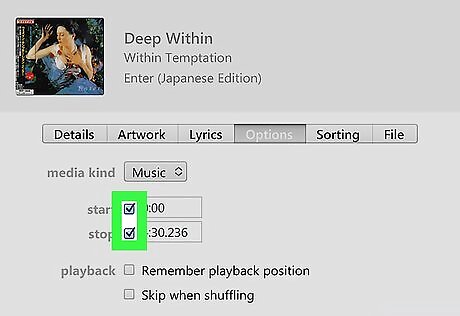
Check the start and stop boxes. They're both near the top of the window, just below the media kind section. Doing so will place checkmarks in the respective boxes, allowing you to change the start and stop time for the song.
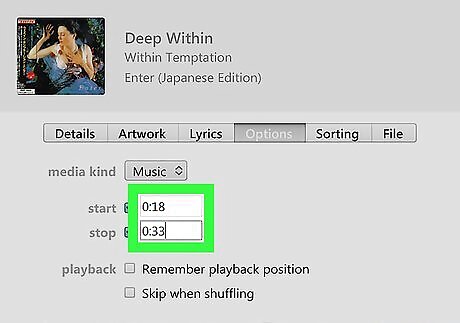
Enter the start and stop time. In the start text box, enter the time in the song at which you want the ringtone to start, then do the same with the point at which you want the ringtone to end in the stop box. Remember, the ringtone can be up to 40 seconds long (or 30, depending on your operating system).
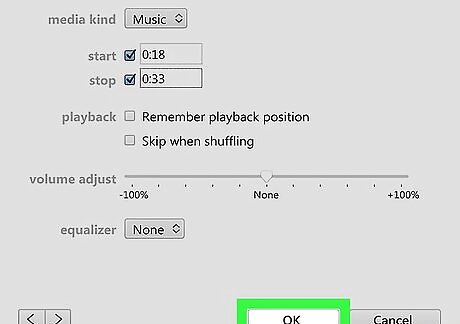
Click OK. It's at the bottom of the window. This will save the song's changes and exit the information menu.
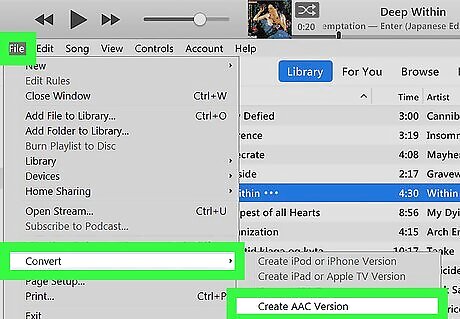
Create an AAC version of the song. You’ll need to convert the song to the right format before you can use it as a ringtone. Make sure that the song is selected by clicking it, then click File in the menu bar at the top of the screen, select Convert in the menu, and then click Create AAC Version. A new version of the song that is the length of your ringtone will appear below the original song in iTunes or Music. For example, if your selected ringtone segment is 26 seconds, the new song will have "0:26" next to it instead of the full song length. If you don't see the Create AAC Version option, you’ll need to enable it. To do this: Click Edit in the menu bar at the top of the screen in Windows. On a Mac, select either iTunes or Music from the menu bar, depending on which macOS and app you are using. Click Preferences or Settings. Depending on which version of iTunes or Music you have, either open the General tab or the Files tab. From there, click Import Settings. Click the "Import Using" drop-down box and click AAC Encoder in the drop-down menu. Click OK to save your changes, then click it again in the main Settings/Preferences window. Don’t forget to reset the start and stop times for the original song in your iTunes/Apple Music library!
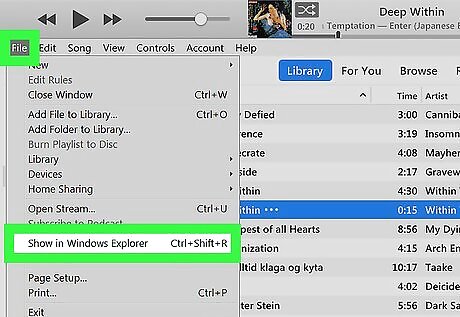
Open the AAC file's location. Select the AAC version of the song, then click File and click Show in Windows Explorer (Windows) or Show in Finder (Mac) in the drop-down menu. This will open the file's location on your computer.
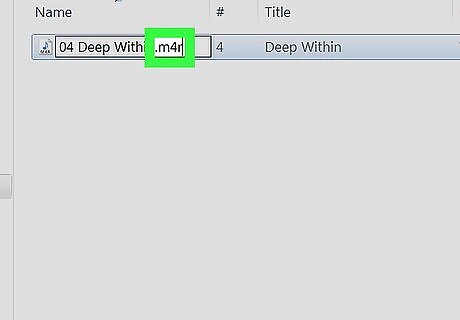
Change the AAC file into an M4R file. This process will vary depending on whether you're using a PC or a Mac: Windows: Click the View tab at the top of the File Explorer window Check the "File name extensions" box if not checked Click the ".m4a" version of the song to select it Click the Home tab and click Rename Replace m4a with m4r at the end of the song and press Enter, then click OK. Mac: Select the AAC version of the song (the ".m4a" version) Click the File menu at the top of the screen Click Get Info in the drop-down menu Change m4a to m4r in the "Name & Extension" section and press ⏎ Return Click Use m4r in the alert box that pops up. Leave the File Explorer or Finder window open for now. You’ll need it when you move the ringtone to your iPhone.
Placing the Ringtone on Your iPhone
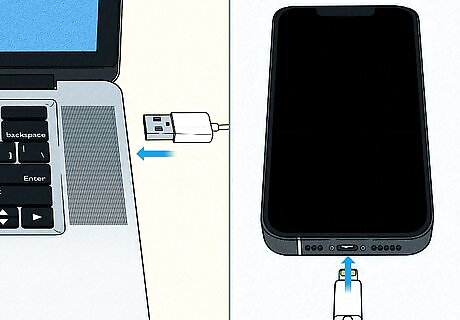
Attach your iPhone to your computer. Plug the USB end of your iPhone's charging cable into a USB port on your computer, then plug the other end of the cable into the charging port on your iPhone.
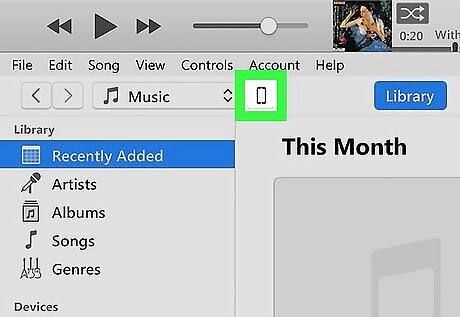
Open your iPhone in iTunes or Finder. If you're using iTunes, click the iPhone icon/button at the top of the iTunes window to display your iPhone's contents. If you're using macOS Catalina or later, open a new Finder window by clicking the two-toned smiley face icon (Mac Finder) on the Dock, and then click your iPhone in the left sidebar.
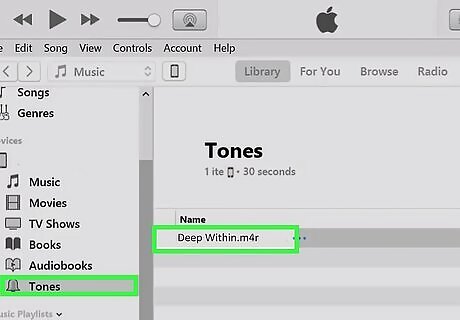
Drag the M4R file to your iPhone. The best way to move the file over depends on whether you’re using Finder or iTunes. If you’re using Finder, simply drag the ringtone file from its location on your computer and drop it into the General tab. You can also copy the file and paste it. If you're using iTunes and see a folder on your iPhone called Tones or Ringtones in the Media folder in the left panel, you can drag the file right to that folder. If you don't see this folder, just dragging the file to the main panel in iTunes will transfer the file to your iPhone.
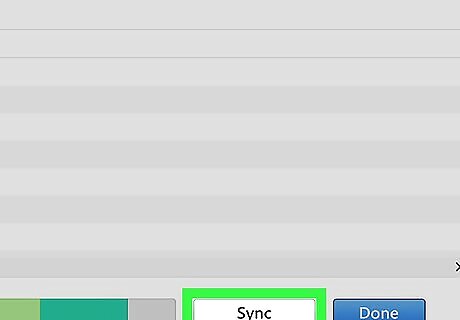
Click Sync. It's a white button in the bottom-right side of the iTunes or Finder window. Once your iPhone is finished syncing, you can disconnect your phone from your computer and complete the remaining steps on your phone. Depending on which version of iTunes or Finder you’re using, clicking Sync might not be necessary. In many cases it’s enough to drag and drop or copy and paste the file.
Making a Ringtone in GarageBand
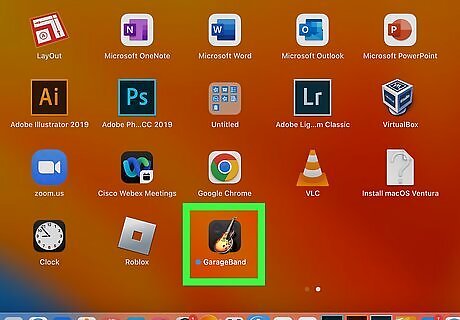
Open GarageBand on your Mac. If you want to make a ringtone from a song you created in GarageBand—or if you’re just looking for an alternative to using iTunes or Apple Music—you can use GarageBand to make ringtones and export them directly to your iPhone. To get started, you’ll need to open the GarageBand app on your Mac computer. You can find GarageBand by opening Launchpad in the Dock at the bottom of the screen. The icon looks like an electric guitar in front of an amp. You can also create a song in GarageBand directly on your iPhone. If you do this, skip straight to Step 6. To create a song in the mobile app, launch GarageBand on your phone and tap the + Create Song icon. Select from one of the options to import or record a track, or put together a song from tracks and samples in the GarageBand sound library. Once you’re satisfied with the song you’ve created, tap the icon that looks like a triangle pointing down in the top left corner of the screen and select My Songs. This will take you back to the My Songs browser.
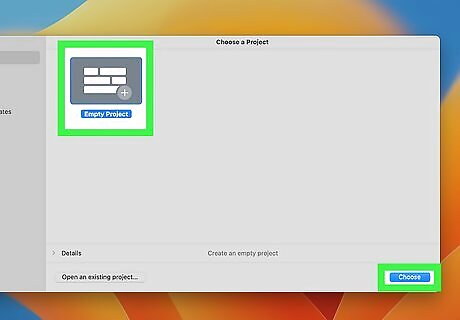
Open the project you want to turn into a ringtone. Click File and select Open, then open the song you want to convert to a ringtone. You can also import a song into GarageBand by: Selecting File and clicking New Clicking Empty Project and clicking Choose, then selecting Create Dragging and dropping a music file from a location on your computer to create a new track
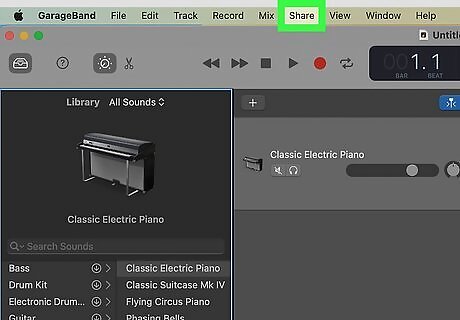
Open the Share menu. It’s in the menu bar at the top of the screen.
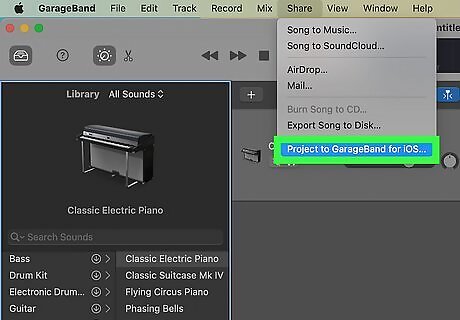
Select Project to GarageBand for iOS. Enter a title for your song and click Save. Make sure you have iCloud Drive selected in the Where dropdown. It may take a few seconds for the file to export. If you see the option to save your project to a GarageBand for iOS folder in iCloud, select that. It will make it slightly easier to find your file in the mobile GarageBand app. If you haven’t already set up an iCloud account, you’ll need to do so before you can export your project.
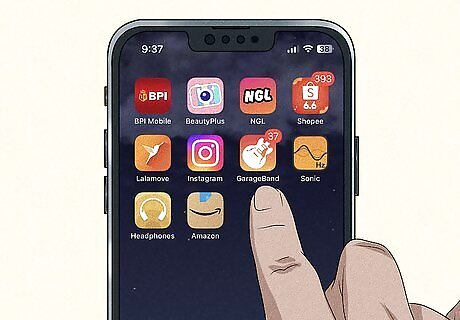
Open GarageBand on your iPhone. The icon looks like a white guitar on an orange to yellow gradient background.
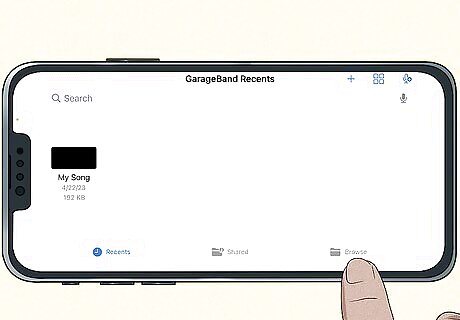
Tap the Browse tab and locate your song. When you launch GarageBand, it should open to the My Songs browser. Tap Browse at the bottom of the window and look for your song. If you don’t see your song, type its name into the Search field at the top of the screen, then tap Search. It should appear if you successfully uploaded it to iCloud.
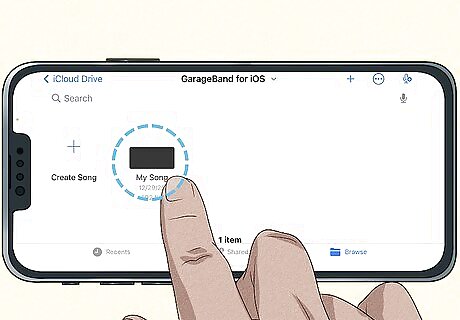
Tap and hold the song. A menu will open up. If you just tap your song instead of tapping and holding it, the project will open in the GarageBand editor.
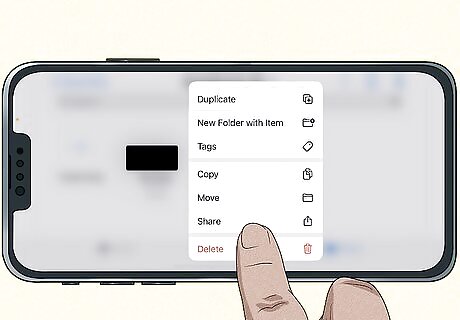
Tap the Share button. You may need to scroll down in the menu to find it.
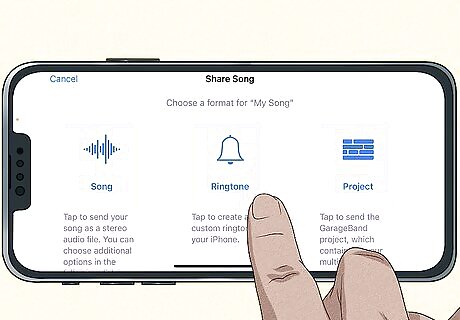
Select Ringtone. A Share Song window will open and prompt you to select a format. Choose the Ringtone option. If your song is longer than 30 seconds, you’ll see a popup advising you that the length of the ringtone needs to be adjusted. Tap Continue, and GarageBand will automatically trim your song for you.
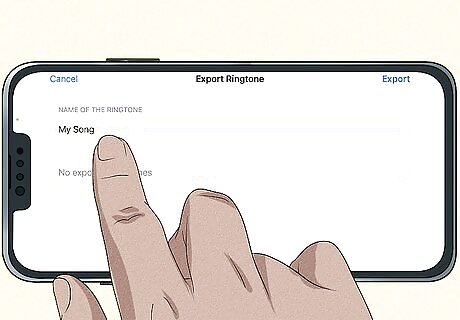
Enter the name of your ringtone and tap Export. It will take a few seconds for the export to process. You can either tap OK and assign the ringtone later, or tap Use sound as… to set the ringtone right away. If you select Use sound as…, you can choose from one of the following options: Standard Ringtone Standard Text Tone Assign to contact Tap Done to exit the Use sound as… menu without setting the ringtone.
Setting the Ringtone
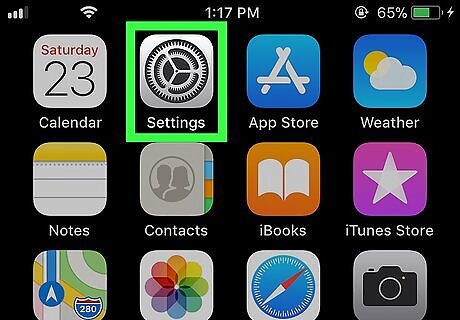
Open your iPhone’s Settings app. Once you’ve created a ringtone and moved it to your iPhone, you can set it as your default ringtone, use it as a text alert, or even assign it to a specific contact. To get started, open your iPhone Settings App Icon Settings app.
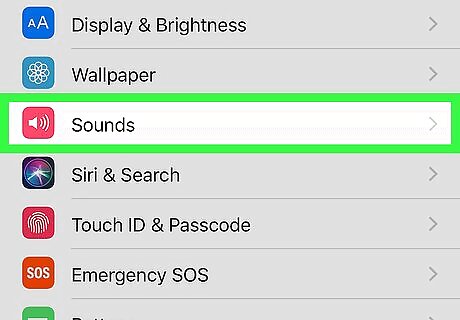
Scroll down and tap Sounds & Haptics. Depending on what version of iOS you have on your iPhone, it might be just Sounds.
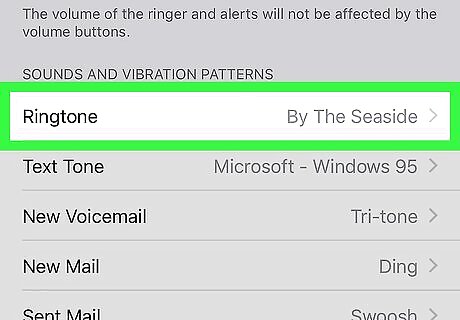
Tap Ringtone. This option is directly below the SOUNDS AND VIBRATION PATTERNS or SOUNDS AND HAPTIC PATTERNS heading in the middle of the page. If you want to assign your new ringtone to a different type of alert, such as text messages or voicemail, select one of those options from the list instead of Ringtone.
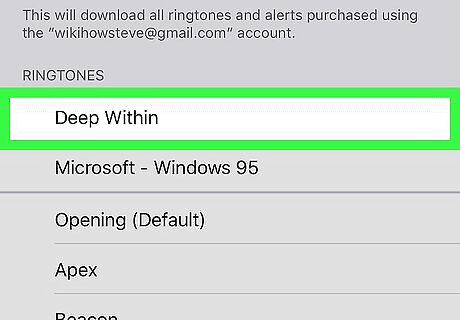
Tap your ringtone's name. In the RINGTONES section, tap the name of the custom ringtone that you want to set as your phone's default ringtone. You should see a blue checkmark appear to the left of it, signifying that your phone will use your custom ringtone for all incoming calls. You should also hear a preview of your ringtone when you tap it.
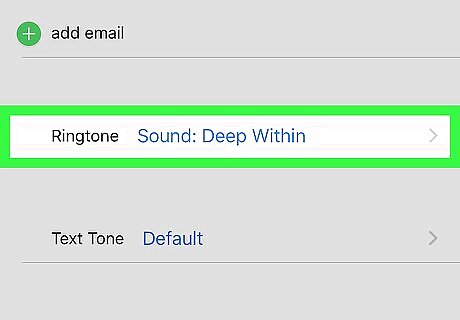
Set your new ringtone for a specific contact (optional). If you'd rather set the ringtone for a specific contact, do the following: Open the Contacts app. It looks like a gray square with an icon of a person on it and several colorful tabs along the side. Tap a contact's name. Select Edit in the upper right corner of the screen. Tap Ringtone. Select the ringtone you want to use for your contact. Tap Done.


Comments
0 comment