views
Learning the Basics
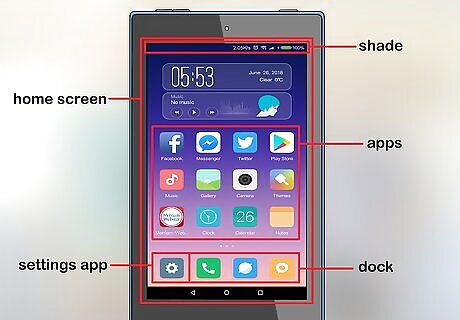
Familiarize yourself with common Android terminology. Some terms that will help you out include the following: Home Screen - The screen to which your tablet opens when unlocked. Lock Screen - The screen to which your tablet opens when the display is on, but locked. App - A program. Apps are mobile versions of computer programs, websites, and services. App Drawer - The area in which all of your tablet's apps are stored. The App Drawer icon resembles a grid of dots, and is usually found at the bottom of the Home Screen. Long-press - An action used to move apps or open a shortcut's menu. Tap and hold something to long-press it. Dock - The row of apps at the bottom of the Home Screen. You can customize the Dock to hold apps that you frequently use. Shade - A notification banner that you can pull down from the top of the screen. The Shade usually has shortcuts to frequently used settings, such as Wi-Fi and Bluetooth. OK Google - Android's version of Siri. You can say "OK, Google" to open this voice assistant, at which point you can ask questions (e.g., "Where's the nearest Starbucks?") or give commands (e.g., "Email Sally"). Settings - An app (usually gear-shaped) that contains all of your tablet's preferences, options, and setup details. If you want to change an aspect of your tablet, the answer is probably in Settings.
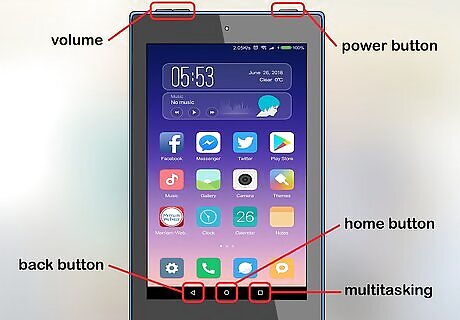
Review your Android tablet's buttons. While most of what you do with your tablet will happen on-screen, there are a few physical buttons that you should be aware of: Volume - The two buttons on the left side of the tablet control the volume. The top button usually increases volume, while the bottom button usually decreases volume. Lock - This button is usually on the top or right side of the tablet. Pressing it will turn off the display and "lock" the tablet, meaning that you'll have to swipe on the Home Screen (and enter a passcode if it's set up) to re-open your tablet. Back - This button is usually in the bottom-left or bottom-right corner of the tablet. Tapping it will take you back one page. Home - The Home button is usually at the bottom-center of the tablet. This button will take you back to the Home Screen when pressed, allowing you to exit apps and menus. Multitasking - This button is usually in the bottom-right or bottom-left corner of the tablet. Pressing it will bring up a list of apps that are currently open, allowing you to sort through them and close them if needed.
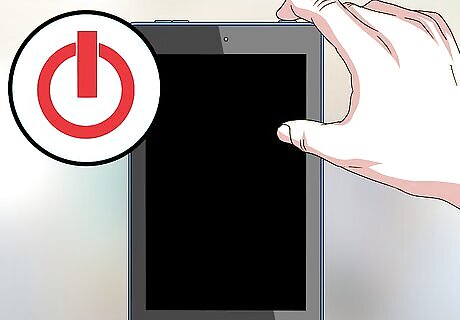
Turn off your Android. Press and hold the Lock button at the top or on the side of the Android, then tap Power off in the pop-up menu that appears. Your Android will begin turning itself off. You may have to tap POWER OFF when prompted to confirm this decision.
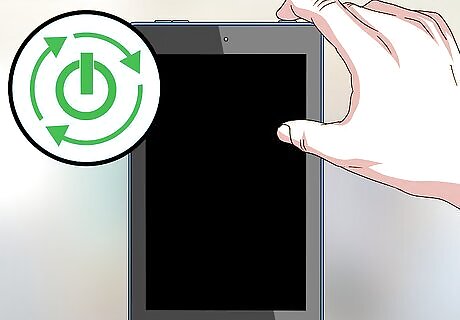
Turn back on your Android. Press the Lock button to begin turning back on your tablet. You may have to press and hold the Lock button for this to work on some tablets.
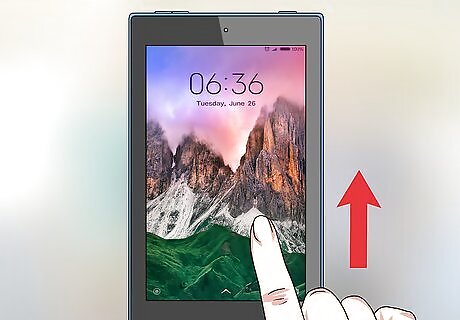
Unlock your Android. Swipe from left to right across the Home Screen. This will open your tablet, allowing you to begin using it.
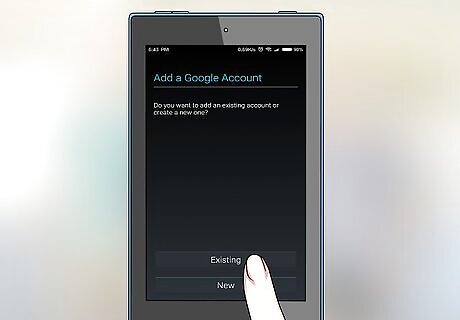
Set up your Android if necessary. If prompted to complete the setup process (particularly for a new tablet), do so. This will typically involve setting a display language and location, setting up a passcode, entering your Google account information, and so on.
Connecting to Internet
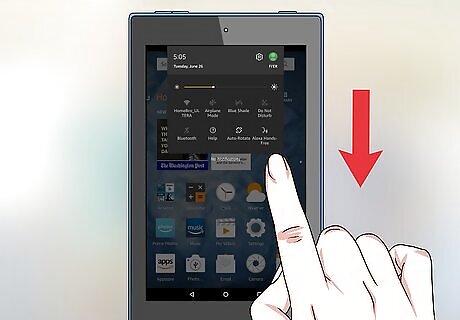
Swipe down from the top of the screen. Doing so opens the Notifications Shade, which also has a list of shortcuts to common settings such as Bluetooth and Wi-Fi.
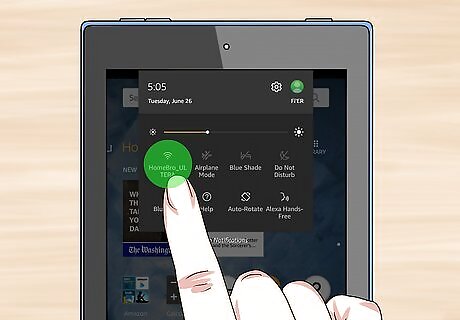
Long-press Wi-Fi Android 7 Wifi. It's typically in the top-left side of the menu. This will take you to your Android's Wi-Fi settings.
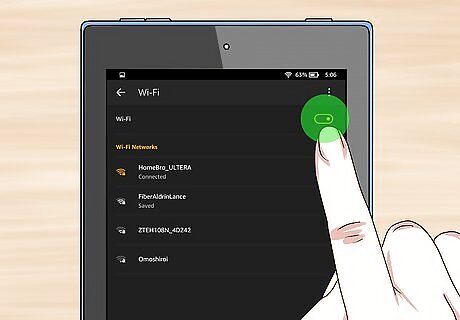
Slide the grey "Wi-Fi" switch Android 7 Switch Off. It will turn on Android 7 System Switch On, thereby enabling Wi-Fi. If the switch is green or blue instead of grey, skip this step.
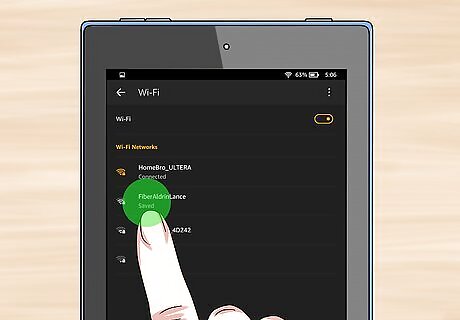
Tap a network's name. Find the name of the Wi-Fi network you want to connect to.
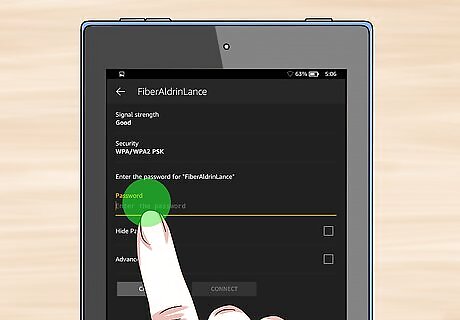
Enter the network's password if prompted. If you're using a home network and you didn't set a password, you'll likely find the Wi-Fi password on the bottom or the back of the router. If the network has no password, you'll connect automatically after tapping the network's name.
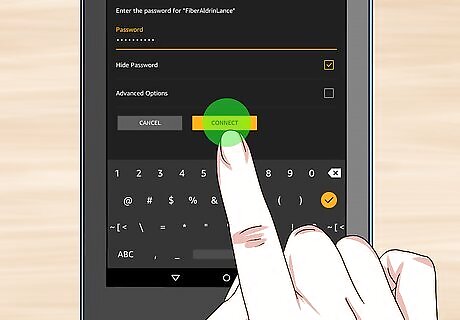
Tap Connect. It's in the bottom-right corner of the screen. As long as the password you entered is correct, your Android will connect to the network.
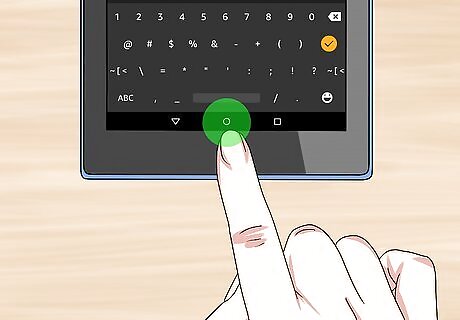
Return to the Home Screen. Press the Home button to do so. Now that you're connected to Wi-Fi, you can proceed with adding your Google account. If you already added your Google account to your tablet during the setup process, you can skip to the Downloading Apps section.
Signing into a Google Account
Make sure that you have a Google account. This is an account into which you sign using a Google email address (usually Gmail). If you don't have a Google account, create one before proceeding.
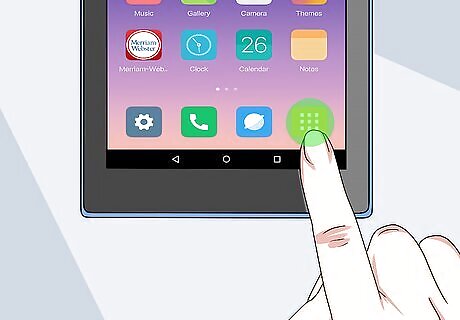
Open the App Drawer. Tap the grid of dots at the bottom of the Home Screen to do so. This will display a list of the apps that are currently on your Android tablet. Every new Android comes with several apps installed. On some Samsung Galaxy tablets, you can open the App Drawer by swiping up from the bottom of the tablet's screen.
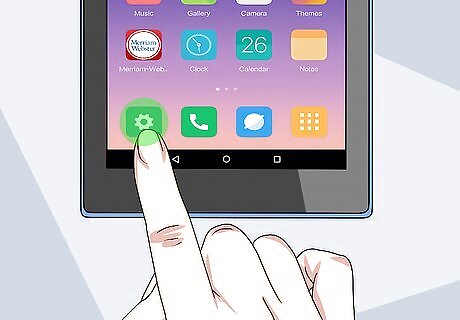
Open your Android's Settings Android 7 Settings App. Tap the gear-shaped app icon to do so. On newer Android operating system versions, this icon resembles a white gear on a blue or purple background.
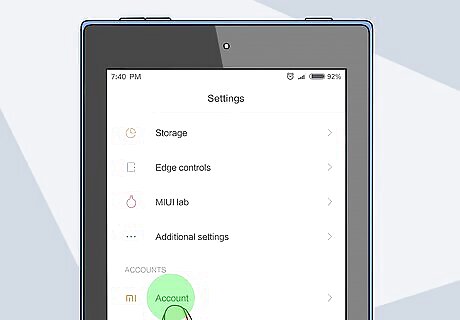
Scroll down and tap Accounts. You'll find this option near the bottom of the Settings page.
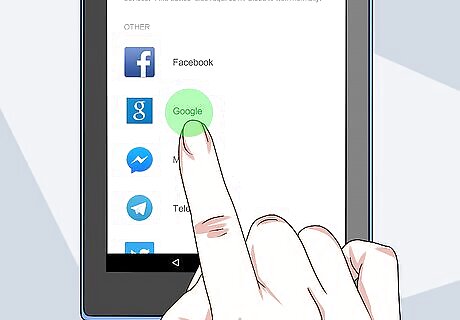
Look for your Google account. On the Accounts page, look for your Google account, as you may have logged in already without remembering. If you don't see your Google account here, proceed to the next step. If your Google account is already here, you're free to proceed to the Downloading Apps section.
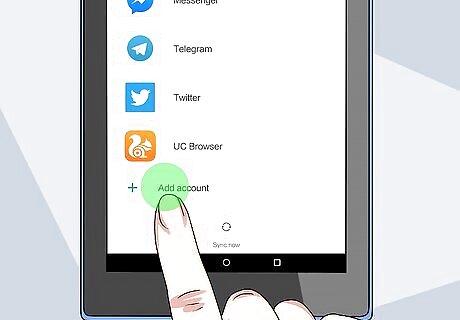
Tap Add account. It's near the top of the page.
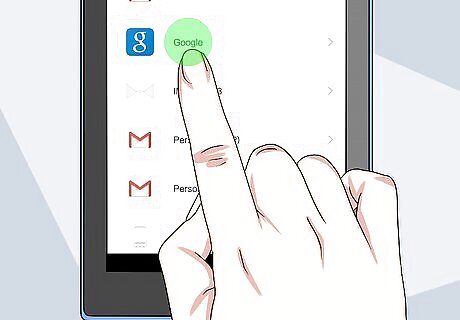
Tap Google. This should be near the top of the page. Doing so will open a text field for your email address and password.
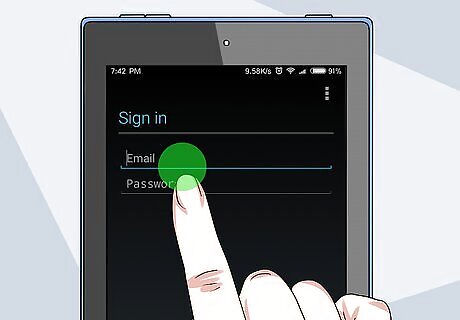
Enter your Google account information. Type in your email address and the accompanying password, then tap SIGN IN (or similar). You may first have to tap Existing account before you can enter your information.
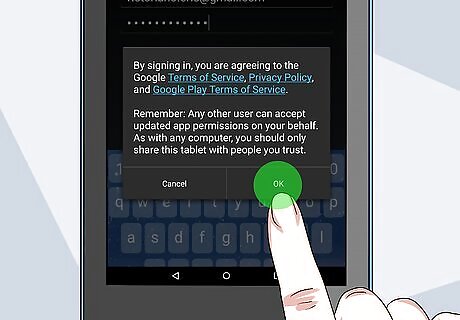
Follow any additional on-screen instructions. Depending on your Android, you may be prompted to enter payment information and/or sign up for Google+ here. If so, you can follow the on-screen prompts, or you can tap SKIP or DECLINE somewhere on the screen to bypass this section.
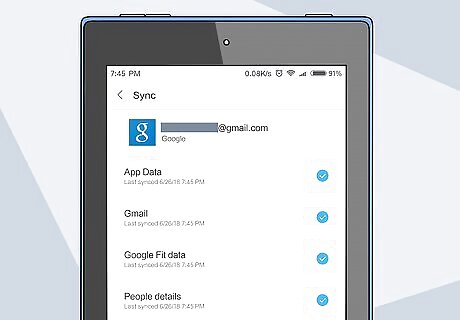
Review your Google account. Once you're signed in, you'll see a window displaying the information that your tablet is using from your Google account. This will include things like contacts, photos, and files.
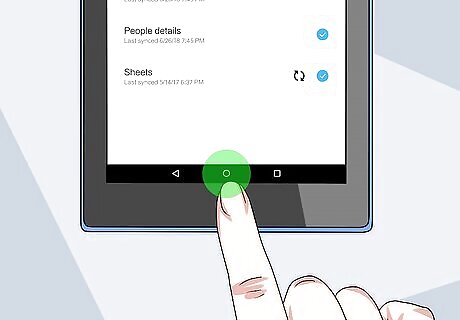
Return to the Home Screen. With your Google account signed in, you can now download apps onto your tablet.
Downloading Apps
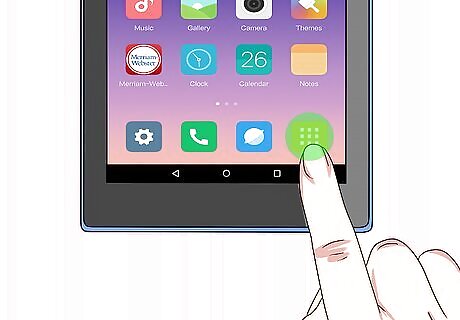
Open the App Drawer. It's at the bottom of the Home Screen.
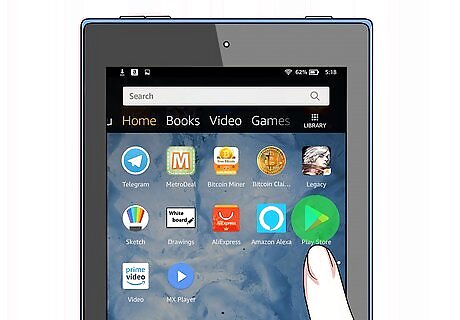
Open the Android Google Play Google Play Store app. You'll find this multicolored triangle app icon somewhere in the App Drawer.
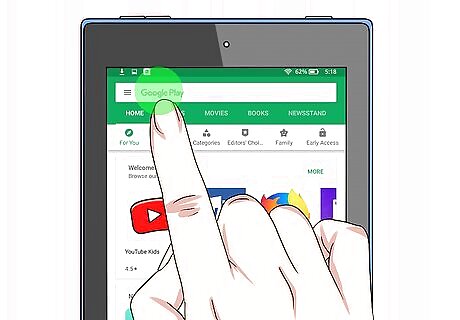
Tap the search bar. It's at the top of the screen.
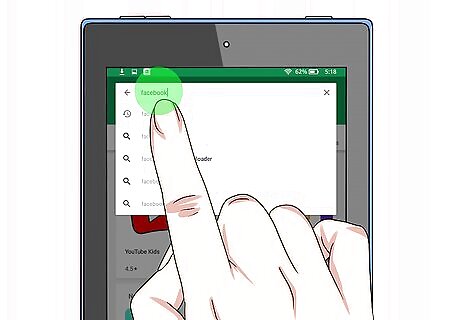
Enter an app's name. Type in the name of an app (e.g., "Facebook") that you want to search for. You can also just type in a search term (e.g., "map") if you don't have a specific app in mind.
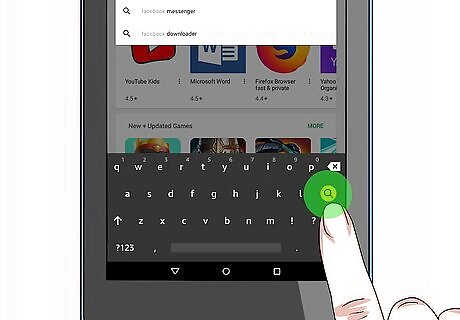
Tap Search or ↵ Enter. You'll find one (or both) of these in the tablet's keyboard. Doing so will search the Play Store for apps matching your search term. You can also tap the app name in the drop-down menu below the search bar. If you see an app name with the app's icon to the left of it, tapping that result will take you directly to that app's page.
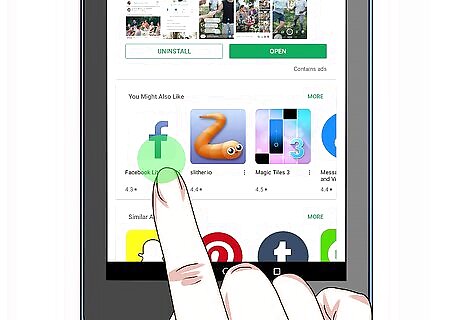
Select an app. Tap an app that you want to download. This will open the app's page. Skip this step if you went directly to the app's page.
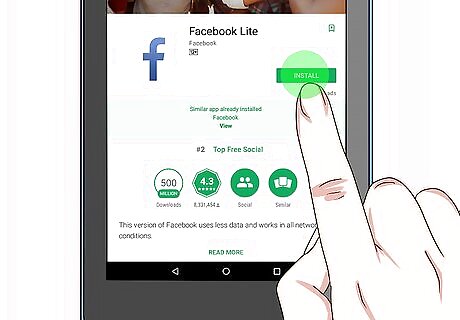
Tap INSTALL. It's a green button on the right side of the app's name. If the app isn't free, you'll instead tap the app's price (e.g., $2.49) here.
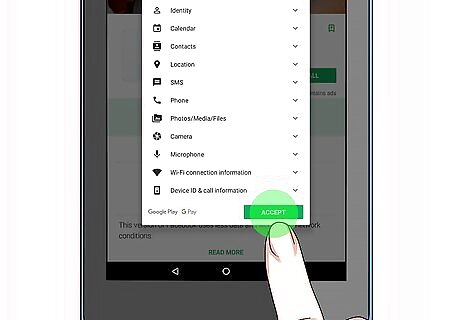
Tap ACCEPT when prompted. This will prompt the app to begin downloading.
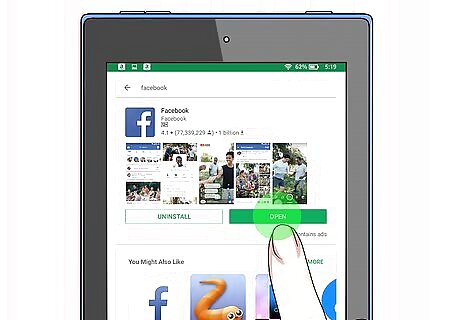
Wait for your app to download. Once the app finishes downloading, you'll see a green OPEN button appear in place of the INSTALL button. You can tap OPEN to open the app immediately, or you can tap the app's icon on one of the tablet's Home Screen pages to open it from there.
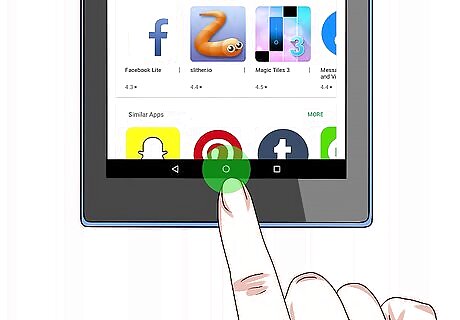
Return to the Home Screen. You may have noticed an app or two that you don't want to have on your tablet; if so, you can proceed to the Uninstalling Apps section. If you don't want to uninstall any apps, skip to the Organizing Apps section instead.
Uninstalling Apps
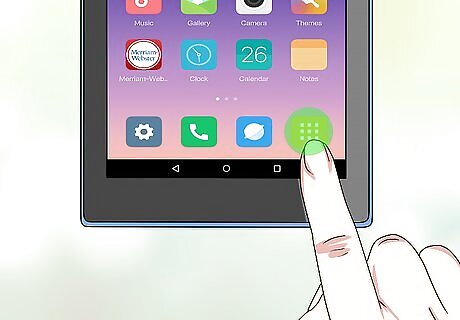
Open the App Drawer. It's at the bottom of the screen.
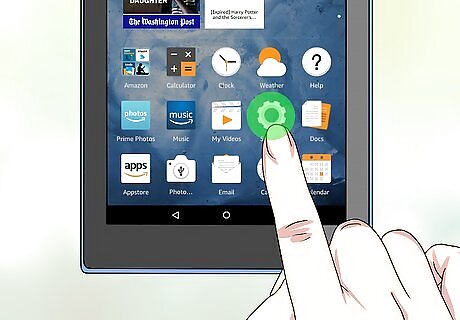
Open Settings Android 7 Settings App. Tap the Settings app icon to do so.
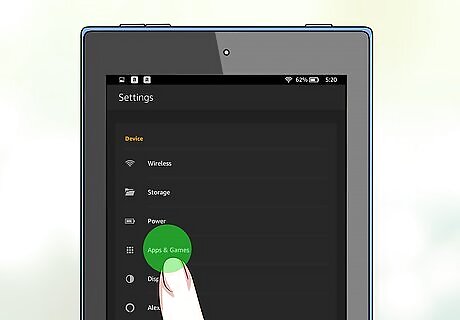
Tap Apps & notifications. It's near the top of the menu on most tablets. This will open a list of your currently installed apps.
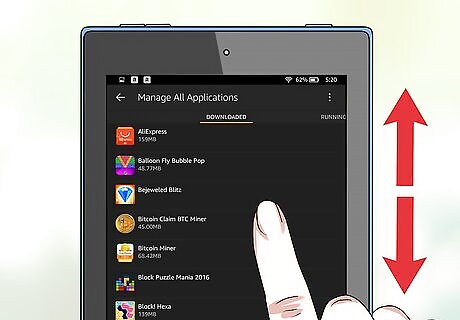
Find the app that you want to delete. Scroll through the list of installed apps until you find the one that you want to remove from your tablet. You may have to tap See all apps or App info on this page in order to find the app that you want to delete.
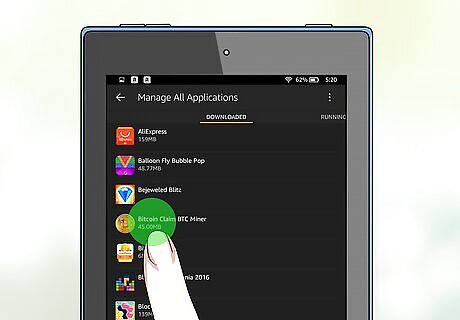
Tap the app. Doing so will open its page.
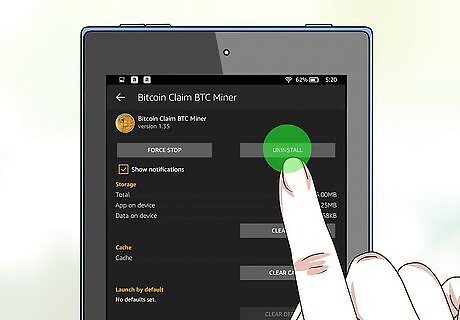
Tap UNINSTALL. It's at the top of the app's page. If the app that you want to delete is a manufacturer-installed app, you won't be able to delete it. Instead, tap DISABLE here to hide the app.
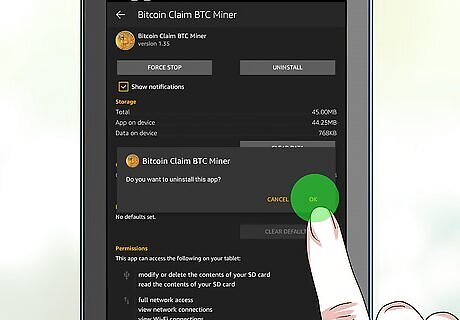
Tap OK or UNINSTALL when prompted. This will confirm your decision and remove the app from your tablet.
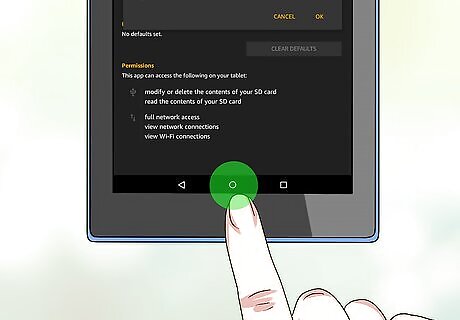
Return to the Home Screen. If the app that you deleted was on the Home Screen, it will be gone now.
Organizing Apps
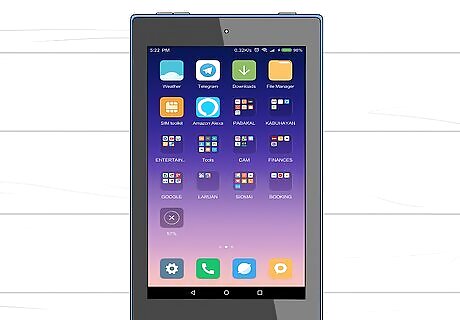
Make sure that you're on the Home Screen. You'll need to be on your tablet's Home Screen in order to organize your apps.
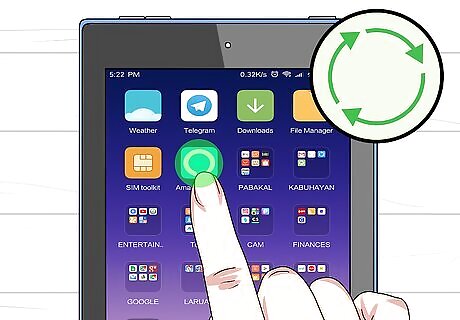
Move an app. Long-press an app until it enlarges slightly, then drag it to a different location on the Home Screen and release your finger. You can place an app between two other apps by dragging the app to hover over the line between the two apps, waiting for them to jump apart, and then releasing the finger.
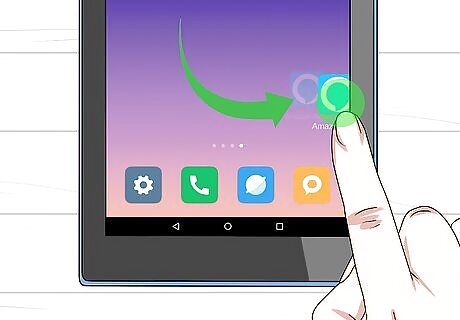
Add a page to the Home Screen. Long-press an app to begin moving it, then drag it to the right side of the screen until a new page opens. You can then drop the app on that page. To access additional pages from the Home Screen main page, swipe from right to left across the screen. You can navigate back a page by swiping from left to right.
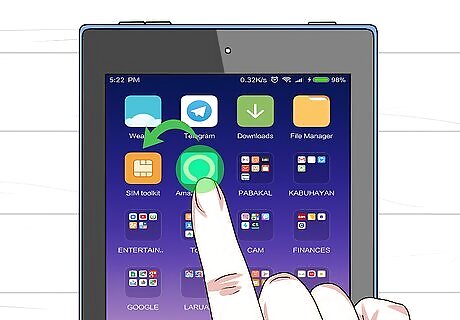
Create a folder. Long-press an app to move it, drag it onto another app, wait for the second app to expand slightly, and release your finger. You may be prompted to enter a name for your folder after doing this. You can add apps to the folder by long-pressing them and then dragging and dropping them into the folder. On some tablets, a folder area will appear when you hover over the app instead.
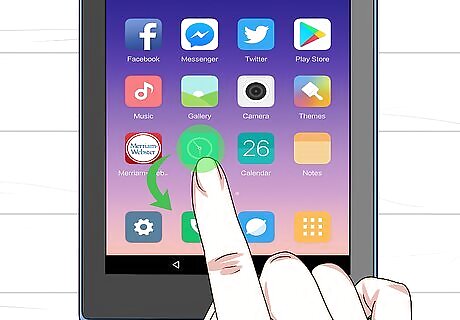
Add an app to the Dock. Long-press an app until you can move it, then drag the app down to the Dock, wait for other apps to move to make room for it, and release your finger. Most tablets can accommodate around 7 apps in the Dock. You can remove an app from the Dock by long-pressing it and then moving it onto the Home Screen.
Taking Photos
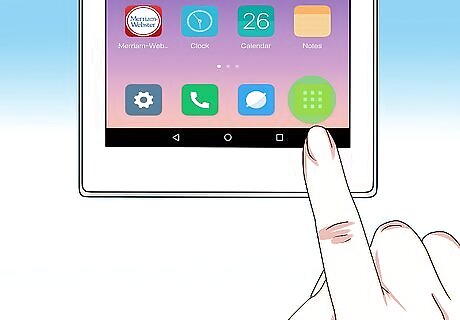
Open the App Drawer. It's at the bottom of the Home Screen.
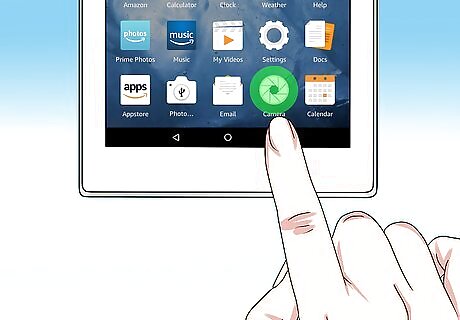
Open the Camera app. Tap the Camera app icon, which usually resembles a camera or the outline of a camera. Your tablet's Camera app might be named something other than "Camera", so look for the camera-shaped icon here.
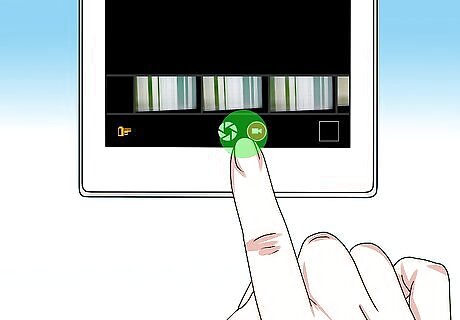
Select a capture mode. Your Camera app will usually open to the "Photo" mode, but most tablets allow you to record video by swiping left or right over the "Capture" button that's at the bottom of the screen.
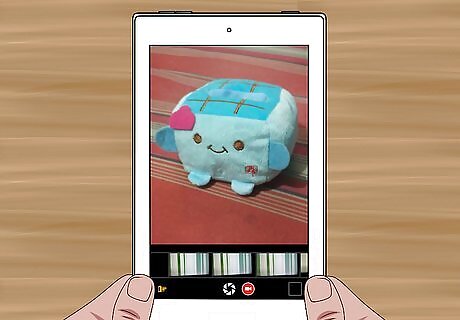
Point the camera at a subject. Aim your tablet's camera at something that you want to photograph (or video tape). You can also change the tablet's view to the front-facing camera (e.g., the camera on the screen side of the Android) if it has one by tapping the circular arrow icon.
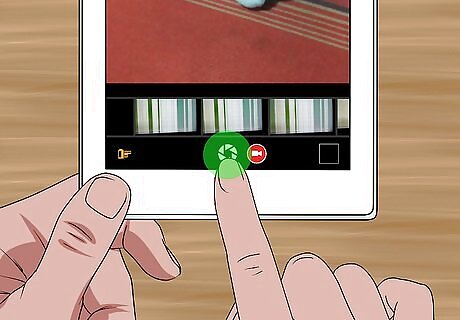
Take a photo. Tap the "Capture" button, which is a circular, white button at the bottom of the screen. This will take a photo and automatically save it in your tablet's Photos app. If you want to record a video, tap the red "Record" circle instead to begin recording. Tap this circle again to stop recording and save the video.
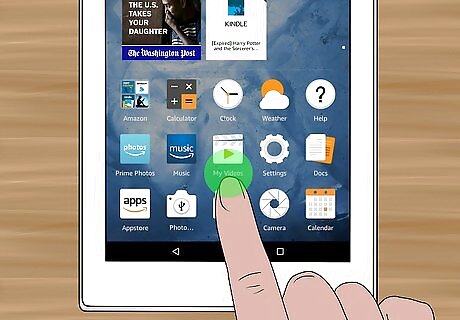
View your photos and videos. Every Android tablet comes with a Photos app in which your taken and saved photos and videos are stored. You can find this app in the App Drawer and open it to view the photos/videos that you've taken or saved.
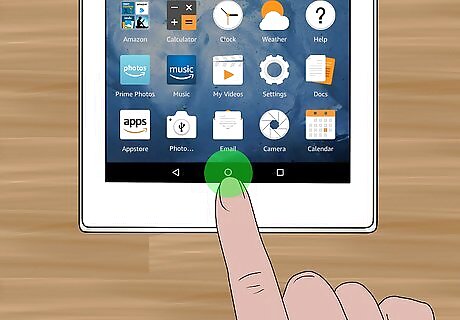
Return to the Home Screen. You're almost done acquainting yourself with your tablet! The final thing that you should do is create a passcode to secure your tablet. If your tablet already has a passcode, you're all set.
Creating a Passcode
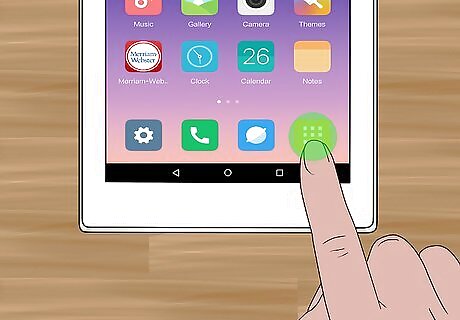
Open the App Drawer. It's at the bottom of the Home Screen.
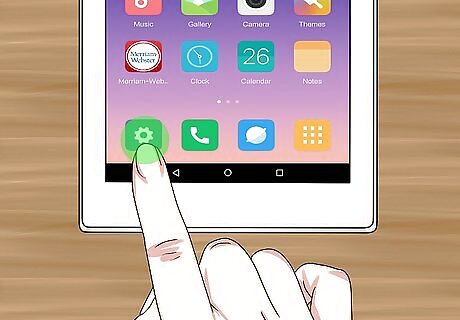
Open Settings Android 7 Settings App. Tap the Settings app icon in the App Drawer.
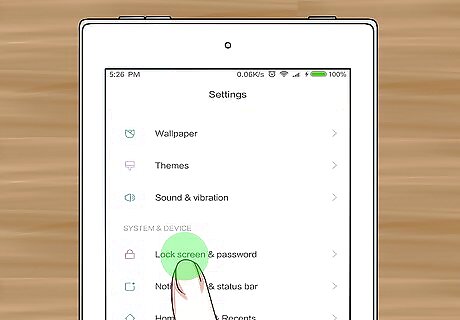
Scroll down and tap Lock screen & security. You'll find this option near the middle of the Settings page. On some tablets, you'll just tap Security here.
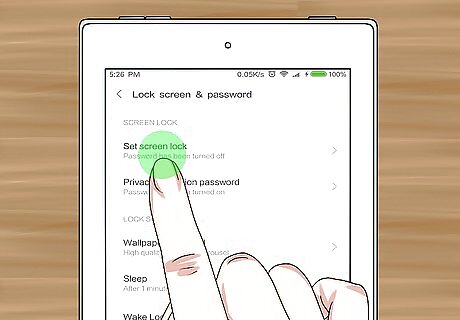
Tap Screen lock or Screen lock type. This option should be near the top of the Security page.
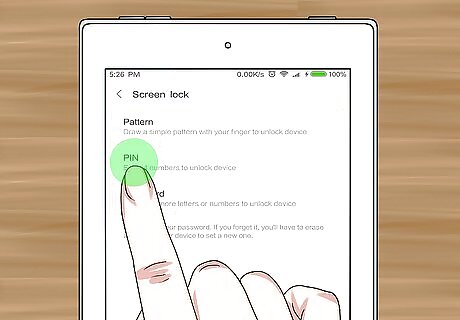
Select a type of passcode. There will be up to four different types of code, so tap one of the following: Swipe - No code; requires you to swipe from left to right across the Lock Screen in order to unlock the tablet. Pattern - A pattern that you have to draw with your finger. PIN - A several-digit code. Password - An alphanumeric (letters, numbers, and/or symbols) code.
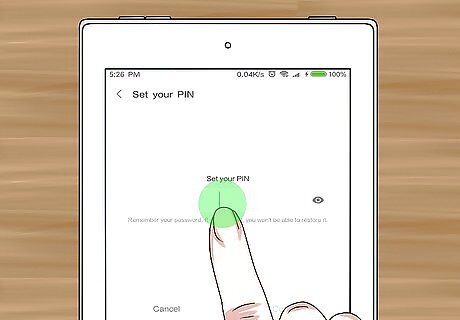
Enter the code, PIN, or pattern. This will vary depending on your tablet; you may also have to follow some on-screen instructions before you can enter your preferred code.
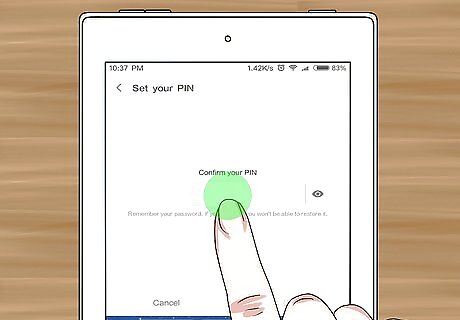
Confirm the code when prompted. Doing so will ensure that you enter it correctly more than once.
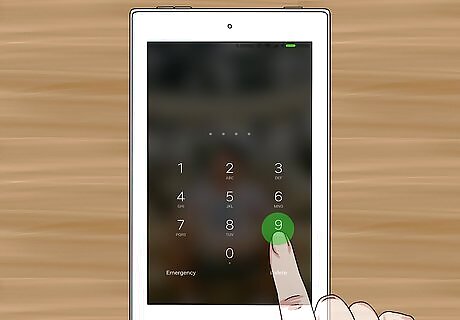
Test your code. Lock your tablet by pressing the Lock button, press the Lock button again to wake up the screen, and then swipe from left to right across the Lock Screen and enter your password, PIN, or pattern.







Comments
0 comment