
Preparing the Wood Sides
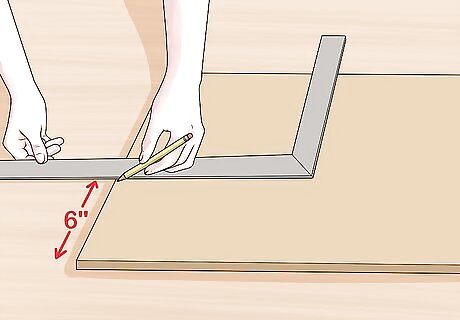
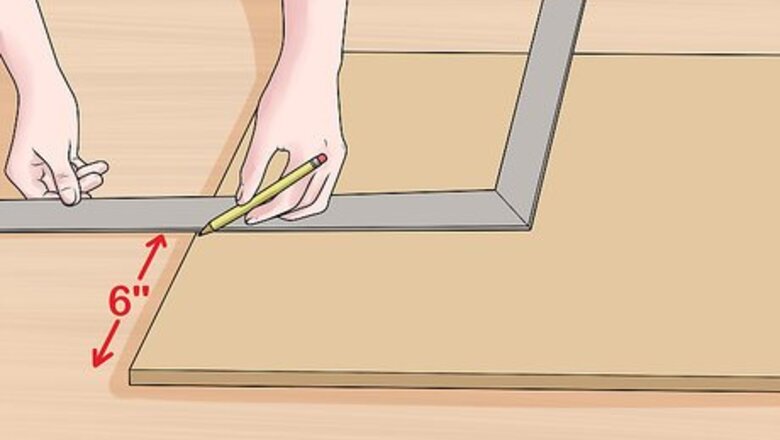
Make a mark on the wood 6 in (15 cm) higher than the bottom front corner. Lay 1 of your side planks on a flat working table. Pick a corner to be the bottom front of the staircase and, with the aid of measuring tape or a ruler, make a pencil mark 6 in (15 cm) above the corner.
Create a mark on the wood 8 in (20 cm) in front of the top rear corner. Find the corner located diagonally across from the bottom front corner. This will be the staircase’s top rear corner. Using a tape measure or ruler, create a pencil mark 8 in (20 cm) in front of the corner.
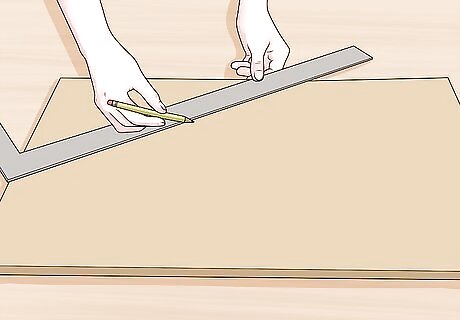
Draw a line between the 2 marks. Place a framing square or straight edge on top of the plank. Align the tool so that 1 of its edges rests on both marks. Hold the tool down with your hand, then trace along the edge with a pencil, creating a solid line.
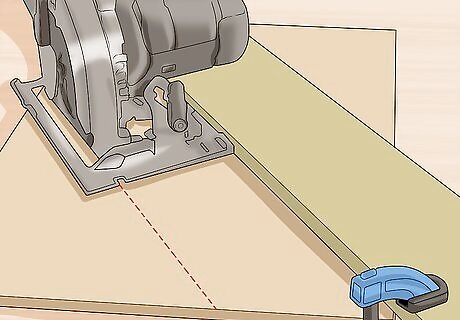
Cut the marked line with a circular saw. Set your wood plank on a sturdy working table or sawhorse. Position the plank so the marked line is not on the table, then secure the plank with woodworking clamps. Set your circular saw on 1 side of the marked line, then turn on the device and slowly cut through the wood. When you’re finished, repeat the entire process with the other side plank. While sawing, wear heavy duty working gloves and protective goggles for safety.
Installing the Tread Cleats
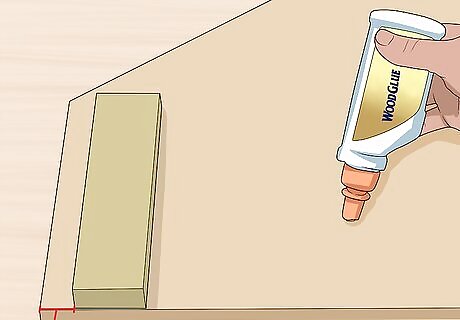
Set a vertical cleat .75 in (1.9 cm) from the front edge of the side plank. Place your plywood side plank on a flat working surface. Locate the bottom front corner and measure back for a distance of .75 in (1.9 cm). Apply wood glue to the widest side of horizontal tread cleat and place it so the front edge lines up with the measured distance.
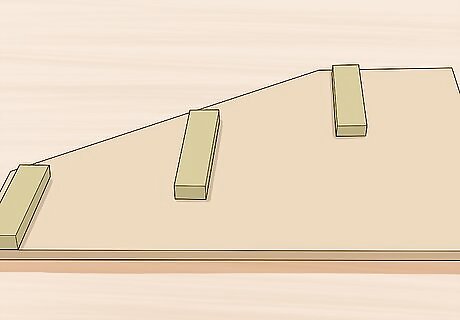
Place the remaining cleats by using the first as a guide. With your first cleat secured, the rest should fall into place naturally. Line up the 1.5 in (3.8 cm) end of a long horizontal tread cleat with the upper rear side of the first tread cleat, then hold it down with wood glue. Next, line up the 1.5 in (3.8 cm) bottom of a vertical tread cleat with the top rear side of the horizontal tread cleat and secure it with glue. Repeat this with another vertical and long horizontal tread cleat, creating a staircase pattern. To leave enough room for the horizontal risers, the 1.5 in (3.8 cm) top side of each vertical tread cleat should remain uncovered.
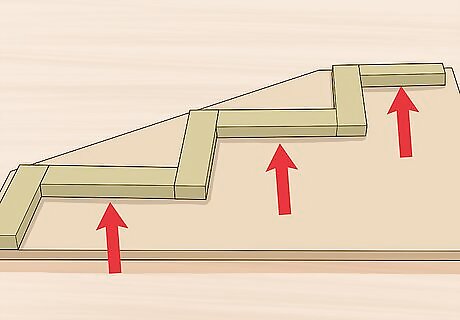
Finish the support structure with the short horizontal tread cleat. To finish your staircase support guides, place the 1.5 in (3.8 cm) end of the short horizontal tread cleat against the upper rear end of the final vertical tread cleat. Then, secure the plank with wood glue. When you’re finished, there should be a .75 in (1.9 cm) gap between the end of the short horizontal tread and the edge of the side plank.
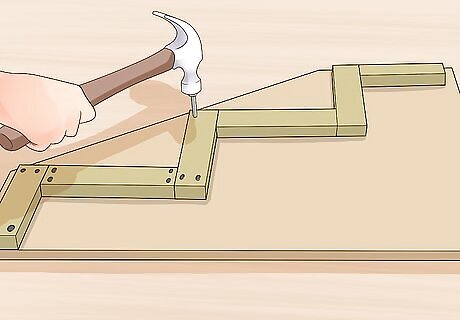
Nail your cleats to the board. Check that each cleat is level using a speed square. Then, secure each cleat to the board with 1 in (2.5 cm) finishing nails. Use 3 to 4 nails per cleat and space them out as evenly as possible. Then, repeat the entire installation process with the other side plank.
Assembling the Stairs
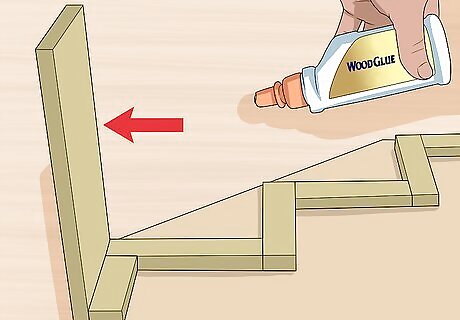
Attach your vertical risers to the vertical cleats. Place wood glue on the front edge of the lowest vertical cleat, then press a vertical riser to it. Make sure the riser is level, then secure it by pressing 1.25 in (3.2 cm) finishing nails through the front of the riser into the cleat. Do the same for the other 2 vertical risers and cleats, then attach the opposite ends of the risers to the cleats on the other side plank.
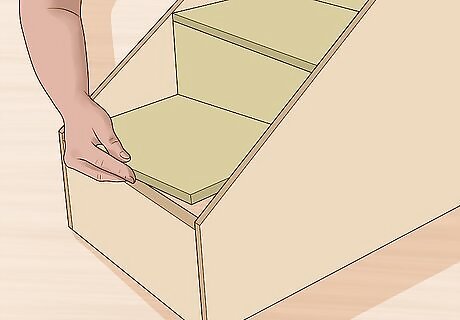
Fix your horizontal risers to the horizontal cleats. Squirt wood glue onto the bottom edge of a horizontal riser and the top edges of 2 parallel horizontal cleats. Press the riser onto the cleats, making sure the front edge is directly on top of the adjacent vertical riser. Then, secure the riser by pushing 1.25 in (3.2 cm) finishing nails through the front and top of the riser into the horizontal cleats. Repeat this with the remaining risers.
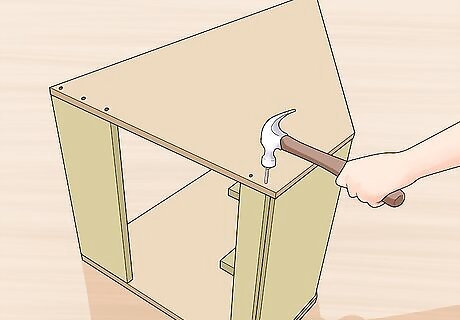
Nail your support plank to the back of the staircase. Cover the back edges of your staircase with wood glue, then press your support plank to it. The plank should sit flush against the side planks and upper horizontal riser. Then, secure the support plank by nailing 1.25 in (3.2 cm) finishing nails through the plank into the rest of the staircase.


Comments
0 comment